Using the Novell ODBC Driver to Generate NDS Reports
Articles and Tips: tip
01 Jul 1999
Many Novell customers love Novell Directory Services (NDS) but wish there was a simple way to generate reports of NDS data. This NetNote outlines a simple technique using the Novell ODBC Driver for NDS and any program which has ODBC/SQL query capability to create "instant" NDS reports. The example described in this NetNote uses Microsoft Excel.
How to Obtain and Set Up the Novell ODBC Driver
The ODBC Driver for NDS presents a relational view of NDS. It can be used by any ODBC-aware application on the Windows platform to retrieve data from NDS via SQL queries.
Download the ODBC driver from http://developer.novell.com/ndk/odbc.htm. The ODBC. EXE file is also available in the Novell ODBC Driver SDK.
Run the ODBC.EXE file and install the ODBC driver on a Windows 95/98 or NT workstation. Accept all the defaults. When you see the "Setup Complete" window, check "Configure Sample Data Source" and click on Finish.
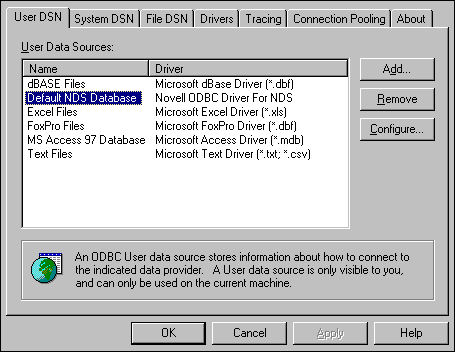
You will now see the ODBC Data Source Administrator utility (which you can also access later via the ODBC Data Sources icon in the Windows Control Panel). You should see a Default NDS Database data source with the "Novell ODBC Driver For NDS" listed to the right, as shown in Figure 1. If it's not listed, something probably went wrong during the installation, in which case you'll need to reinstall the Novell ODBC driver.
Figure 1: The Novell ODBC Driver should be listed in the Data Source Administrator.
This default data source works fine for most applications. If you want, you can click on Add to create other data sources. For now, click Configure to specify the NDS tree and context you want to work in.
Click OK to exit the ODBC Data Source Administrator utility. It is highly recommended that you reboot your computer at this point.
Now that you have installed and configured the Novell ODBC driver, log in to the network. To test your reporting setup, use a utility such as NetWare Administrator to create a pool of users. Make sure that for each User object the following fields contain data: Given Name, Full Name, Location, Title, Phone Number, and E-Mail Address.
Using an ODBC/SQL Query Program
Open a program which can make SQL/ODBC queries. The following instructions are for using Microsoft Excel from the Office 97 SR-2 release.
From the menu bar of an open spreadsheet, select Data | Get External Data | Create New Query. The "Choose Data Source" dialog box will appear.
Select the name you designated for the Novell ODBC driver and click OK.
The Query Wizard will guide you through the remaining steps. Under "Available Tables and Columns," locate the NDS object class you want to query. (Each object class is viewed by the ODBC driver as a separate "table".) Click on the plus sign (+) to open the columns that are available. Double-click on the desired columns to move them to the right under "Columns in your query." When you have finished selecting columns, click Next.
You will now be able to create a filter for your query from the "Filter Data" dialog box. You can select columns and specify whether the item selected equals, does not equal, is greater than, contains, and so on. In the next field you enter the value you want to use as a filter. Do not enter anything in these fields if you want all data to be placed in the spreadsheet. Click Next to continue.
Next you'll be able to specify a sort order. Indicate the column for the primary sort, and then any secondary sorts you want. You can also indicate ascending or descending sorts. Click Next to continue.
Hint: Don't perform a sort during the initial query of information; rather, perform the sort after the data has "landed" in your application.
When the "Finish" window appears, you have the choice to "Return Data to Microsoft Excel," which places the data into the spreadsheet. Alternatively you can select "View data or edit query in Microsoft Query," which opens a separate query dialog box and lets you edit the query in real time. For greater flexibility, you can also directly edit the SQL language. For this exercise, select "Return Data to Microsoft Excel" and click Finish.
* Originally published in Novell AppNotes
Disclaimer
The origin of this information may be internal or external to Novell. While Novell makes all reasonable efforts to verify this information, Novell does not make explicit or implied claims to its validity.