Installing and Using NPrinter NT
Articles and Tips: article
Software Engineer
Developer Support
JAN BEULICH
Sofware Engineer
Developer Support
WOLFGANG SHREIBER
Software Engineer
Developer Support
01 Feb 1998
Historically, Novell has been offering NPrinter solutions with the NetWare client software, giving customers the option to share printers connected to their local workstations. Customers would load the NPrinter.EXE at their workstation, letting the local printer service a print queue managed by NetWare.
With the advent of Client32, a new version of NPrinter was introduced that interfaces with Client32 NLM. Thus, customers running either Windows 3.1 or Windows 95, were given an adequate solution. However, the IntranetWare Client for Windows NT does not employ NLMs. There is also no replacement shipping with the client software. NT as a workstation OS is becoming a widely spread reality though, and customers upgrading from older systems have a valid demand for their existing equipment to work properly with the new OS. NPrinterNT addresses this demand.
Multiple Printer Support
NPrinter NT supports multiple printers attached to the local machine.
Multiple Tree Support
NPrinter NT can service print queues from multiple trees at the same time.
User Friendly Naming
NPrinter NT does not require the MSDOS style port names like LPT1 etc. Instead, the more user friendly UNC style printer names are used.
NT Integration
NPrinter NT is implemented as a native NT service, that will run whether or not a user is currently logged in to the local NT workstation or to IntranetWare. The service can be stopped and restarted from the Services applet in the System Control Panel. Installation and version maintenance is done through the Network Neighborhood Properties dialog box. NPrinter NT uses the System Event Log for diagnostic and error messages.
Language Enabled
NPrinter NT is fully language enabled, using unicode. The initial release supports English and German.
Installation
NPrinter NT is installed from the Network Neighborhood property sheet, as shown in Figure 1.
Figure 1: Installing NPrinter NT from the Network Service Tab.
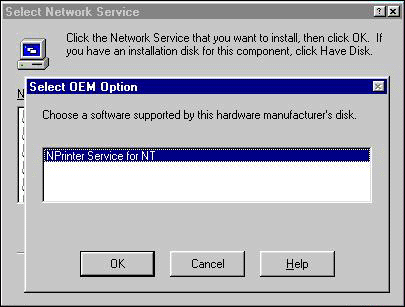
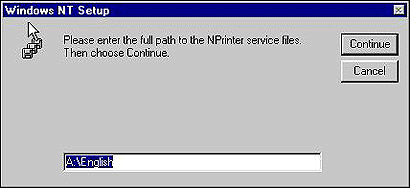
Select add from the services properties page. When prompted for a disk, select "Have Disk." The NPrinter NT installation will detect your current default language and display the appropriate source directory. Accept the directory by selecting "OK." The installation script copies the necessary files to the local system and installs the service. After a successful installation, NPrinter NT appears as an installed service in the Network Neighborhood property sheet, as shown in Figure 2.
Figure 2: NPrinter NT after a successful installation.
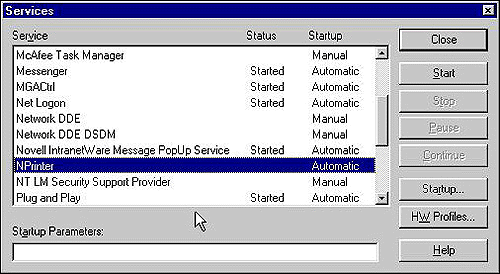
The service is initially configured to start automatically, that is, it will start the next time you start the local system. However, a reboot is not required. Instead, you may choose to start NPrinter NT immediately from the Control Panel Services List, as in Figure 3.
Figure 3: The NPrinter NT Service Entry.
Unattended Mode
The installation script also allows for installation in unattended mode. For a sample, how to install the IntranetWare Client for NT with an unattended installation, refer to the unattend.txt file that ships with the IntranetWare Client software. The readme.txt that comes with NPrinter NT has all the necessary information on how to add the service to an unattended setup.
Operation
Upon startup, NPrinter NT scans the local registry to discover any local printers that have been configured to service an IntranetWare print queue, and connects to the corresponding print servers.
Figure 4: The list of local printers.
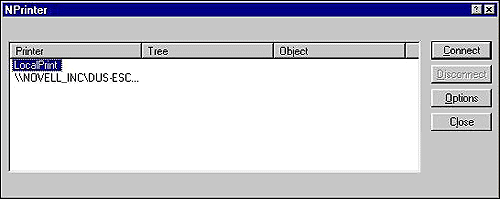
To configure a local printer for use with NPrinter NT, click the NPrinter NT icon in Control Panel (Figure 5).
Figure 5:The NPrinter NT icon on the Control Panel.

A dialog will show up that has a list of the currently available local printers and their status, Figure 6.
Figure 6: The printer list after connecting to a Printer object.
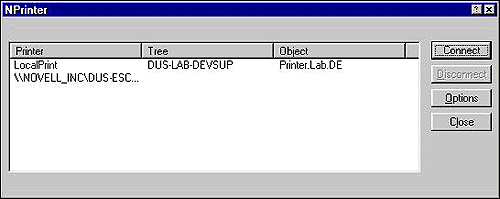
Clicking the "Connect" button will bring up a browser, that allows you to select a printer object from one of the trees you are currently connected to. The configuration change is saved to the local registry. It will take effect once the service is restarted or the system rebooted.
* Originally published in Novell AppNotes
Disclaimer
The origin of this information may be internal or external to Novell. While Novell makes all reasonable efforts to verify this information, Novell does not make explicit or implied claims to its validity.