Generating Reports in ConsoleOne
Articles and Tips: article
Research Engineer
Novell AppNotes
jfischer@novell.com
01 Mar 2003
Last month we discussed how to set up Role Based Administration using the iManager utility. This month, we will conclude our discussion of the Console One utility by discussing its reporting features.
Why Generate Reports?
An important part of running a network is to always be aware of what is happening on the network. As a network administrator, you should be familiar with the network's normal day-to-day activities in order to better pin-point problems or other non-normal behaviors.
Network monitoring has become an important function for a network administrator. Successful network monitoring includes watching for trouble spots, performance bottlenecks, and network inconsistencies. By generating network statistics reports about the network, you can gather information about the network that can be used to justify new equipment or equipment replacement, to set up security, and to better troubleshoot hotspots.
Levels of Network Monitoring
Network administrators should monitor several levels of the network. A few of these are:
Network traffic
eDirectory objects and status
File System statistics
Server utilization
Network bandwidth utilization
ConsoleOne's Reporting Feature
ConsoleOne includes predefined report forms that you can use to generate reports on objects within eDirectory. The ConsoleOne reporting feature can provide you with detailed and valuable information about the status of your eDirectory tree.
The predefined reports can be customized to provide you with information you need about eDirectory objects. Other Novell products, such as ZENWorks, include their own reports. You can also create custom reports with a separate product called JReport Designer tool.
What You Can Monitor
With the predefined ConsoleOne reports, you can generate reports on the following information:
Servers
Printers
Print Servers
Trustee Assignments
Security Equivalences
Group Memberships
Users
User security policies
How to Set Up Reporting
In order to set up the reporting feature of ConsoleOne, you must perform the following steps. ConsoleOne reporting is currently only available when ConsoleOne is run from a Windows workstation.
Install Reporting Services schema extensions
Install Novell-defined report catalogs
Install the ODBC driver for eDirectory
Configure the data source
Install Reporting Services Schema Extension
Follow these instructions to extend the schema in order to allow for Reporting Services objects in the eDirectory tree.
Open ConsoleOne.
Highlight the Organization container.
Click Tools > Install.
Click Next .
Select Reporting Services Install Snap-in .
Highlight the tree from where you want to install the snap-in.
Click Next .
Click Finish .
Install Novell-Defined Report Catalogs
Highlight the container where you want to place the catalog objects. For example, you can choose the Organization object.
Click Tools > Install-Defined Reports.
Select the report catalogs to install and the location to store the associated files.
Click Install .
Install the ODBC Driver for eDirectory
The ODBC driver allows ConsoleOne to query eDirectory as a database and return the information you enter in the report you generate. Without installing the ODBC driver, Reporting Services will not function.
Browse to the directory where ConsoleOne is installed. By default, it is C:\Novell\ConsoleOne\1.2
In the Reporting\Bin folder, double-click the ODBC.exe file and follow the prompts to install it.
Configure the DSN
The Data Source Name, or DSN, provides the connection to eDirectory as a database and you must configure this so that Reporting Services can query eDirectory. To do this:
Open the Windows control panel by going to Start > Settings > Control Panel.
Double-click the ODBC icon.
On the User DSN tab, click Add > select the ODBC driver for eDirectory > Finish.
In the Data Source Setup box, enter NDS Reporting as the name for the DSN. You can ignore the Description field.
Click OK .
Click OK .
eDirectory Catalog Objects
Figure 1 shows eDirectory Reporting Catalog objects that are added into the tree.

Viewing the eDirectory Reporting Services Catalog objects
When Novell Reporting Services is installed successfully, you will see three new objects in your eDirectory tree. These objects are Reporting Catalog objects and contain the predefined reports that you will run on your tree.
Each catalog object contains several forms that you can use to generate specific reports. The following tables display the forms associated with their catalog objects and what the report will show when it is generated.
eDirectory General Object Reports Catalog
|
Report
|
Information Returned
|
|
File Servers |
Server name, status, network address, OS version, eDirectory version |
|
Printers |
Printer name, print server, and print queues |
|
Print Servers |
Print server name, printers, printer status |
eDirectory User Security Reports
|
Report
|
Information Returned
|
|
Disabled User Accounts |
All disabled user accounts |
|
Locked Users |
All locked users |
|
Security Equivalence |
Users that have a security equivalence |
|
Template Settings |
Specific template properties |
|
Trustee Assignments |
Lists the ACL for each user specified |
|
User password Requirements |
Password security policy |
|
Users Not Logged In |
Users who have not logged in for 90 days |
|
Users with Expired Passwords |
All users whose password has expired |
|
Users with Multiple Logins |
Users who have logged in from multiple workstations |
eDirectory User and Group Reports
|
Report
|
Information Returned
|
|
User Contact List |
User Contact properties |
|
Duplicate Common User Names |
Name of duplicate user name and contexts |
|
Group Memberships |
Group memberships for all users |
|
Organizational Roles |
Organizational role objects, and occupants |
|
User Information |
General user properties |
|
Login Scripts |
Contents of the Login Script |
Generating Reports
Once Reporting Services is installed and you are familiar with each catalog object, as well as which reports each catalog object can create, generating the reports is easy. For example, if you want to generate a report for all users trustee assignments, follow these steps to generate reports.
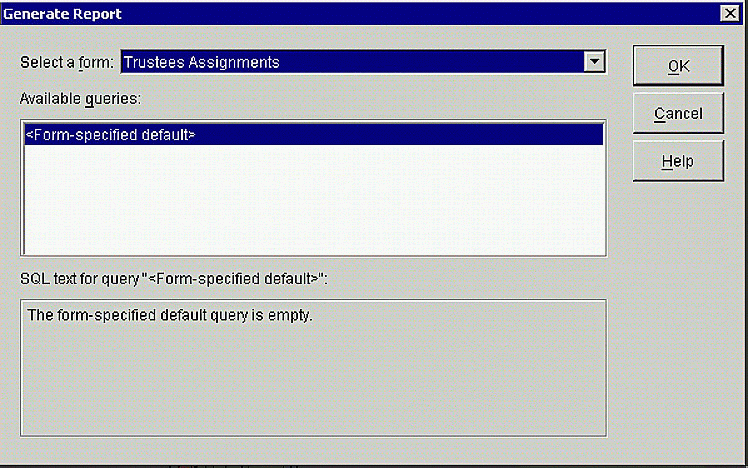
Right click on the User Security Reports Catalog object and select Generate Report.
In the Select a Form drop down menu, select Trustee Assignments as shown in Figure 2.
The Generate Reports Dialog Box.

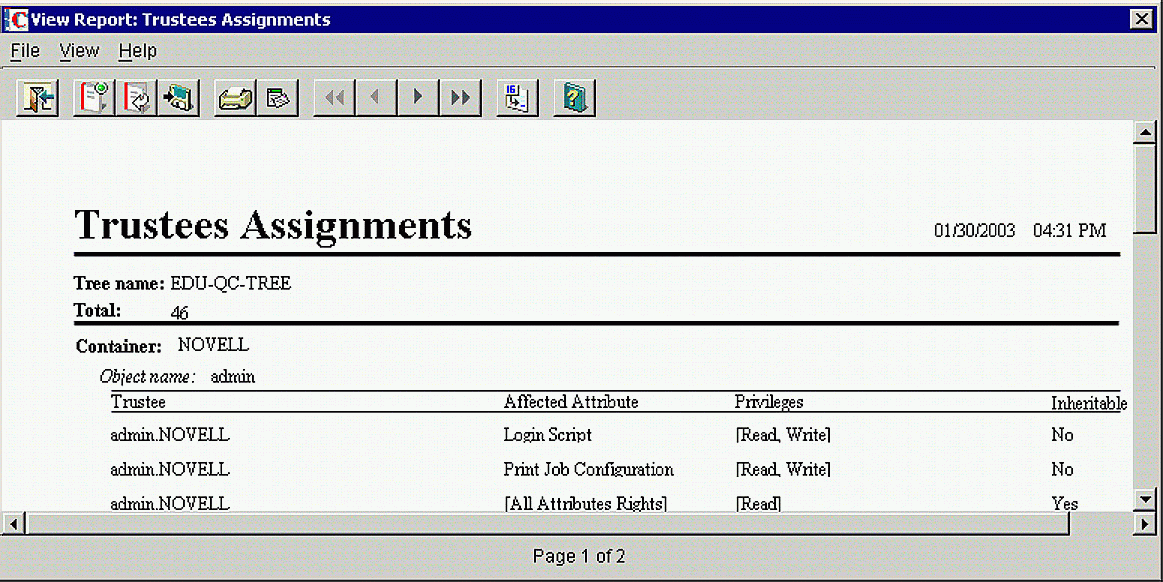
Generating the Trustee Assignments Report
Click OK and the report is displayed as shown in Figure 3.
Exporting Reports
Once a report is generated, you have the option to export the report to a variety of formats. You can export the report to text, HTML, PDF, or SDF formats. This can be useful to generate printed or online formats, which you can then show to management or to other IT staff.
For example, if you wanted to generate a report and put the report on a company Intranet site, follow the steps below:
Generate a report by following the previous steps.
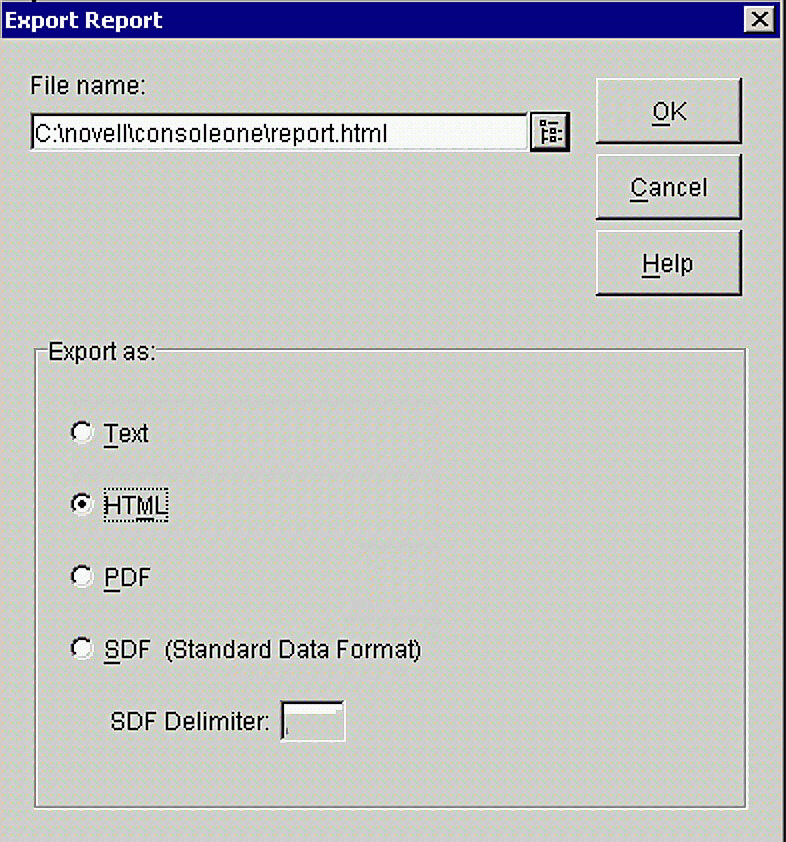
Click the File menu > Export Report. Figure 4 shows the Export Report Dialog Box.
The Export Report Dialog box.
Browse to the location in the file system where you want to store the file and give the file a name.
Choose the HTML format option.
Click OK.
Customizing a Query
You can also customize a query for a particular form. This allows you to specify the information you want to see in that form. Essentially, you query eDirectory as a database using SQL statements and return the results you need for the report you wish to generate. Follow the steps below to customize a query:
Right-click the Report Catalog object that you want to use to generate the report, then click Properties.
Select the Queries tab.
Click New.
Enter a name for the Query.
Enter the expressions to generate the results you want for your report.
Click OK to save the query.
Summary
In this month's article, we have discussed Reporting Services with ConsoleOne. We have learned the importance of generating reports and how to generate them. In next month's article, we will begin a discussion about iManager 1.5.
* Originally published in Novell AppNotes
Disclaimer
The origin of this information may be internal or external to Novell. While Novell makes all reasonable efforts to verify this information, Novell does not make explicit or implied claims to its validity.