Getting the Most Out of the NetWare Server Consolidation Utility
Articles and Tips: article
Senior Software Engineer
Novell, Inc.
bcutler@novell.com
Trace Eddington
Technical Writer
Novell, Inc.
teddington@novell.com
Glen Davis
Software Test Engineer
Novell, Inc.
gldavis@novell.com
01 Oct 2002
This AppNote provides a brief overview of the NetWare Server Consolidation Utility (SCU). This utility allows you to copy file system directories from one location in an eDirectory tree to any other location in the same tree, as well as move NDPS Printer Agents from one Print Service Manager to another.
- Introduction
- Overview of the Server Consolidation Utility
- Basic SCU Operations
- Things to Watch Out For
- Conclusion
|
Topics |
NetWare utilities, server consolidation, network management |
|
Products |
NetWare Server Consolidation Utility 1.0 |
|
Audience |
network administrators, installers |
|
Level |
beginning |
|
Prerequisite Skills |
familiarity with the NetWare file system |
|
Operating System |
NetWare 4.x through 6.x |
|
Tools |
none |
|
Sample Code |
no |
Introduction
For years NetWare administrators have wished for a quick and easy way to copy files from one location to another in the same eDirectory tree and preserve all of the existing NetWare attributes, trustees and file ownerships, and directory space restrictions. Until now administrators had to settle for using either a third-party backup or copy tool to accomplish this task. And even then, they weren't assured that all of their data, including directory space restrictions and file ownerships, would be transferred. With the release of the Novell NetWare Server Consolidation Utility (SCU), their wish has come true.
There has also been a need to move NDPS Printer Agents (PAs) from one Print Service Manager (PSM) to another without having to delete the old one and create a new one. This process is now possible with the SCU as well.
Much of the feedback that Novell has received about the SCU has praised its ease of use. In fact, it's so easy to use that, initially, writing an AppNote for it seemed to be unnecessary. However, we have identified some information that will assist you in getting the full benefit out of the SCU. This AppNote gives a brief overview of the utility, including basic usage and hardware/software requirements, and discusses several things to watch out for as you work with the utility.
Overview of the Server Consolidation Utility
The NetWare SCU allows you to copy file system directories ("folders" in Microsoft Windows terminology) from one location in an eDirectory (NDS) tree to anywhere else in the same eDirectory tree. It uses the SMS Backup APIs, which all of our backup vendors use, to back up and restore these files. It copies the data from server to server without going through the client (workstation). The client serves only to provide a simple drag-and-drop user interface.
The client sends commands to the destination server to tell it where to get the files, and thereafter it only monitors the data transfer. An agent NLM (NUWAGENT.NLM) on the destination server actually does all of the work. The files are copied, not moved. You are even allowed to decide what to do when a file with the same name is encountered on the destination server: do nothing, copy the file if the date and time of the source file is newer, or always copy the source file.
You can also move NDPS Printer Agents from one NDPS Print Service Manager to another PSM in the same eDirectory tree. In this case, the PAs are actually moved. If you make a mistake and need to move the PAs back to the way they were, all you need to do is drag-and-drop them back to the original PSM.
In order to perform this operation, SCU ships with several new NDPS libraries. Novell has tested these libraries with the SCU, but not with any other NDPS utilities. To prevent them from being used by any other NDPS utilities, these libraries are stored in the same location as the SCU executable. After they're tested with other NDPS utilities, these libraries will be released in the next Support Pack from Novell.
Hardware and Software Requirements
Client Workstation Setup. To run the SCU, your workstation must have the following characteristics:
Windows NT, 2000, or XP Professional
The latest Novell Client (version 4.83 as of this writing)
50 MB of free disk space
Administrator rights to the source and destination servers so that NLMs can be copied and loaded
Server Setup. The supported configurations for source and destination NetWare servers are as follows:
You can copy from any version of NetWare beginning with version 4.2.
You can copy to any version of NetWare beginning with version 5.1.
If you want to copy data from a NetWare 4.2 server or from a server that has only IPX bound to it, you will need to have IPX on the destination server as well. This is required because the two servers communicate with each other to copy the file data, and they must have a common protocol to do so.
You must have the latest version of the TSA and SMDR NLMs, which are available in NW6SP2 and NW51SP5 as of this writing. The SCU itself ships with the minimum required modules. If the SCU tells you to do so, you may have to go to the server console to unload and reload these NLMs. This is because the SCU copies newer NLMs to the servers, if needed, but doesn't automatically load them.
NetWare 4.x and 5.0 servers are not supported as destination servers. You are not stopped from copying data to these servers, but Novell has not tested this configuration. If you want to copy data to a NetWare 4.2 or 5.0 server, you do so at your own risk. You must load CLIBAUX.NLM on any destination NetWare 4.2 servers.
It is recommended that you install the latest support packs on all servers. This is the preferred method because Novell tested the SCU using only the latest support packs as of the release date of the SCU. NetWare support packs can be downloaded from Novell's support site at http://support.novell.com.
Availability
The Novell NetWare Server Consolidation Utility is available free of charge from http://download.novell.com. Search in the NetWare section. It will also ship with the next release of NetWare (code-named Nakoma). At this point, the utility is only available in English.
Basic SCU Operations
In the SCU, you first model the consolidation project you want to undertake, and then commit once you have it set the way you want it. The information for the consolidation is stored in a Microsoft Access database file. When you begin the SCU, you are asked whether you want to create a new project, open an existing project, or open the last project you worked on (see Figure 1).
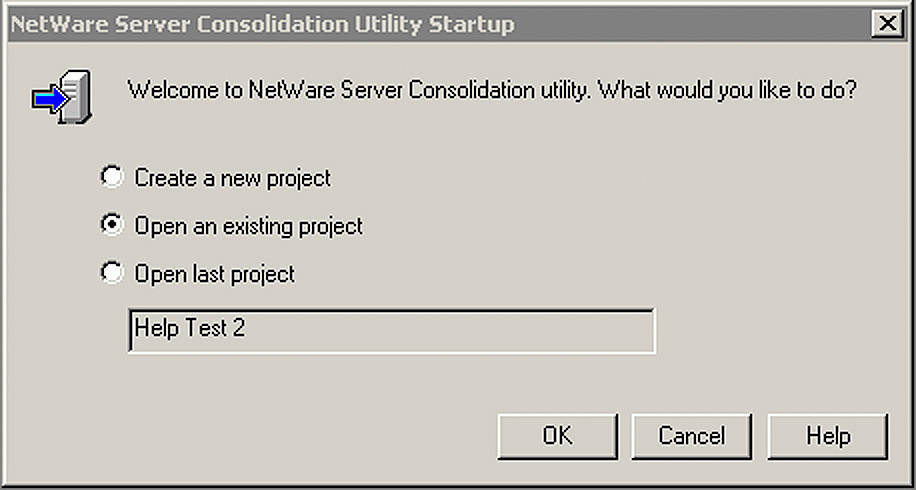
The NetWare Server Consolidation utility startup screen.
If you select "Open an existing project" and click OK, you will then be asked to browse to the appropriate project's database file, as shown in Figure 2.
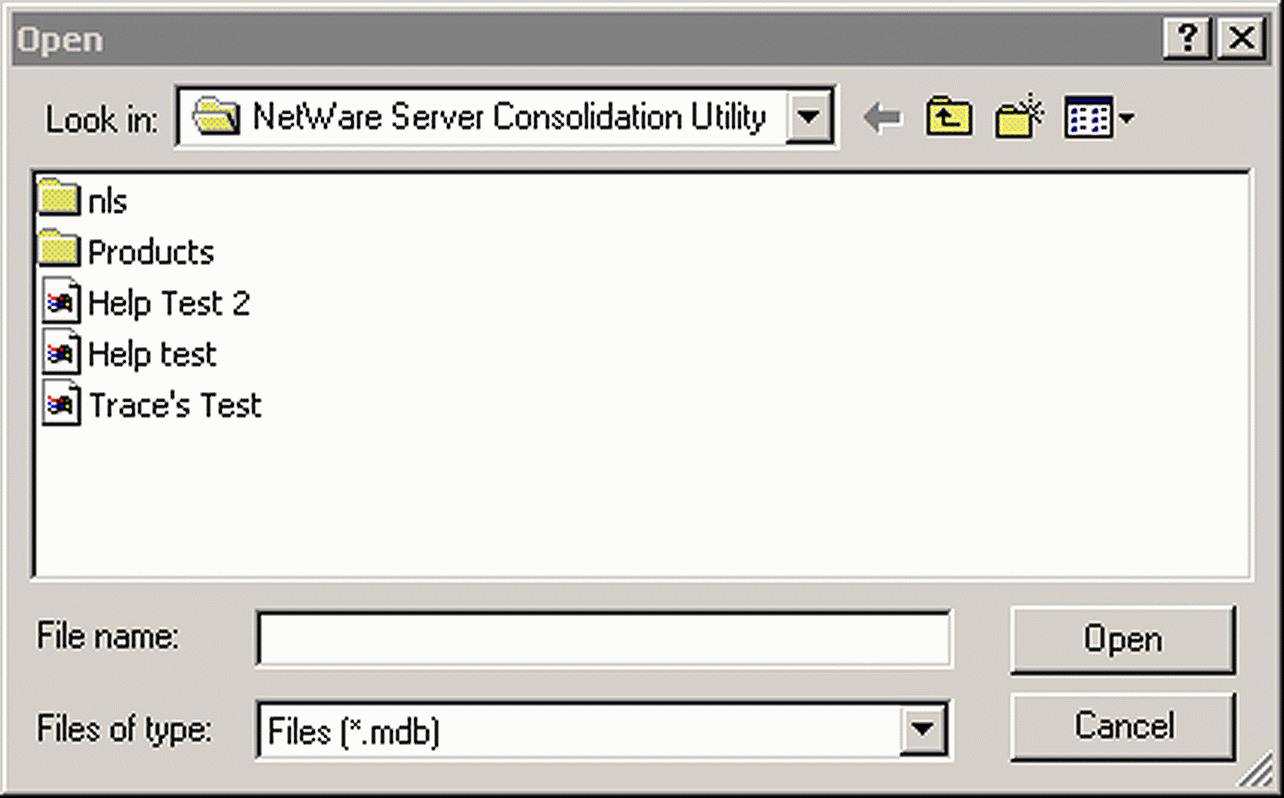
Browsing to an existing project's database file.
You could actually create the database using the SCU and then manually enter the data into it using Microsoft Access, but we think the drag-and-drop method is much easier.
Once the modeling phase has been completed, you commit your changes by selecting either the "Verify and Copy" button from the button bar, or the "Menu" option from the Project menu. The wizard displays a textual representation in tabular format of all of your selections, as shown in Figure 3.
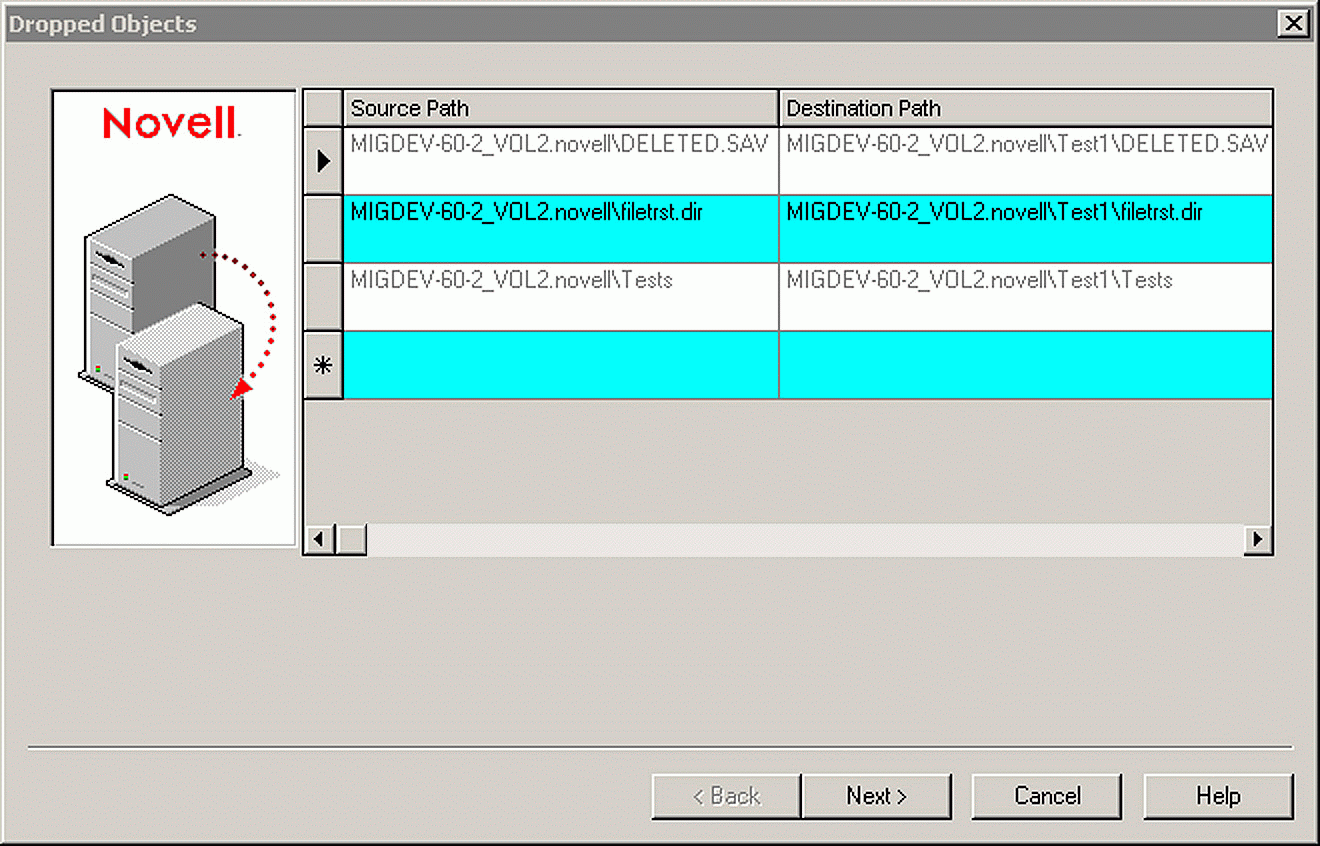
The wizard's display of your selections in tabular format.
You then decide how you want the utility to process duplicate files: copy always, copy only if the source is newer, or never copy over existing files.
The SCU goes through a verification process to make sure that you have all of the required permissions, the correct versions of the NLMs, and that the source and destination servers can talk to each other. If all of the prerequisites of the verification are met, you can proceed with the copy/move phase. If not, you are given a review screen listing all of the errors and warnings that were found during the verification phase (see Figure 4).
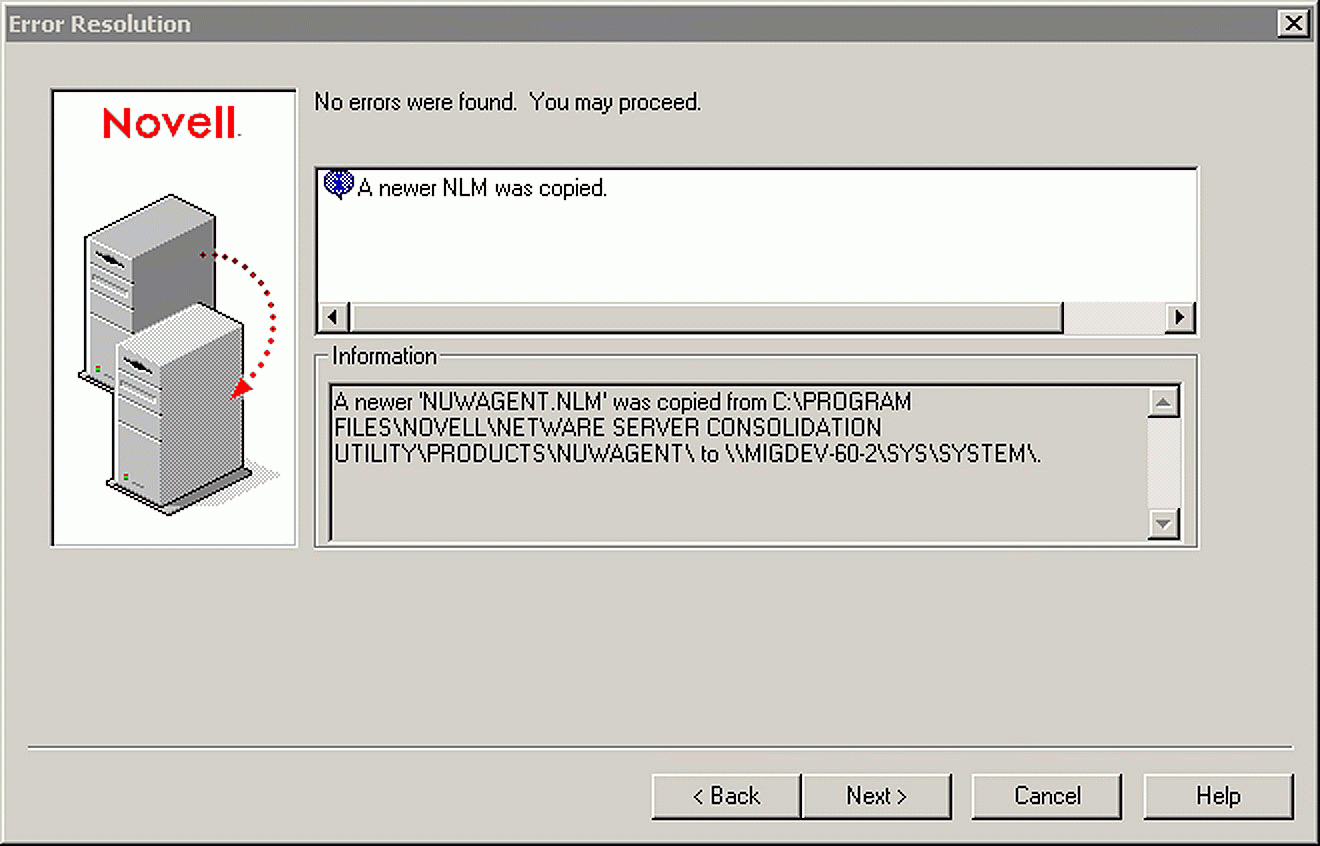
The wizard's review of errors and warning found during verification.
The copy phase loads NUWAGENT.NLM on each destination server. This NLM acts as the agent for copying the file data. Since the SMS APIs require a user name and password, you are asked for a password before starting the copy.
Things to Watch Out For
This section discusses some of the things you should watch out for when working with the SCU. The topics are divided into three areas:
File System
Verification Phase
Printing
File System
This section provides information about aspects of the SCU relating to the NetWare file system.
Consolidating to or from a NetWare 5.1 Cluster. (This information does not apply to NetWare 6 clusters.) When a NetWare 5.1 volume is cluster-enabled, an object is created in eDirectory with the name of the cluster, followed by an underscore, followed by the volume name. For example, if the server is called MyServer, the cluster is called MyCluster, and the volume being clustered is MyVolume, then a Volume object called MyCluster_MyVolume is created in eDirectory. SCU can't use this object.
For the SCU to function properly with a NetWare 5.1 cluster-enabled volume, a physical (not cluster) Volume object must be used instead. In order to create such an object, a Volume object must be created manually. The physical volume's name should be formatted as follows: server name, followed by an underscore, followed by the volume name. For example: MyServer_MyVolume.
To create a physical Volume object, complete the following steps.
Start ConsoleOne and browse to the context where the NCP Server object resides (MIGDEV-600, in this example).
Right-click on the right pane, then select New | Volume. In the first field (see Figure 5), enter the name of the new object. This should be the server name, followed by an underscore, followed by the volume name (MIGDEV-600_ VOL1, in this example).
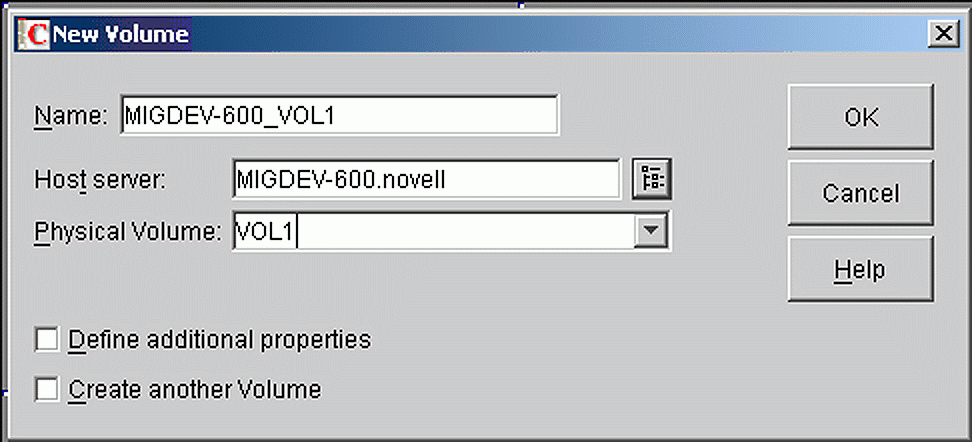
Creating a physical Volume object for a cluster-enabled volume.
In the second field, browse and select the appropriate server (MIGDEV-600.novell in this example).
In the third field, click the drop-down menu and select the volume (VOL1 in this example), and then click OK.
In the SCU project window, you need to refresh the container to make the new object appear. Do this by closing and opening the container where the volume object is located. Press the "-" key to close the container, then press the "+" key to reopen it.
When dragging and dropping in the project window, be sure to use the newly- created Volume object. After the consolidation is complete, you can delete this Volume object.
If you try to drag-and-drop the volume or subdirectories of the MyCluster_ MyVolume object, an error will appear in the verification step to tell you that you must create the special Volume object before proceeding.
Copying Over Existing Directories and Files. Be aware that trustees, ownerships, and directory restrictions don't transfer to existing directories or files. If the destination directories already exist, the trustees, ownerships, and restrictions won't be overwritten. If the source file overwrites the destination file, the source file's information will take precedence.
Resolving SMDR Errors During Verification
During the Server Consolidation project verification, the source and destination servers will attempt to connect to each other using the Novell SMS libraries. The NetWare servers on which the SMDRs reside must be able to communicate with each other. If the servers cannot connect to each other, a critical error will appear in the project window, stopping the copy process. The exact error message will vary, but the heading will always show "Error opening connection to SMDR."
There are various ways of resolving these critical SMDR errors, depending on how your network is set up. These connections can be made in several different ways. First, the SMDRs can establish a connection between the two servers through eDirectory. Second, it can establish a connection through the Service Location Protocol (SLP), which is used by the IP protocol stack, or through the Service Advertising protocol (SAP), which is used by the IPX protocol stack. The third way that the servers can connect is by using the HOSTS file located in each server's SYS:\ETC directory. The SMDR will try to establish a connection in the following order: SLP, eDirectory, SAP, Hosts. If one method fails, the SMDR will try the next until it either succeeds or has tried every method.
eDirectory Resolution. The first way the connection error can be resolved is though eDirectory. By default, two SMDR objects are created in eDirectory in the context in which the server resides. The two object names are "SMS SMDR Group" and "<ServerName> SMS RPC" (where <ServerName> is the name of the NetWare server). If the two eDirectory server objects are located in the same eDirectory context, the SMDRs should be able to connect to each other.
If the Server objects are located in different contexts, you can configure SMS so that both servers are in the same SMDR Group and both have their SMS RPC objects created in the same context. To accomplish this, do the following on the destination server:
Unload all of the TSA NLMs (TSAPROXY.NLM, TSA600.NLM, TSA500.NLM, and so on).
Unload SMDR.NLM.
At the console prompt, type "SMDR NEW".
When asked "Do you want to disable NDS?" enter N.
At the next prompt, "Press enter for using default context/enter the new container context SMDR Group Context:" (sic), enter the context where the source server resides.
At the "Enter the user name (full context) that has managing rights" prompt, enter the full name, preceding dot included, of the administrator object, or an Admin-equivalent object.
At the next prompt, enter the password for this user.
At the "Do you want to disable SLP?" prompt, enter Y.
At the "Do you want to disable SAP?" prompt, enter Y.
SLP Resolution. Another way to get the SMDRs to connect when using IP is by using SLP. SMS uses the SMDR.novell SLP service to make its connections.
To accomplish this, complete these steps on the destination server:
Unload all of the TSA NLMs (TSAPROXY.NLM, TSA600.NLM, TSA500.NLM, and so on).
Unload SMDR.NLM on the destination server.
At the console prompt, type "SMDR NEW".
When asked "Do you want to disable NDS?" enter Y.
At the "Do you want to disable SLP?" prompt, enter N.
At the "Do you want to disable SAP?" prompt, enter Y.
At the "Do you want to disable name resolution through SYS:\ETC\HOSTS file?" prompt, enter Y.
To find out if your servers are discovering each other through SLP, type the following command at the source and destination server consoles:
Display SLP Services SMDR.novell
If the source server displays the destination server in its list, and the destination server displays the source server in its list, then the SMDRs should be able to communicate. If the source list doesn't include the destination server or vice versa, then SLP needs to be set up, troubleshot, or possibly reconfigured.
SAP Resolution. If you are using IPX on both the source and destination servers, SMS can use SAP for server discovery.
To configure this, follow these steps:
Unload all of the TSA NLMs (TSAPROXY.NLM, TSA600.NLM, TSA500.NLM, and so on).
Unload SMDR.NLM on the destination server.
At the console prompt, type "SMDR NEW".
When asked "Do you want to disable NDS?" enter Y.
At the "Do you want to disable SLP?" prompt, enter N.
At the "Do you want to disable SAP?" prompt, enter Y.
At the "Do you want to disable name resolution through SYS:\ETC\HOSTS file?" prompt, enter Y.
The DISPLAY SERVERS command on the console will display a list of all discovered servers. The source server should display the destination server in its list, and the destination server should display the source server in its list.
Hosts File Resolution. With the latest Novell Support Packs (SP 5 for NetWare 5.1 and SP 2 for NetWare 6), the SMDRs can resolve server connections through the SYS:\ETC\Hosts file.
Configure SMDR with the SMDR NEW command as follows:
Unload all of the TSA NLMs (TSAPROXY.NLM, TSA600.NLM, TSA500.NLM, and so on).
Unload SMDR.NLM on the destination server.
At the console prompt, type "SMDR NEW".
When asked "Do you want to disable NDS?" enter Y.
At the "Do you want to disable SLP?" prompt, enter N.
At the "Do you want to disable SAP?" prompt, enter Y.
At the "Do you want to disable name resolution through SYS:\ETC\HOSTS file?" prompt, enter Y.
Add the IP address and server name of the source server into the destination server's SYS:\ETC\hosts file (for example: 137.65.1.1 ServerName).
Printing
This section presents some things to be aware of when moving NDPS Printer Agents with the SCU.
Back Up the NDPS Database Prior to Moving PAs. It is recommended, but not required, that prior to moving Printer Agents, you should do a backup of the NDPS database of the server on which the PSM resides. Here is the procedure to back up the NDPS database:
At the NDPS Manager Console on the source server, press <Esc> to exit from the Printer Agent List, or go to the Manager Console screen.
Select "NDPS Manager Status and Control" and press <Enter>.
Select "Database Options: (see list)" and press <Enter>.
Back up the NDPS database by selecting "Backup Database Files" and pressing <Enter>.
Resynchronize the NDPS database by selecting "Resynchronize Database Files" and pressing <Enter>.
If, for some reason, the moving of the NDPS Printer Agents fails and you need to get back to where you were prior to the move, follow this procedure (assuming you backed up the NDPS database before doing the move):
At the NDPS Manager Console, select NDPS Manager Status and Control and press <Enter>.
Select "Database Options: (see list)" and press <Enter>.
Select "Restore Database" and press <Enter>.
Resynchronize the NDPS database by selecting "Resynchronize Database Files" and pressing <Enter>.
Queue-based Printing. The SCU doesn't handle queue-based printers. If the printer agent is servicing queues, it can't be moved. One option is to remove the associated queues and re-associate them after moving the PA.
Printers with Jobs in the Queue. If the PA you are attempting to move has active jobs in the queue, they will need to finish printing, or be deleted, before you can move the PA.
NDPS Brokers Not Changed. In order to assure that the print drivers are available, when a PA is moved it keeps the same Broker. Moving it to another broker that doesn't have the same set of print drivers could disable the PA.
Public Access Printers Not Moved. Only private access printers can be moved. Public access printers can't be moved with the SCU.
Conclusion
This AppNote has provided an overview of the basic operation of the NetWare Server Consolidation Utility. It has also discussed some things to watch out for when working with this utility. This information should help you get the most out of the utility in your server consolidation efforts.
* Originally published in Novell AppNotes
Disclaimer
The origin of this information may be internal or external to Novell. While Novell makes all reasonable efforts to verify this information, Novell does not make explicit or implied claims to its validity.