How to Certify an NLM Application on NetWare 6
Articles and Tips: article
Support Account Manager
International Developer Support
bellis@novell.com
01 Dec 2001
Novell provides a process by which software vendors may test products that operate in a Novell NetWare environment. This program is called Yes, Tested and Approved. This article discusses how the application testing tools operate so you can get your software application Yes, Tested and Approved. More information on the testing process is available at http://developer.novell.com/yespgm/.
- Introduction
- Setting up the Test Environment
- Install Your Product
- Load Tools on Server
- Run Test Console
- Exercise Your product
- Submission
|
Topics |
YES Tested and Approved, NLM application, NetWare 6 |
|
Products |
NetWare 6 |
|
Audience |
developers |
|
Level |
beginning |
|
Prerequisite Skills |
familiarity with application development |
|
Operating System |
NetWare 6 |
|
Tools |
Java Runtime Environment (JRE), Novell TestConsole, Novell Software Test Tools |
|
Sample Code |
no |
Introduction
In this article, you will learn the process used to test software products that include a Netware Loadable Module (NLM). The Yes program is available for testing hardware devices, client side applications as well as server side applications. This article focuses on the server side application that is not a backup product and will be most useful for developers. Additional information regarding all Novell test tools can be found online in our documentation at http://developer.novell.com/ndk/doc.htm#No.
Setting up the Test Environment
You must have at least one client machine that will run the test tools and one server running NetWare. Additional servers and clients may be necessary if you will be testing a product that uses NDS or contains functionality that requires additional machines to transfer files or information. If in the process of exercising your product you need a particular configuration of machines to successfully execute the functionality of the product, you will need to create that same environment.
|
Client Requirements
|
Server Requirements
|
|
Java-enabled Pentium 200-MHz client with 64 MB memory running Windows 98, 2000, or NT and above. Monitor minimum resolution of 800 x 600 IP Connection |
NetWare 5.0, 5.1, or 6.0 (test tools are different for NetWare 6) If you have interest in certifying on NetWare 4.x please contact Developer Support by phone 800-733-9673 or by email devsup@novell.com. |
Install the Java Runtime Environment (JRE)
Prepare the client machine by installing the Java Runtime Environment (JRE) found at http://java.sun.com/products/jdk/1.1/jre/download-jre-windows.html.
Install the Novell TestConsole
TestConsole is a Java-based utility used to automate test execution in a testing network or lab. It provides a common interface to plug in all the test suites provided through the Novell DeveloperNet Program for testing and certification of software applications. This tool is available at http://developer.novell.com/ yespgm/softwarecert.htm.
To install the TestConsole follow these directions:
-
Execute tconsole.exe.
-
Select Next after viewing the Welcome screen.
-
Select Yes after reading the license agreement.
-
Select Next after viewing the Readme file.
-
Select Next to install to the default folder, or Browse to choose a different folder.
-
The program checks for an existing Java Runtime Environment (JRE), and prompts you to install the JRE if one is not present. If multiple JREs are present, you are able to select the one you wish to use with TestConsole (1.1.8 or 1.2.2).
-
When the installation is complete, select Finish.
Install the Software Test Tool Kit
The Software Test Tool kit includes Procedure and Allocation Logger (PAL), Sentry, NLM Test Tool, and the Electronic Tick Sheets. PAL tests the ability of NetWare Loadable Modules (NLM) to handle failed memory allocation calls and tracks the amount of memory allocated in order to test for memory leaks. It also tracks the procedures that are called, and how many times they are called. These test suites will appear as separate tests in the NetWare 5 test tools. PAL, Sentry, and the NLM test tool have been combined into one test in the NetWare 6 test tools.
-
Authenticate to the test server(s) sys volume with admin rights or equivalent.
-
Execute Soft test.exe.
-
Select Next after reading the statement about closing other Windows Applications.
-
Select Yes after reading the license agreement.
-
Select Next after reading the contents of the package.
-
Select the desired server(s).
-
Select Yes or write down the lines that need to be added to the file as mentioned and then add them manually after.
-
Select Finish.
Install Your Product
This process will place the NLM on the test server. If your product does not include any NLMs then you will want to follow directions on testing client applications. Likewise, if your product is a backup application you will need to use additional tools and can find directions at http://developer.novell.com/ ndk/bktest.htm.
It is a good idea to load your product's NLM(s) before beginning the testing process to make sure that it loads properly. This is important because the nature of the test tools creates behavior you may not see in other situations.
Make sure that you use debugging versions of the NLM or copy the NLM's associated MAP file into the directory as the NLM is being tested. The MAP files used must be those created at the time you compile the NLM. Each NLM being tested should have a MAP file.
Load Tools on Server
At the server console enter load pal. In the NetWare 6 testing process, this will initiate all the server side tools. If testing against NetWare 5 you will need to type additional commands. These commands will create a log screen. This screen is accessible from the server when you hit <ctrl> <esc> simultaneously. Do not leave this log screen on continuously during testing as it slows the testing process. You may wish to refer to this log to see if there has been any activity during a period of testing where there appears to be no activity.
Run Test Console
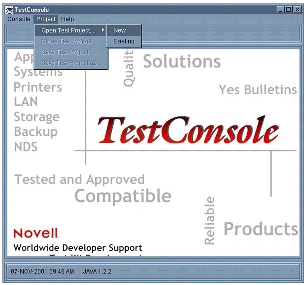
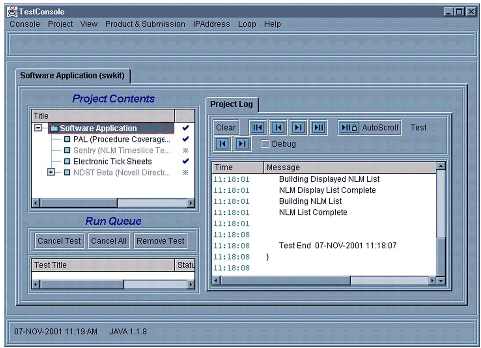
Return to the client machine and execute the test console. This can be done from the short cut on the desktop or from the Start menu, click Programs > Novell Software Test Tools > TestConsole. Wait for several windows to open including the following window. Then begin the setup for the test process.
Test Console.
-
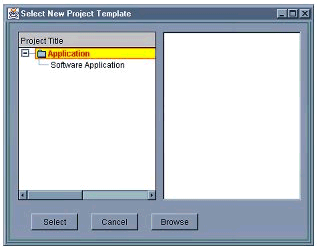
Select Software Application and then click Select as seen in Figure 2.
Select New Project Template.
-
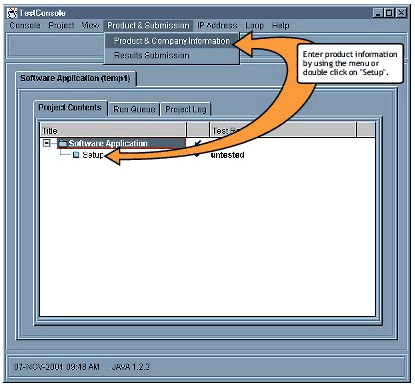
You must input information about the product before you begin testing. To enter information use the menu options Product & Submission > Product & Company Information as shown in Figure 3 or double click on setup.
Enter product information by using the menu or double click on setup.
-
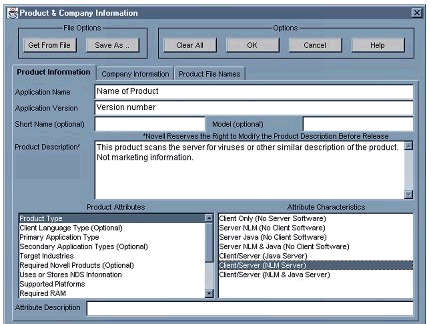
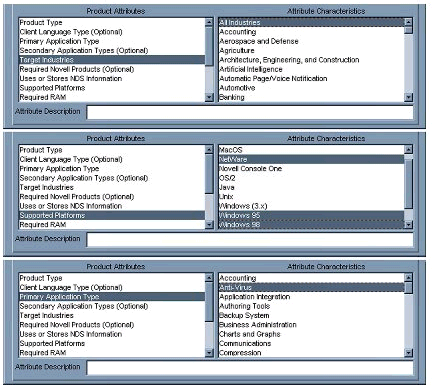
Enter the appropriate information under all three tabs. You will need to enter the product name and version. Figure 4 shows two columns Product Attributes and Attribute Characteristics. For each line under Product Attributes, you will need to either select an option under Attribute Characteristics or enter values in the attribute description box.
Product & Company Information.
-
Notice in Figure 5 that options under Attribute Characteristics change as you select a new lines under Product Attributes. Be sure to enter information for each line in Product Attributes.
Characteristics change as you select a different product.
-
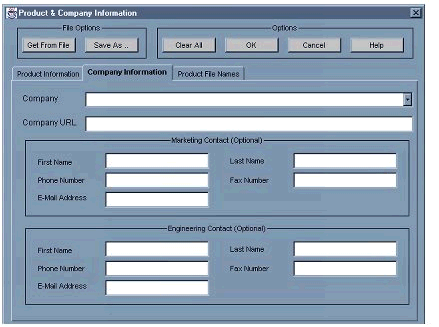
Enter your company's information under the second tab shown in Figure 5.
Product & Company Information.
-
The third tab is different in the tools for NetWare 6 compared to NetWare 5.
NetWare 5 - In the field File Search Specification, enter the path where the NLMs to be tested are found. Find the NLM under Available Files and click Add do this until all the NLMs in your product appear in the window labeled Selected File List. Once the NLMs have been selected, save the information by clicking Save As and OK.
Add NLMs to Selected File List.
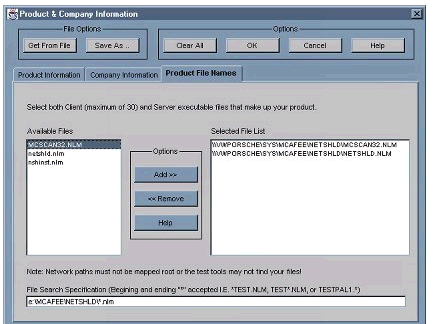
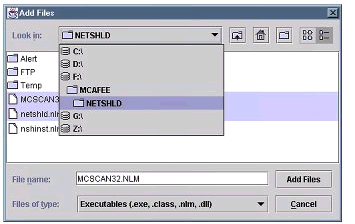
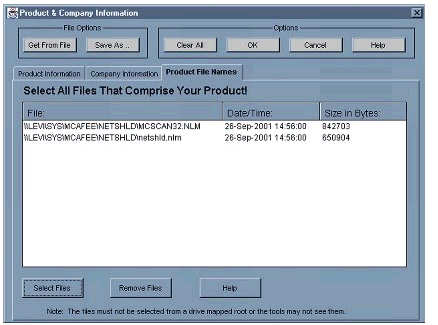
NetWare 6 - The steps are the same only the interface is slightly different see Figures 8-10.
Product File Names.
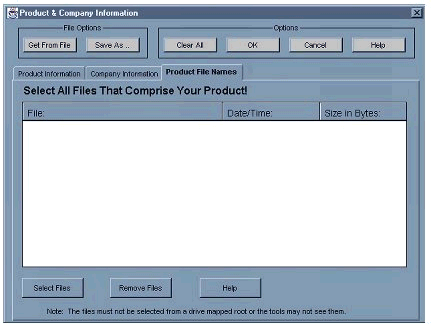
Add Files.
Save the information.
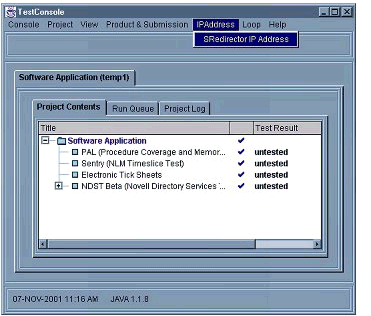
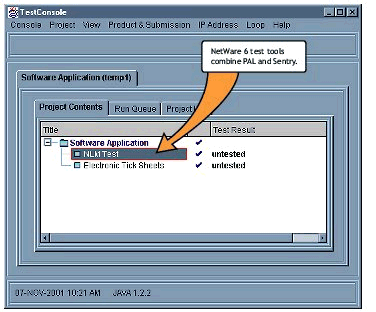
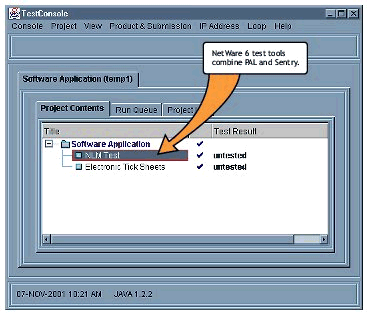
Now the console will show the tests that can be run. The window, as shown in Figure 12, is different in the NetWare 6 tools because the PAL, Sentry, and NLM tools have been combined. Before running the test be sure you are connected to the server and the IP address has been selected using the menu shown in Figure 11.
IP Address selected.
NetWare 6 text tools combine PAL and Sentry.
-
Check the server to see that PAL is loaded. If not, load pal by typing load pal at the console prompt.
-
Return to the client test console and select the tests you wish to run (see Figure 13). Then add them to the run queue by double clicking on them. For the NetWare 6 tests, you simply double click on NLM test shown in Figure 14.
Select test you wish to run.
NetWare 6 text tools combine PAL and Sentry.
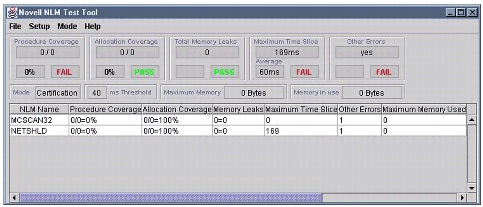
Running the test tools will open a window that will display each of the NLMs you selected on a separate line. If the NLMs do not appear you may not be connected to the server or you may not have added the MAP files to the directory where the NLMs are found.
Novell NLM Test Tool.
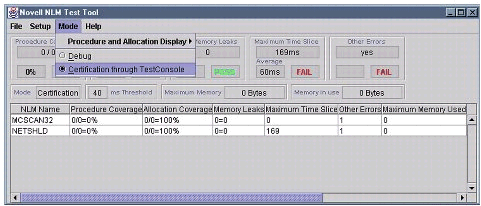
By default the certification mode is not selected. At this time you may enter Certification mode as shown in Figure 16. In the NetWare 5 tools, this is accomplished by clicking the button marked Deny All Memory.
Certification through TestConsole.
Now your environment is properly set for testing.
Exercise Your product
This is different for every product. This portion of the test process involves hitting every piece of code (if possible) in the product. Because the testing program is set to certification mode you will experience new behavior. The first time your NLM may not load. In fact, it may take 50 or more attempts to load the NLM before it successfully loads. You will need to test unloading as well. While it is loaded you should exercise every piece of functionality of the program. As you do, you will see the numbers change in the test window.
Test window.
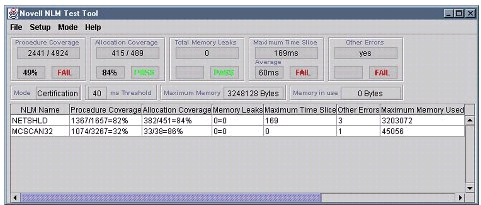
While exercising the product, each feature of the product must be run. Once all the code has been tested. Proceed to the electronic tick sheet shown in Figure 18.
Electronic tick sheet.
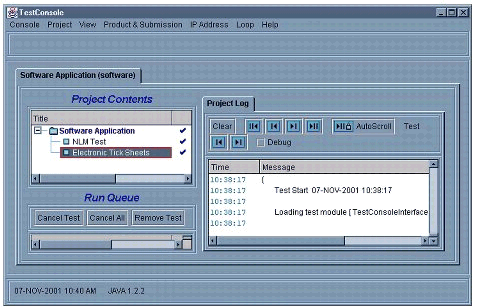
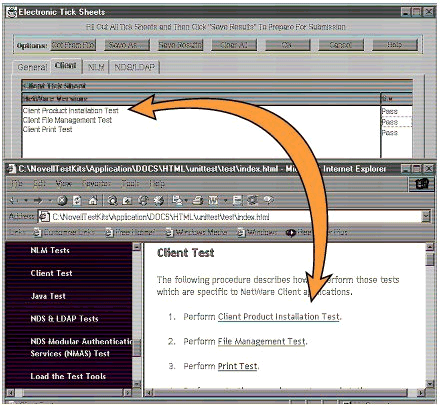
With the test sheet open you will be required to perform the tests as explained in the documentation. At the start menu select Programs > Novell Software Test Tools > Software Doc html. Here you will find the corresponding tasks that need to be performed to pass the tests in the tick sheet.
Tick Sheet.
If you have completed the requirement for the test in the tick sheet double click on the word Fail and it will change to Pass (see Figure 20). Proceed to the other tabs Client, NLM, and NDS/LDAP. You can save information as you verify each test.
Electronic Tick Sheets.
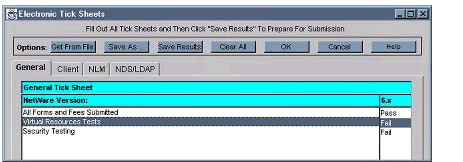
Once you have completed and passed all the tests in the tick sheet click OK.
During this process you will need to verify that you have registered any virtual resources for your product. Sign and submit the contract, which is available at http://developer.novell.com/labsguide/contracts/devnetagreement.pdf.
Submission
Results may be submitted in two ways. A subscription to the DeveloperNet program at the Executive level or higher, allows you to submit the results directly to Novell. To do this, follow the directions below. Others may submit the product to be tested through a Novell Authorized Testing Center (NATC). Choose an NATC from those listed at http://www.developer.novell.com/yespgm/natc.htm.
-
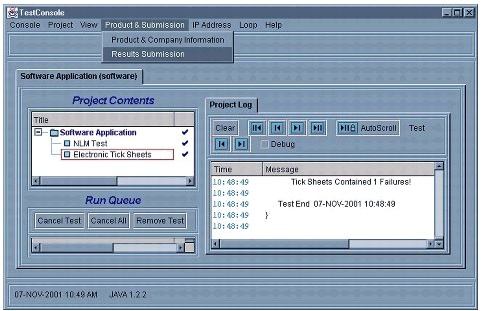
Select Product & Submission > Result Submission.
-
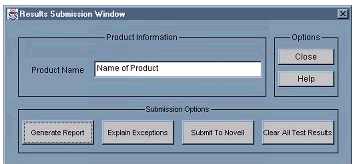
Select Generate Report.
-
Select Explain Exceptions.
-
Submit To Novell.
Result Submission.
Result Submission Window.
Successful completion of the testing process will be awarded a bulletin. This information is available to all Novell customers through our solutions search http://www.developer.novell.com/nss/.
* Originally published in Novell AppNotes
Disclaimer
The origin of this information may be internal or external to Novell. While Novell makes all reasonable efforts to verify this information, Novell does not make explicit or implied claims to its validity.