How to Use the ODBC Driver with NDS, Part 2
Articles and Tips: article
Software Engineer
NamSys Inc.
jparkin@home.com
01 Dec 2000
This AppNote, the second in a three-part series, addresses how to integrate the ODBC driver to assist in making reports on network use polled from the NDS tree.
- Introduction
- Displaying the NDS Tree Using SQL Queries
- Obtaining the NDS ODBC Driver
- How to Use the ODBC Driver with RDO
- Putting It into Practice
- Using SQL to Retrieve Data from NDS
- Conclusion
Introduction
In Part 1 we introduced the NDS ODBC driver. We also showed you how to build a simple report in Microsoft Excel using a driver and DSN connection. This information will be expanded on in greater detail in this article.
One of the most important facets of the ODBC driver is the ability to use SQL to query the tree. This article will get you started with SQL and how you can build queries using SQL to retrieve information from the NDS tree. A section of this article is on how the ODBC driver maps the NDS tree. Also covered in greater detail will be some of the finer points to remember when building a query. We will be focusing primarily on the use of SQL inside Microsoft Visual Basic using RDO objects, as the ODBC driver does not function well with Microsoft's ADO objects.
SQL is an acronym for Structured Query Language. This language was designed to allow users to access databases using simple English commands. An example of a SQL statement would look like this:
SELECT * WHERE fname = 'Bob' and lname = 'Myers'
This example retrieves all the fields from the data store where the fname field contains "Bob" and the lname field contains "Myers".
This AppNote is not designed to give you full working knowledge of SQL, as there are many text resources on this topic as well as many Internet sites that give a more thorough explanation of SQL and its syntax. It is expected that you have a basic knowledge of SQL and its workings for the information and case studies with this AppNote. If you do not have a solid background in SQL, I will be breaking down the statements before moving on.
SQL and NDS Mapping
The NDS ODBC driver maps the directory tree into a format that can be easily adopted for SQL queries. The basic mapping structure is this: the NDS objects are tables, the attributes are fields or columns, and entries are records or rows.
A SQL query example to retrieve (from a really small NDS tree) the names attributes and e-mail address attributes from the users class of an NDS tree would be as follows:
SELECT Surname, "Given Name", "Full Name", "Email Address"FROM UserNDS
The result from the above query would appear something like the following:
|
Surname
|
Given Name
|
Full Name
|
Email
|
|
Northey |
Joshua |
Joshua Northey |
jnorthey@somewhere.com |
|
Ruttle |
Dale |
Dale Ruttle |
Dnorthey@somewhere.com |
|
Parkin |
James |
James Parkin |
Jparkin@somewhere.com |
|
Foster |
Greg |
Greg Foster |
Gfoster@somewhere.com |
UserNDS is the table, and Surname, Given Name, Full Name, and Email are all fields inside that table. The results from the query are the entries of the attributes or records.
I would not recommend doing this exact query yourself unless you are part of a relatively small organization. Again I would like to point out that such a query could have the potential of using up all of your system resources if you have a large user list. Due to this fact, I would recommend putting some sort of filter criteria in the query.
Notice that in the query statement, the table is UserNDS when we are really querying the User class. This is because User is a SQL keyword. Another such keyword is Group, and since there is an NDS class called Group, you would then enter GroupNDS instead of Group for the table in the SQL query. Note that this only applies to the User and Group classes.
The database in these connections, for SQL purposes, would be the actual tree that you are connected to. How to create a connection to a tree will be covered later.
When you are selecting an attribute that happens to be part of a structure or table itself, the fields inside that field would have a layout like "attribute_field" or "user_surname" Because we are already pulling specifically from the User class, we would only have to use the "surname" field name.
Multivalued Attributes
In NDS, multiple values are allowed to exist for each class. The ODBC driver reads and displays all these and as a result added columns may occur. Handling of this potential is important, especially given the fact that some attributes may have more values than others. For example, if you have three e-mail address and three given names, you could end up with nine rows (three e-mail address multiplied by three given names). Basically, each given name would display all three e-mail addresses:
|
Given Name
|
Email Address
|
|
Joshua |
Jparkin@somewhere.com |
|
Joshua |
Jparkin@bob.com |
|
Joshua |
Jparkin@yourhouse.org |
|
Josh |
Jparkin@somewhere.com |
|
Josh |
Jparkin@bob.com |
|
Josh |
Jparkin@yourhouse.org |
|
Jo |
Jparkin@somewhere.com |
|
Jo |
Jparkin@bob.com |
|
Jo |
Jparkin@yourhouse.org |
Since this is the way ODBC generally displays the data, imagine the amount of paper used up when printing a report of 500 employees, each with between two to seven e-mail address (don't laugh--I know people with seven e-mail addresses). One can see how quickly your system resources could be eaten up just by retrieving these two fields, let alone any others that may be needed in the report. So what are we to do?
There are two methods to handle this problem: just let it be and deal with it in a programmatic way, or concatenate the rows.
Concatenating Rows
You will notice that when you go into a SQL query builder you will see most attributes or fields twice, one with the actual name and another with "_S" in them. The "_S" is the concatenated row field. This means that you have the same amount of information but stored in one row. For example, Email_S would then display the e-mail address in one row as one field.
The default delimiter is a comma. You can add delimiters to separate the data in the rows and to add some formatting functions as well. This allows the report to be easily read, and properly interpreted. You select the delimiter in the SQL query. Thus, the query to provide the same results as above but concatenated would look like this:
SELECT Surname, "GivenName_S", "Email Address_S" FROMUserNDS WHERE {fn SetSeperator(',')};
This query sets the delimiter to a comma (the default) and therefore the result would be similar to the following:
|
Given Name
|
Email Address
|
|
Joshua, Josh, Jo |
Jparkin@somewhere.com, jparkin@bob.com, jparkin@yourhouse.org |
As you can see, you would save a lot of paper.
As I mentioned earlier, you can also add some formatting functions to the delimiter, as shown in the following table:
|
Argument
|
Result
|
|
'\n |
'Line feed |
|
'\r |
'Carriage Return |
|
'\t |
'Tab |
|
'\f |
'Form Feed |
|
'\b |
'Back Space |
|
'\\' or '\ |
'Back Slash |
For more information on this topic and mapping, see the help that comes with the ODBC driver.
Only certain attributes can be concatenated. The rules are fairly straightforward. First off, the attribute must contain multiple values. Second, the values must have one of the following syntaxes:
Case Exact String
Case Ignore String
Class Name
Distinguished Name
Facsimile Telephone Number
Network Address (Address column only)
Numeric String
Printable String
Telephone Number
Typed Name (ObjName column only)
I would recommend checking out the NDS Schema Reference for more information regarding these syntaxes and the attributes.
SQL, Visual Basic, and the NDS ODBC Driver
VB has built-in SQL creators/editors via a really easy-to-use graphical interface. SQL commands can be used in VB to connect to, retrieve, order, and filter an ODBC-connected database. These statements are generally created and passed to a string variable, then used in an Execute command to run. These commands work on DAO and RDO objects. Each of these options is valid and has its own advantages and disadvantages.
Here are some of the basic SQL commands you will need to know and understand:
Select
From
Where
SELECT. The select command tells the ODBC driver which fields to select. The SELECT command parameters look like this:
SELECT {field name(s)}
When using the SELECT statement with multiple fields, you can use the all character "*" which selects all the fields in the table. An example of this was seen above. This can be a problem with large data stores such as an NDS tree where there can be literally thousands of objects inside any given object. Therefore unless you are going to use all of them, it is recommended to only select the fields you are going to have in your report. To separate multiple fields you would use a comma delimiter. So if I was going to select a couple of fields in the User object, it would look like the following
SELECT NDS_Tree, NDS_Name, NDS_FullName
This is a straightforward example of how to use the SELECT command. But if you try to use fields with spaces in it such as Internet Email Address, you will get a nasty error. The solution to this is simple in VB: just put a square bracket around it. So now let's add the Internet Email Address field to the above example.
SELECT NDS_Tree, NDS_Name, NDS_FullName, [Internet Email Address]
It is a common practice to put the square brackets around all fields requested. This method is not necessary but is a good habit to get into.
FROM. The FROM commands tells the ODBC driver which table to pull the fields from. When dealing with relational data stores, such as a Microsoft FoxPro database (.dbc) that contains several tables inside it (which may have matching field names), this command makes sure the fields are coming from the right place. The syntax for the FROM statement is as follows:
FROM {Table}
When using this in NDS the {table} would be more appropriately named {object}. To build on the above SQL query, the command to pull the fields from the User object would be:
SELECT NDS_Tree, NDS_Name, NDS_FullName, [Internet EmailAddress] FROM UserNDS
Notice I used UserNDS instead of User. If you were to use one of the visual SQL builders inside of VB or in a Visual Interdev data view, you will see the object UserNDS. This is because User is also a SQL command and could cause problems depending on which SQL interpreter you use. This is covered more in depth later. Suffice to say at this time, that when using the ODBC driver, put the NDS after User to save possible language errors.
WHERE. The WHERE command is the filter command. With this command you are able to filter the query. This way if you have 1000 employees you can specify which ones you are looking for. You can use the WHERE command in conjunction with AND and OR qualifiers to further refine your search. This enables you to add business logic to your queries. You need to also use further mathematical qualifiers such as =, , and in your statements. The syntax for the WHERE statement is as follows:
WHERE {field}{=,>,>}{qualifier}{AND/OR}{field}{=,>,>}{qualifier}
You can add virtually unlimited AND/OR statements in your query to refine it even more. So if you wanted to grab someone named Bob Longheart from the marketing group you could use the following where statement:
WHERE [Full Name_S] = 'Bob Longheart' AND [GroupMembership_S] = 'Marketing'
Here we use the square brackets around the field (object) names because the field names have spaces in them. I am using the equal sign in this example because I am looking for a specific person.
Now to add on to the example query:
SELECT NDS_Tree, NDS_Name, NDS_FullName, [Internet EmailAddress] FROM UserNDS WHERE [Full Name_S] = 'Bob Longheart'AND [Group Membership_S] = 'Marketing';
Since this is the end of the SQL query, a semicolon is added as well. This statement will now go through the tree and grab the individual name Bob Longheart from the Marketing group and read the Tree, Name, and Full Name. Again I remind you that the ODBC driver is read-only and as a result you cannot add information to the tree using this method. However, you can use the ActiveX controls released by Novell to accomplish this task if needed.
Special SQL Commands
Using these special SQL commands, you will be able to grab information on objects. These commands access the extra columns generated by the ODBC driver and can be used in either reports or in a program to generate a graphical layout of a specific object.
NDS_FullName - contains the full name of the object.NDS_Name - the name of the object.NDS_Context - contains the context of the object.NDS_Tree - contains the tree of the object.
For further examples of SQL queries and their results, check out: http://developer.novell.com/ndk/odbc.htmand follow the View Documentation link.
Displaying the NDS Tree Using SQL Queries
There are lots of potential problems when grabbing information from the NDS tree. These can include such difficulties as using all of your system resources and hanging your system or lack of efficiencies from loss of time.
There is also another command for SQL that I didn't cover because it is pretty powerful and complex. The command is the Like operator. You can use it to select fields with a pattern string. To build the string you need to use the following characters.
|
Symbol
|
Usage
|
Description
|
|
* |
Any group of characters |
This is the simple anything and everythingsymbol. This should be familiar to all the DOS junkies.Example: WHERE A* locates everythingthat has an A starting it. |
|
? |
Any single character |
The query returns all objects that contain the character followed by the the ?Example: WHERE ?j returns all the objects in a tree that have the letter j in them. |
|
# |
Any single numeric digit |
This can be used when you are looking for a specific series of numbers.Example: 654#21 would return 654921, 654821, 654721 (well, you get the point). |
|
[ ] |
Characters in the braces |
Use this if you are looking for words that have only certain characters.Example: [os] will return Josh and Jo, but not JP. |
|
[! ] |
Anything NOT the braces |
Use this if you are looking for fields that contain certain strings that don't contain letters.Example: [!o] will return JP but not Josh or Jo. |
|
[ - ] |
Anything within a scope |
Use this if you are looking for a certainscope of letters.Example: When used in conjunction with *. [a-b]* would locate anything with a or b starting it. You could replace the asterisk with any combinationof letters to make up a word if you want. |
By using the above statements you will be able to manipulate the tree to reduce your queries to a respectable size, one that will not eat up your resources and increase the speed of your queries.
Another statement to make viewing easier is the ORDER BY command. This command basically builds a temporary index for the recordset. The index is only temporary and cannot be called from the many methods available. It is just for your viewing pleasure. Here is the syntax of the ORDER BY command:
ORDER BY {fields}
You can use multiple fields in the order by statement to retrieve further enhance the viewing experience to the user.
Obtaining the NDS ODBC Driver
The NDS ODBC driver is available as a free download from http://developer.novell.com. Subscription is free (at the electronic level) and I strongly recommend that you do subscribe, as there are many developer resources available to Novell's DeveloperNet members.
The NDS ODBC driver from Novell works on any Win32-based operating system. It does not run on the Novell server itself.
The following should be strongly adhered to:
Given the potential size of a single container object in the NDS tree itself (just a mere 10,000 in NDS 7 to millions of objects in NDS 8), care must be taken when generating the results. The amount of system resources needed to store and generate the reports could be beyond system capabilities. Therefore care must be taken to ensure that the resulting query will not exceed these limits.
Due to the replication ability of NDS, data may be stored on various servers located anywhere on the network, including across the world. When generating reports using the ODBC driver, there could be dramatic loss of speed due to this fact. Therefore, plan carefully.
How to Use the ODBC Driver with RDO
Since the ODBC driver doesn't fully support ADO, the next best thing is RDO/DAO. Here I will discuss how to use RDO/DAO to pull data from the tree. Since you are going to be building applications using RDO/DAO, you can use the Data Control. This is the easiest way. Through the Data Control you can choose how you want to connect to the data store. Your choices are using one of the Microsoft Jet Engines or using ODBC. The following code samples will be using ODBC.
When building an RDO/DAO application, you need to make sure you put the proper references in the application. This is done by going to the Project menu and selecting References. This is important because Visual Basic will generate quite a number of errors if you don't sent the proper references. The references we will be using are Microsoft Remote Data Object 2.0 and Microsoft DAO 3.51 Object Library. This is a very crucial step and must be done.
Data Control
The Data Control allows you to let the user scroll through the data store using its built-in interface (it is not that pretty, but it is functional). You can scroll individual records one at a time or grab the entire data store. Both have their advantages; however, due to the possible size of some NDS trees, it is not recommended that you grab entire data stores because this can cause massive problems on the client side.
Since we are accessing the data stores using the data control, the most obvious start would be to set the Connect, DatabaseName, and RecordSource properties.
First let's look at the Connect property. The Connect property stores the information on how you want to connect to the data store. This can be one of the Microsoft Jet Engines or ODBC. When you click on the box, you get a combo box to do just that. You will see all the Microsoft Jet drivers installed. You will have to type in "ODBC;" at this time. (Don't forget the semi-colon after ODBC.)
You need to tell RDO which DSN to use. Unfortunately, there is no pull-down box that has a listing of your DSNs. Consequently, you have to enter it in. It always helps to make the DSN names easy for this reason.
Finally, you need to enter the RecordSource property. This is where you would enter the SQL query you would like to execute. With RDO the query would look like this:
SELECT NDS_Tree, NDS_Name, NDS_FullName, [Internet emailaddress] FROM UserNDS
There is really no limit to the data controls you can have on a form. With this you will be able to do multiple SQL queries on the same tree, or even different trees, depending on your NDS configuration. If you wanted to grab information from other objects such as a GroupWise object using the same user, it is quite possible by simply modifying the code a little bit. For example, you could grab the login information and e-mail address from a user, and then pull the corresponding information from the GroupWise object, and compare the two for contact information.
Data Enabling Objects
You can data enable certain objects such as text boxes. This allows you to use a no-code way of rapidly developing a report for individuals. To data enable an object such as a textbox you would need to point it to a certain data control. The data control (you can have more than one on a page at once) needs to be defined in the data source property of the text box.
Next, define the data field property. When you select the data field property, VB connects to the tree and runs the appropriate SQL query. The pull-down list populates with the fields retrieved from the SQL query. Simply select the appropriate one.
You can set up as many data-enabled objects as you wish. This is also not limited to text boxes, but also combo boxes and list boxes, depending on how you want the report to look. The example included in this final section shows you how to data enable a grid control.
Putting It into Practice
The download from DeveloperNet includes some examples for Visual Basic as well as Crystal Reports. Let's have a look at them now so that we can put all of this to practice.
The Visual Basic User Information sample included with the sample shows how to build an easy report by obtaining the Name, Email Address, and Group Membership values from the NDS tree. This sample includes no code but is built entirely by RDO and DAO objects. I will now walk you through how to build the same program.
This sample requires that it you have access to an NDS tree. Remember you will be limited to what information you can retrieve by your access to the tree. It is better for these samples for you to be logged in as administrator or the equivalent.
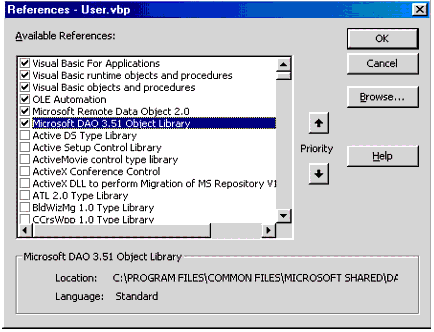
Start by loading up Visual Basic and select building a Standard EXE. With this project you are going to generate an NDS report using only two controls, one of which will be non-visible. Under Project References you will want to make sure the following references along with the default settings are enabled: Microsoft Remote Data Object 2.0 and Microsoft DAO 3.51 Object Library (see Figure 1). These components are required to allow your application to connect to a data store either via ODBC or Microsoft Jet.
Figure 1: Selecting the object library.
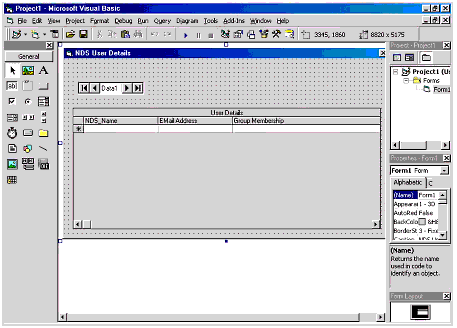
Next, you will create a Data control and a DBGrid control on the form(see Figure 2).
Figure 2: Creating a data control.
Under the properties of the Data control (Data1), make the following additions:
|
Attribute
|
Properties
|
|
Connect |
ODBC; |
|
Database Name |
WROXDSN; |
|
Visible |
False |
|
Record Source |
Select NDS_Name, [Internet email address], [group membership] from UserNDS |
Let's analyze this for a moment. The Connect attribute tells VB what type of data store this is. When you access the selections that are available to you, you get a listing of all the Jet drivers that come with VB. However, you are not going to use Microsoft Jet to connect to the database so you have to enter ODBC.
Since you have chosen ODBC, you must enter a DSN name. However, this gets entered in the Database Name attribute. This way VB knows to look in the ODBC listings and find one called WROXDSN, which you just created so that is okay. Under the Record Source attribute you enter a SQL query. You can create a SQL query to try using the Visual Data Manager under the Add-Ins menu, or create a Data Environment by selecting the Data View Window. This will allow you to easily create a SQL query graphically.
Now let's examine the SQL query itself. The Internet email address and group membership are fields in the User object or the NDS tree. The reason for the square brackets '[ ]' is there are spaces in the field names. Therefore since NDS_Name didn't have any spaces in the name, it doesn't need the square brackets. INDS_Name retrieves the name of the object. Therefore, in this query you are grabbing the name of the object, e-mail address, and group membership.
UserNDS is the name of the object you are going to query inside the NDS tree. Actually it is the User object but because User is also a command inside SQL, "NDS" is added to the end. Since you are running a query and retrieving multiple records at once, there is really no need for the data control to be visible to the user.
You must a have a way to make the report visible; hence the DBGrid. First of all, you must select Data1 as the data source. Then right-click on the DBGrid itself and select properties. From here you can edit everything from graphical layout, font colours, size, and the like as well as select the fields you want displayed. Feel free to make the display look how you like.
When the DBGrid comes up, its default is two columns. Since there is no way in the properties to select the number of columns to display, there is a special trick that must be done. Right-click on one of the two column header boxes and select edit. Right-click on the same spot again and select insert. This will insert another column. You can keep inserting as long as you don't click off that control. When you do that, you have to start the whole process of selecting edit before adding or deleting rows. Since you are retrieving three fields (Name_NDS, Internet Email Address, and Group Membership) you only need to add one more column.
When you select the column tab, you can add headers to the columns (caption) and data fields. Since you already selected Data1 as the data source, when you hit the combo box you get a listing of the fields retrieved from the query entered into Data1. When you select a field, the field name is automatically entered in the caption box. This can be edited to make it more reader friendly.
So for column0 select the data field NDS_Name and leave the default values blank. For column1 select the data field Internet Email Address and for column2 select the data field Group Membership.
Save the project and run it. If all went well, you should have your first report done without using any code. You can modify the result any way you want.
Using SQL to Retrieve Data from NDS
Okay, that was easy, but it didn't give you very much control over your application. You built it in minutes, but there is more you want to do. In addition, do you really need to use all those objects on a form? What if you just want to build a module to plug in to other applications or an ActiveX component? Well there is a way you can.
This sample can be used for plugging into your applications in development. This program is designed to use SQL to retrieve fields and query information from the NDS tree. This is just a simple module that you can use to set up your calls to the subroutine and return the values. In the end we will build a form to send the queries and display the retrieved data. The form, however, is not necessary, nor is it important to the code.
The first that needs to be done is the references again. You absolutely have to set up those project references. If you don't, you are in for a whole world of hurt. It can take a long time to try and debug an application only to find out that no references were applied to the application. (Don't laugh--it happened to me.) You are going to build this sample from just a code standpoint with a few objects. For this application just use the DAO 3.51 Object Library.
Since you are just building a module that can be plugged into your existing application (hence NDS enabling it and possibly getting NDS tested and approved from Novell) you are not going to rely on a data control. Instead, you need to be able to write just code to handle everything (not a bad thing, really, but it can be time consuming). This, however, gives you an opportunity to understand how VB handles data flow and control, especially in conjunction with the Novell ODBC driver for NDS.
If you are going to use a DSN connection you must first build it. You can do this by following the instructions mentioned previously in this article. Second, you need to declare a global variable for the database. This needs to be defined in your General Procedures in the Module. Since this is going to be a module, you would also want to have the opened recordset available to the rest of the program. The resulting code would look like this:
Public NDSTree as DatabasePublic NDSrs as RecordsetPublic recCount as Integer
The recCount just keeps track of how many records were pulled out of the recordset on the query.
The next thing you must do is in the function itself, which for simplistic sake I will call PullTree. You need to define all the variables you are going to use. When connecting to a database you obviously need a variable for the SQL query. Also too a variable is needed for the Recordset, the NDS object name, Table Definitions (TableDef).
Public Function PullTree()Dim NDSObject as StringDim NDSTableDef as TableDefEnd Function
Since the SQL query, Tree Name, and DSN information is needed to truly communicate to the NDS Tree and pull values out, you need to be able to pass this to the function. You can do this by setting parameters in the function statement. Again, this is just a creation of a module that will enable you to connect to a tree and pull out the called information and pass it back. This is module is not designed to be a standalone program by any means. You must define the parameters of the function. To build the function line itself would look like this:
Public Function PullTree(sqlQuery as String, tmpTree AsString, tmpDSN As String)
Note that there are no optional parts in the function statements. That is because these are all needed to pull information from the NDS Tree. You also do not have to define a variable using the Dim statement in the function because it is being defined in the function name. If you want to use a DSN connection, simply null an empty string for passing to the tmpDSN.
The next thing to do is set up strings to grab the information from the calls to the function and build the connect string. First you must define the connection string and build the connection string.
Dim Connect as stringIf tmpDSN = "" thenConnect = "ODBC;Driver={Novell ODBC Driver forNDS};DSN=;DBQ=" + tmpTree + ";"ElseConnect = "ODBC;DSN=" + tmpDSN + ";DBQ=" + tmpTree +";"End If
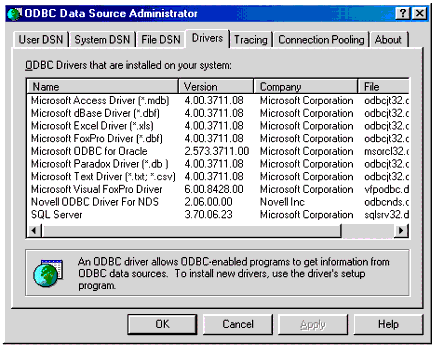
This set of procedures checks to see if you sent a null string to tmpDSN and if so builds a DSN-less connection. Make sure you have the proper name for the ODBC driver. In version 2.06 (July 2000 release) of the ODBC driver the name is as above. This may change over time as Novell sees fit, so make sure you are using the correct name. To check this, go to the ODBC control panel and select the driver tab (see Figure 3).
Figure 3: Checking driver names.
The next thing that is needed is to open the database using the OpenDatabase and then open the recordset. You can use the following lines of code:
Set NDSTree = OpenDatabase("", False, True, Connect)

 Set NDSrs = NDSTree.OpenRecordset(sqlQuery)
That is it for the module. It is up to you to put it to good use. The final view of the code is as follows:
Public Function PullTree(sqlQuery As String, tmp

        Tree As String, tmpDSN As String)

 'This function opens a connection to a NDS tree and runs a

        SQL query

 Dim Connect as String

 If tmpDSN = "" then ' See if DSN -less connection

        Connect = "ODBC;Driver=

 {Novell ODBC Driver for NDS};DSN=;DBQ=" + tmpTree + ";"

 Else ' DSN connection

        Connect = "ODBC;DSN=" + tmpDSN + ";DBQ=" + tmpTree + ";"

 End if

 'Connect to the NDS tree and open the database and recordset

 Set NDSTree = OpenDatabase("", False, True, Connect)

 Set NDSrs = NDSTree.OpenRecordset(sqlQuery)

 NDSrs.MoveLast

 recCount = NDSrs.RecordCount

 NDSrs.MoveFirst

 End Function
You can NDS enable your applications as you see fit. If you want to submit it to Novell for the NDS Enabled logo approval (and many of their other logos), go to http://developernet.novell.com. From there you can find the submission forms to proceed.
To give you an example of how to use this module, let's create a quick browse program. To do this, just build off the existing application. You will not have to redo the references unless you are starting a new application. If this is the case, you will have to go back to the Project menu and select References. Make sure the DAO 3.51 Object Library is checked and then you are ready to proceed.
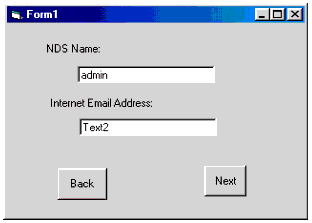
This quick application will allow you to browse the NDS tree using the NDS_Name and Internet Email Address fields. The first thing you will do is build the form. Put on two boxes and two command buttons. You can then add labels to make the form more reader friendly, or so that you know what you are looking at. Captions for the command buttons are Next and Back. The final form should look like the one in Figure 4.
Figure 4: Building the form.
You can enhance the form as needed. For the next button (Command1) add some functionality. The code would look like this:
Private Sub Command1_Click()

 If NDSrs.AbsolutePosition = recCount - 1 Then Exit Sub
 NDSrs.MoveNext

 Text1.Text = NDSrs("NDS_Name")

 If Not NDSrs("Internet email address") = Null Then

        Text2.Text = NDSrs("Internet email address")

 Else

        Text2.Text = ""

 End If

 End Sub
Let's look at this for a moment. Since you are moving forward in the recordset you don't want to over the edge of the recordset. Actually VB has issues with this too. (I think it is just afraid of heights and doesn't like to fall, so we need to implement a safety net to make sure this doesn't happen.) You used the recCount in the function to count how many records there are. This is used here to make sure you don't go past the boundaries. EOF and BOF don't work too well with DAO and NDS. Since the first record in the recordset is 0, then you must subtract one from the equation. Therefore, if you are at the end of the recordset you don't do anything. You can make an error message show up or even loop back to the beginning again. It is all up to you and how you want your program to work.
The other interesting thing about working with DAO and NDS is that if a field is empty you get a null response, not"" just null. If you use "" in the check, you will get an invalid use of null error. (Kind of vague but it's not the worst error I've ever seen in my life--nor probably yours.)
When grabbing the field values in the recordset, use the following code:
Xxx = recordset("fieldname")
This assigns the variable xxx with the value of the field. I do not recommend using
Xxx = recordset!fieldname
because you can run into some problems with fields that have spaces in the names or null values in the tables.
With the Back button (command2) we will implement the same code only in reverse, as shown here:
Private Sub Command2_Click()

        If NDSrs.AbsolutePosition = 0 Then Exit Sub

        NDSrs.MovePrevious

        Text1.Text = NDSrs("NDS_Name")

        If Not NDSrs("Internet email address") = Null Then

                Text2.Text = NDSrs("Internet email address")

        End If

        End Sub
Again, you have implemented the VB safety net in this routine. The AbsolutePosition tells you where you are in the recordset. If you retrieve a query you might get record numbers 17, 32, 48, 143, 2220, etc., but how are you to know which one is the first one? How do you know when you are at the first record of the recordset? Using AbsolutePosition you will have the ability to know what position the pointer is at in the recordset. The first record is at AbsolutePostition 0 and therefore if at AbsolutePosition 0 you are at the beginning of the recordset and therefore should not move to the previous record. That would cause VB to fall off the edge of the recordset and who knows what horrible digital monsters live over there.
Again, you need to check to see if the Internet Email Address field is null; if so, don't do anything with it. That will make VB happy.
So far you've learned how to make VB happy by keeping it confined in the boundaries of the recordset, but you have yet to make a call to the PullTree function you built. Without building some sort of reference points (such as the recordset), you will get a number of errors. Therefore, we will cover that now.
When the form loads would be a good time to implement this call, at least in this example. So under the Form_Load event you need to input some code. It would look something like this:
Private Sub Form_Load()

        Dim tmpSQL As String

        Dim varTree As String

        Dim varDSN As String

        tmpSQL = "Select [NDS_Name], [Internet email address]

        FROM [UserNDS];"

        varTree = [TreeName]

        varDSN = [DSN Name]

        Call PullTree(tmpSQL, varTree, varDSN)

        NDSrs.MoveFirst

        Text1.Text = NDSrs("NDS_Name")

        If Not NDSrs("Internet email address") = Null Then

        Text2.Text = NDSrs("Internet email address")

        End If

        NDSrs.MoveLast

        recCount = NDSrs.RecordCount

        NDSrs.MoveFirst

 End Sub
Let's walk through the code. You need to dimension the variables used to pass information to the function.
Dim tmpSQL As String

 Dim varTree As String

 Dim varDSN As String
The next thing is the SQL query. This query can be entered by the user or whatever you would like, but it should be stored to the tmpSQL variable. In this case you are grabbing the NDS_Name and Internet email address fields from the User object in the NDS tree. Notice the square brackets around the field names. These can be added whether the field name has spaces in it or not. This is different from ADO because ADO uses quotes.
tmpSQL = "Select [NDS_Name], [Internet email address] FROM [UserNDS];"
I left the varTree and varDSN blank. You should fill in as necessary. Make sure that the varTree is the tree name you want to connect to, but you do have the choice to varDSN blank. Remember that you have a choice on the connection--DSN or DSN-less. If you want to have a DSN -less connection you need to make varDSN an empty string (""). This option is included in the module that you created.
varTree = [TreeName]varDSN = [DSN Name]
The most important thing here is that you make a call to the function. You need to pass the appropriate information to the function.
Call PullTree(tmpSQL, varTree, varDSN)
Now the recordset is defined, the SQL query is executed, and thus you can now play with it as you see fit. But first you need to know how many records there are in the recordset. This is where the following lines of code come in:
NDSrs.MoveLast

 recCount = NDSrs.RecordCount

 NDSrs.MoveFirst
What you do first is move to the last record in the recordset and count the number of records that exist. That gets passed to the public variable recCount and then you move to the first record to play with how you see fit (except write, that is).
The final code listing is as follows:
Public NDSTree As Database

 Public NDSrs As Recordset

 Public recCount As Integer

 Public Function PullTree(sqlQuery As String, tmpTree As

        String, tmpDSN As String)

 If tmpDSN = "" then ' See if DSN -less connection

        Connect = "ODBC;Driver={Novell ODBC Driver for NDS}

 ;DSN=;DBQ=" + tmpTree + ";"

 Else ' DSN connection

        Connect = "ODBC;DSN=" + tmpDSN + ";DBQ=" + tmpTree + ";"

 End if

 Set NDSTree = OpenDatabase("", False, True, Connect)

 Set NDSrs = NDSTree.OpenRecordset(sqlQuery)

 End Function

 Private Sub Command1_Click()

 If NDSrs.AbsolutePosition = recCount - 1 Then Exit Sub

 NDSrs.MoveNext

 Text1.Text = NDSrs("NDS_Name")

 If Not NDSrs("Internet email address") = Null Then

        Text2.Text = NDSrs("Internet email address")

 End If

 End Sub

 Private Sub Command2_Click()

 If NDSrs.AbsolutePosition = 0 Then Exit Sub

 NDSrs.MovePrevious

 Text1.Text = NDSrs("NDS_Name")

 If Not NDSrs("Internet email address") = Null Then

        Text2.Text = NDSrs("Internet email address")

 End If

 End Sub

 Private Sub Form_Load()

        Dim tmpSQL As String

        Dim varTree As String

        Dim varDSN As String

        tmpSQL = "Select [NDS_Name], [Internet email address]

                FROM [UserNDS];"

        varTree = "gennexx"

        varDSN = "gennexx"

        Call PullTree(tmpSQL, varTree, varDSN)

        NDSrs.MoveFirst

        Text1.Text = NDSrs("NDS_Name")

        If Not NDSrs("Internet email address") = Null Then

                Text2.Text = NDSrs("Internet email address")

        End If

        NDSrs.MoveLast

        recCount = NDSrs.RecordCount

        NDSrs.MoveFirst

 End Sub
Important Facts to Remember
You can now NDS enable your applications. You know how to access and manipulate the NDS tree using ODBC drivers and now are armed with a routine to retrieve the stored data.
When working with the ODBC drver, keep the following things in mind:
NDS 8 can have billions of objects. I don't think you nor I have the ability to retrieve and store that much information at this time from a query.
The user of your application must have access rights to the NDS tree to access the data needed by the application. Otherwise an error will appear or you will simply retrieve no information.
ADO is not fully supported as of yet in the ODBC driver, but will be in the near future.
You can use DSN-less connections which will provide some speed improvements; however, they are longer to code and harder to debug.
Become an electronic member of Developernet at http://developer.novell.com(it is free).
The ODBC driver is write only and there are no plans to make it read/write.
Plan your trees well.
Understand the logic of what you are trying to accomplish because trees can become overwhelming.
Conclusion
In this article you were introduced to how the ODBC driver maps to NDS and gave you an intro to SQL. You should now able to build intelligent queries to retrieve the information you desire from the NDS tree.
It is important to know the attributes on which you are conducting your query. NDS can store multiple entries in a single attribute. This can result into a rather large result set and an incredible waste of paper for large organizations. At this time you may want to consider concatenating the rows to retrieve a more user friendly (and paper friendly) report.
It is important to remember that NDS is not a relational database; as a result the ODBC driver considers Objects as Tables, Attributes as Columns, and Attributes Values as Records. Also, NDS structures can be quite large, and can contain large amounts of data. Remembering these two important facts will help you quickly and easily build applications that use the NDS ODBC driver.
Novell is offering big-time support for developers who NDS-enable their applications (co-marketing, distribution, and more). You would be wise to take advantage of this. By using the ODBC driver to read information (even if it is just to find an address of someone), you can quickly become NDS-enabled. ODBC is lightweight and can be used even in a large scale network environment. NDS is also not just for NetWare--it can be run on multiple server platforms including Windows NT, 2000, Linux, Unix, and Sun Solaris.
Keep in mind the important factors listed above and you shouldn't have a problem. Good luck and good coding.
* Originally published in Novell AppNotes
Disclaimer
The origin of this information may be internal or external to Novell. While Novell makes all reasonable efforts to verify this information, Novell does not make explicit or implied claims to its validity.