Understanding the Advanced Settings in the Novell Client for Windows 95/98
Articles and Tips: article
Technical Writer
Novell Inc.
ED LIEBING
Senior Research Engineer
Novell Developer Information
01 Apr 1999
This AppNote demystifies all those advanced configuration settings that are available in the Novell Client software.
- Introduction
- Accessing the Advanced Settings
- Connection
- Environment, NETX Compatibility
- File System
- Packet Management
- Performance, Cache
- Printing
- Trouble Shooting
- WAN
- Graphical Interface
- SLP General
- SLP Times
- Conclusion
Introduction
The Novell Client for Windows 95/98 version 3.x includes a number of advanced parameter settings that allow system administrators and advanced users to accommodate unique network characteristics. These are listed under the Advanced Settings tab in the Client's Properties page.
The Advanced Settings parameter groups are:
Connection
Environment, NETX Compatibility
File System
Packet Management
Performance, Cache
Printing
Trouble Shooting
WAN
Graphical Interface
SLP General
SLP Times
This AppNote discusses the advanced settings for each parameter group, along with their defaults and value ranges.
For additional information on the Novell Client for Windows 95/98, visit http://www.novell.com/documentation/.
Accessing the Advanced Settings
To access the Novell Client Properties page, right-click the big red N (NetWare Services) icon located in the Windows 95/98 task bar tray and select Novell Client32 Properties. (You can also access the Network Properties window by right-clicking the Network Neighborhood icon on the Windows 95/98 desktop, highlighting the Novell NetWare Client entry, and then clicking on the Properties button.)
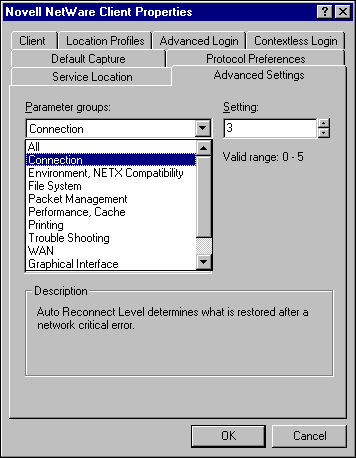
Click the Advanced Settings Tab and click the down arrow to the right of All under Parameter groups for a list of groups (see Figure 1).
Figure 1: The Parameter Groups in the Advanced Settings tab.
Each group contains a list of parameter settings that you can modify. The rest of this AppNote will cover each of the parameters, their values and the default settings as they are defined under their particular group.
Connection
The Connection group contains the parameters dealing with the Client's connection to the network.
Auto Reconnect Level
This setting describes the level of automatic reconnection the Client will support in the event it loses its connection to a network service. Each level includes the previous level, plus any additional features listed. Selecting a value from 0 to 5 will cause the following to be restored:
0 = No auto reconnect
1 = Devices (connections, drive mappings, and printers only)
2 = Devices (connections, drive mappings, and printers) plus read-only files
3 = Devices (connections, drive mappings, and printers) plus all files and file locks
4 = Devices (connections, drive mappings, and printers) plus added file write data recovery is guaranteed
5 = Reserved for future use
If you specify 5, the auto reconnect level is effectively 4.
The range is 0 to 5. The default is 3.
Auto Reconnect Timeout
This setting specifies the time in minutes to drop autoreconnect capabilities if the client cannot connect to the services that were previously available.
The range is 1 to 65,535 minutes. The default is 10.
NetWare Protocol
Allows you to specify the NetWare protocols that are initially used to authenticate to the network and the order in which they are accessed. You can give priority to a specific protocol for login, the load order, and other functions performed by the Client. The values are:
NDS BIND
BIND NDS
NDS
BIND
The default is NDS BIND.
Note: This is not to be confused with the protocols that you can set through the Protocol Preference tab that is also found under the Novell NetWare Client Properties window. The Protocol Preference tab gives the complete listing of both IPX and IP protocol services that are available (with NetWare 5's default of IP protocol loading first), as well as the services that can be used to resolve NetWare server names to appropriate services and IP addresses when necessary.
Resolve Name Using Primary Connection
The resolution of name requests will only be done over the primary connection (for NetWare 5, this is IP using the NWHOST file) if this entry is set to On (the default). If you set this entry to Off, resolution of name requests for IP will be done over all connections rather than the primary connection only.
The default is On.
Environment, NETX Compatibility
The Environment, NETX Compatibility grouping contains settings used mostly for backward compatibility with earlier versions of DOS and Windows 3.x applications.
Cache NetWare Password
This setting specifies whether the NetWare password from the first NetWare login is stored in memory and is used to authenticate to additional NetWare resources.
Use the default setting if you do not want to be prompted for your username and password when accessing additional resources on other servers. You will be prompted only when the Client cannot authenticate to those network resources by using the username and password you specified when you first logged in.
Your username and password are stored in memory, not on your hard disk. After you shut down your computer, your username and password are no longer in memory and you will be prompted for them again the next time you start your computer.
Set the value of this setting to Off if you want to be prompted for your username and password whenever you access a network resource that you are not already authenticated to. For example, if you set the value to Off and you log out of a tree or server, you have to log back in to regain access to it. Also, you must specify your username and password for every NDS and bindery resource you want to access.
The default is On.
DOS Name
This parameter sets the name of the operating system used in the shell. This value can be 1 to 5 characters long. The %OS variable in the login or profile script uses this variable when mapping a search drive to the network DOS directory.
For example, if you have a Windows 95 workstation and you wish to make the CAB files available to all Windows 95 users, you can put a line similar to the following in the container login script or profile script:
IF %OS == "WIN95", THEN MAP INS S3:=SYS_VOL:PUBLIC\WIN95\CAB
The default changes to match the operating system that presently loaded, such as WIN95 or WIN98.
End of Job
This command is for backward compatibility purposes with programs that usually predate DOS v3.0. If turned on, this sends an End Of Job command to the file server, which releases all resources (files, locks, semaphores) allocated on the file server to the current task.
The default is Off.
Environment Pad
This setting adds the specified number of bytes to the DOS environment for DOS applications running in a Windows environment. Use this parameter if you have DOS applications that need additional environment space after Windows is loaded. (In Windows 95/98, you can specify these settings for each DOS application through the Properties/Memory/Initial Settings entry.)
The range is 17 to 512 bytes. The default is 17.
Force First Network Drive
This setting specifies the network drive letter that the sys:login directory is mapped to before logging in and after logging out of a server or network. On returns you to the First Network Drive. Off leaves you at the current drive.
Note: For this setting to work, the First Network Drive setting must also be set.
Setting the value to On specifies that the drive letter that the SYS:LOGIN directory is mapped to after logging out must be the same as the one used in First Network Drive.
Setting the value to Off specifies that the drive letter is the one you logged out from, unless you logged out from a local drive.
The default is Off.
Hold Files
This setting specifies whether files opened by a program using FCB_IO are held open until the program ends. The default setting Off means that files opened by a program using FCB_IO can be closed by the program before it exits. On means they are held open until the program exits. Older versions of certain applications that use FCB_IO might need the value of this setting to be On.
The default is Off.
Long Machine Type
This parameter tells the Novell Client software what type of machine is being used each time the %MACHINE variable is. Use this setting to set the machine's search path to the correct version of DOS. The default is IBM_PC. Another popular long machine type is COMPAQ.
You can use the %MACHINE variable along with the %OS and %OS_VERSION variables for mapping network drives to specific operating system versions or their CAB files. An example could be as follows:
MAP INS S2:=SYS:PUBLIC\%MACHINE\%OS\CAB
Maximum Cur Dir Length
Earlier versions of DOS defined a valid ASCII string to be 128 bytes, which gave 128 bytes to define a directory path up through the file name. However, some applications do not function correctly if this value is greater than 64.
The range is 64 to 255 characters. The default is 64.
NWLanguage
This setting determines the language that NetWare utilities will default to on this workstation.
The default is English.
Polled Broadcast Message Buffers
The parameter sets the number of broadcast messages saved on the Client when Broadcast Message Mode is set to Polled.
The range is 0 to 100 messages. The default is 0.
Remove Drive From Environment
This setting determines if a search drive letter is removed from the path when a drive is deleted.
The default is On.
Search Dirs First
This setting specifies whether directories or files are displayed first when using the DIR command. When you set this parameter to Off, you will first see files displayed first, followed by directories. If you set this parameter to On, you will first see directories displayed, and then files.
The default is Off.
Search Mode
The setting alters the way the client finds a file that is not in the current path or directory.
In some previous client software versions, the default drive had to be a network drive for this setting to function. But now the effect is global. This setting affects all .EXE and .COM files, regardless of the current drive.
When using Search Mode, select the search mode that works correctly with most of your .EXE and .COM files. If you want to set a search mode for one particular .EXE or .COM file, use the Search Mode option in FLAG.
Search Mode has five settings that range from 1, 2, 3, 5, and 7. The default is 1.
Mode 1 is the default setting that looks in the search drives only when the application specifies no path and the file is not in the default directory. Mode 1 works with both read-only and read-write requests.
Mode 2 prevents the Novell Client from looking in any search drives for auxiliary files (a do not search mode).
Mode 3 acts as Mode 1, but it focuses only on read-only search requests (a search on read-only opens with no path).
Mode 5 searches on all search paths, even if the application also specifies a path (a search on all opens).
Mode 7 acts as Mode 5, except it looks in the search drives for read-only requests (a search on all read-only opens).
Set Station Time
This parameter synchronizes the client workstation date and time with that of the NetWare server that the client workstation initially attaches to. Setting the value of this parameter to Off disables the synchronization feature.
The default is On.
Short Machine Type
This setting specifies which overlay files to use with the specific machine type of your client workstation. This setting is similar to Long Machine Type, except that it is used specifically with overlay files usually used for certain monitor types. The value for this setting can be up to four characters long. Use this setting when the %SMACHINE variable is accessed. Examples of files using this setting and value include the IBM$RUN.OVL file for the windowing utilities and the CMPQ$RUN.OVL file that uses a default black-and-white color palette for DOS-based NetWare menus.
The default is IBM.
Shrink Path to Dot
This setting specifies whether network search drives in the DOS PATH set variable are truncated to a dot or left with the full directory path.
The default is On.
Use Video BIOS
This setting specifies whether the Client uses BIOS or direct video memory access when a pop-up message is displayed.
This parameter applies only to messages that are displayed in character mode. If character-mode pop-ups do not function well, try setting the value of this parameter to On, which causes the Client to use BIOS calls.
Otherwise, this parameter should be set to OFF, which causes the Novell client to use direct video memory access (which is faster than using BIOS calls).
The default is Off.
File System
The File System grouping contains those parameters which deal with locking and some caching mechanisms.
Lock Delay
This setting determines the amount of time (in ticks) the Novell Client waits before trying to get a lock for a file. Use this setting if client workstations frequently receive error messages when a file is requested. Increase this value if you receive SHARE errors.
When many users access a file simultaneously, the Client might be unable to gain access before its allotted wait time.
This number is used for lock types that do not have a wait ability. For locks that have a wait ability, the wait time is calculated by multiplying this setting number by the Lock Retries number and then multiplying by 2. The resulting number is the time, in ticks, the client workstation waits for a lock.
To determine the total time (in ticks) needed to broadcast a name resolution packet across the network, multiply the wait time value by the value used for the Lock Retries setting.
The range is 1 to 65,535 ticks. The default is 1.
Lock Retries
This setting specifies the number of times the Client attempts to get a lock on the network. Increase the value of this setting if a client workstation frequently receives error messages when a file is requested.
This setting is part of an equation that determines the total time the Client waits when attempting to access a locked file.
This number is used for lock types that do not have a wait ability. For locks that have a wait ability, the wait time is calculated by multiplying this setting number by the Lock Delay number and then multiplying by 2. The resulting number is the time, in ticks, the client workstation waits for a lock.
To determine the total time (in ticks) needed to broadcast a name resolution packet across the network, multiply the wait time value by the value used for the Lock Retries setting.
The range is 1 to 65,535 retries. The default is 5.
Read Only Compatibility
This setting determines whether a file marked Read Only can be opened with a read/write access call. If you are using any application that uses the NETX=OFF command, ensure that this setting is On.
Prior to NetWare 2.1, a program could open a Read Only file with write access without getting an error. However, any attempt to write to the file produced an error. This is what happens when this setting is On. When this setting is Off, a Read Only file cannot be opened for write access.
The default is Off.
Use Extended File Handles
This setting controls whether or not the Novell client uses extended file handles. If Use Extended File Handles = Off, then the number of files the client can open is limited by the space available in the JFT (job file table) to 170 files.
If Use Extended File Handles = On the number of files that can be opened is limited only by the value of the server's Maximum Locks Per Connection setting. Except in special cases, the default of Use Extended File Handles = Off is recommended.
The default is Off.
Packet Management
The Packet Management group contains the parameters which affect packet size and other packet level settings.
Checksum
This setting specifies a higher level of data integrity by validating NetWare Core Protocol (NCP) packets. This is an IPX checksum, which may be in addition to other error checking that the network board or driver may already be performing.
The values are as follows:
0 = Disabled
1 = Enabled but not preferred
2 = Enabled and preferred
3 = Required
Setting the value for this parameter to 2 or 3 increases data integrity but decreases performance.
Note: Ethernet frame type 802.3 does not support checksums.
The range is 0 to 3. The default is 1.
Large Internet Packets
This setting allows your workstation to use packets larger than NetWare's default of 576 bytes. When set to On, Large Internet Packets uses the maximum packet size negotiated between the NetWare server and the workstation, even across routers and bridges.
The default is On.
Link Support Layer Max Buffer Size
This setting specifies the maximum supported packet size in bytes. Use this setting to optimize performance for media (primarily Token Ring) that can use packets that are larger than the default size.
If your network board uses bus-mastering, increasing this setting increases system memory usage. Otherwise, system memory usage is usually unaffected by this setting.
The range is 638 to 24,682 bytes. The default is 4,736.
Packet Burst
This setting controls the use of the Packet Burst protocol for file input/output. Generally, Packet Burst reduces overall network traffic and improves performance by allowing multiple packets to be sent before an acknowledgment is required. It also improves performance by eliminating the need for a reply to be generated for every packet sent or received.
If you have a network board that has low performance and if your network performance is slow, you might try disabling Packet Burst. To enable Packet Burst, specify On. To disable Packet Burst, specify Off.
The default is On.
Packet Burst Read Window Size
This setting specifies the maximum window size (in packets) that Packet Burst should use for read bursts.
Note: Normally, you should not change the value of this setting.
The window size that Packet Burst uses changes dynamically depending on network conditions. The Packet Burst Read Window Size sets an upper limit for this window size.
Packet Burst overrides the value for the Packet Burst Read Window Size setting if the number of packets specified results in a window size that is greater than 64 KB.
For example, if each packet is 1,500 bytes and the Packet Burst Read Window Size is 50, Packet Burst overrides the Packet Burst Read Window Size specified and uses a maximum window size of 43 packets. This is because fifty 1,500 byte packets is about 73 KB, whereas forty-three 1,500 byte packets is just under 64 KB.
For low-bandwidth network connections, increasing this value might improve performance.
The range is 3 to 255 packets. The default is 24 (or 255, if Packet Burst detects a low bandwidth network connection).
Packet Burst Write Window Size
This setting specifies the maximum window size (in packets) that Packet Burst should use for write bursts.
Note: Normally, you should not change the value of this setting. Increasing this value might have a negative effect on server performance.
The window size that Packet Burst uses changes dynamically depending on network conditions. The Packet Burst Write Window Size sets an upper limit for this window size.
Packet Burst overrides the value for the Packet Burst Write Window Size setting if the number of packets specified results in a window size that is greater than 64 KB.
For example, if each packet is 1,500 bytes and the Packet Burst Write Window Size is 50, Packet Burst overrides the Packet Burst Write Window Size specified and uses a maximum window size of 43 packets. This is because fifty 1,500 byte packets is about 73 KB, whereas forty-three 1,500 byte packets is just under 64 KB.
Note: For low-bandwidth network connections, increasing this value might improve performance.
The range is 3 to 255 packets. The default is 10 (or 255, if Packet Burst detects a low bandwidth network connection).
Signature Level
This parameter determines the level of enhanced security support provided by packet signing on the first 64 bytes of a packet, which ensures some degree of data integrity.
Enhanced security includes the use of a message digest algorithm and a per connection/per request session state. The values are as follows:
0 = Disabled
1 = Enabled but not preferred. Can sign if required by the server
2 = Preferred, but won't if not supported on the server side
3 = Required signing or won't communicate with server
The range is 0 to 3. The default is 1.
The SET command at the server that initiates packet signatures is as follows:
SET NCP PACKET SIGNATURE OPTION = n
Below is a chart which shows how the client and server options work to give you packet signatures.
Figure 2: Packet Signature options.
|
Server Level
|
||||
|
|
Option 0Server does not sign packets (regardless of client level) |
Option 1 (default)Server sign only if client requests it (client level = 2 or 3) |
Option 2 Server signs if client is capable of signing (client level = 1, 2, or 3) |
Option 3Server always signs and requires all clients to sign or login will fail |
|
Client Level |
||||
|
Option 0Client does not sign packets |
No Packet Signature |
|
No Packet Signature |
No logging in |
|
Option 1 (default) Client signs only if server requests it (server option 2 or 3) |
No Packet Signature |
No Packet Signature(since both sign only of the other request does) |
Packet Signature (the minimal setting for background authentication) |
Packet Signature |
|
Option 2Client signs if server is capable of signing (server option 1, 2, or 3) |
No Packet Signature |
Packet Signature |
Packet Signature |
Packet Signature |
|
Option 3Client always signs and requires server to sign or login will fail |
No logging in |
Packet Signature |
Packet Signature |
Packet Signature(maximum level of packet signature protection) |
Increasing the value to 2 or 3 increases security, but decreases performance, so it should be done only when data integrity is an issue.
Performance, Cache
The Performance, Cache groups contains the parameters that affect caching and performance.
Cache Writes
This setting specifies whether network writes are cached at this workstation. The default setting On improves client performance by saving files to workstation memory before saving them to the network.
Setting the value for this parameter to Off improves data integrity but reduces performance. Leaving the value for this setting as On (the default) can cause data loss if the NetWare server runs out of disk space between write requests or if the workstation crashes or fatally loses its connection with the network.
Network writes are not cached if the True Commit parameter is set to On.
The default is On.
Close Behind Ticks
This setting specifies the time in ticks that the client waits after a file is closed before flushing the file from the cache and writing it to disk. Increasing this value improves performance. There are about 18 ticks per second. The following is a list of further explanations.
Setting the value for this parameter to 0 increases data integrity but decreases performance.
Using this setting improves performance most when files are opened and closed frequently.
If a file is opened again during the delay period specified by this setting, the file is reused without hitting the network.
If the value of Close Behind Ticks is 0, the value of Delay Writes has no effect.
The value of File Cache Level does not affect whether files are held open after they are closed. The value of Close Behind Ticks is the only value that affects this.
The range is 0 to 65,535 ticks. The default is 0.
Delay Writes
Delay Writes keeps the file in cache for the amount of time specified by the Close Behind Ticks parameter after the application closes the file. This is used for applications that repeatedly close and reopen files (such as overlay files). The following is a list of further explanations.
Set the value of this parameter to On if you want faster performance.
When Delay Writes is set to On, network writes can lag behind an application's close file request. This allows the application to continue without having to wait for the data to actually be written to the network server. Therefore, the application can respond more quickly.
When Delay Writes is set to On and you exit Windows or the MS-DOS Prompt where you were running an application, all outstanding write data is written to the network without delay.
The amount of time for the delay is specified by the Close Behind Ticks parameter. If the value of Close Behind Ticks is 0, writes are not delayed regardless of the value of Delay Writes.
If Cache Writes is set to Off, writes are not delayed regardless of the value of Delay Writes.
The default is Off.
File Cache Level
This parameter defines how the Novell client should cache file data. The values are as follows:
0 = Disabled
When file caching is disabled, no extended memory is used for caching.
1 = Read-ahead and write-behind only
Read-ahead is a caching mode where, on a read request, an entire block of data (up to 4KB) is read from the network rather than just the portion of the block that is requested. The assumption is that other nearby data (within the 4KB block) is likely to be accessed next, thus reducing the number of network accesses necessary to read the file. Read-ahead mode is most efficient when the file is being accessed sequentially.
During random accesses to large files, read-ahead causes performance to deteriorate, so read-ahead caching is turned off when random access is detected.
The Novell client also performs write-behind caching where data is written into a cached data block until the entire block is filled, then the entire block is written to disk at once (as opposed to writing data directly to disk in smaller chunks).
This setting causes the client to use read-ahead and write-behind file caching without using any other file-caching methods.
2 = Short-lived caching (open files only)
When using this caching method, the client can cache file data up until the file is closed. If the file is reopened, file read and write operations will begin fresh instead of checking the cache to see if any file data is still there.
With this setting, files are fully cached when they are opened, which means the entire file is stored in memory using as many 4KB blocks as are necessary. The data remains cached in memory until the file is closed. If you reopen the file, it will have to be read again from the server. This is known as "short-lived caching".
3 = Long-lived caching
With this setting, both open and closed files are kept in cache as long as memory is available. This is known as "long-lived caching". When using this caching method, the Client retrieves file data from cache buffers that are already in memory if a file is closed and reopened and if the file data is still in the buffers"but only if no changes have been made to the file since the last time it was in cache memory.
4 = (Reserved for future use)
The larger the value number, the better the performance. Keep in mind that using local caching is more risky because data could be lost if the local hard disk fails or if there is a power glitch.
Network writes are not cached if True Commit is set to On or if Cache Writes is set to Off.
The valid range is 0 to 3. The default is 3.
File Write Through
This setting controls whether all files are opened in write-through mode, which means the client waits until it receives an acknowledgment that data is written to the network disk, thus avoiding both client and server caching mechanisms. If a file is opened in write-through mode, the writes to that file will not be cached on the client or the server. In effect, File Write Through = On disables file write caching, which reduces overall client performance but ensures data integrity in the event of catastrophic failure of the client workstation.
The default setting (File Write Though = Off) is recommended. Often the application or system will offer a similar capabilities, such as a two-phase commit in a relational database management system (such as Oracle).
Max Cache Size
This control sets the largest possible amount of memory (in KB) that the client can use for caching.
When the value of this parameter is set to 0 (the default), the cache size is dynamically set to 25 percent of the total amount of memory that is free when the CLIENT32.NLM program loads. The amount of memory that is free at this time can vary significantly between workstations depending upon what other software is initially installed after the workstation's operating system.
When the value of this parameter is not 0, the cache size is set to the specified value. However, the cache size cannot be greater than 75 percent of the total free memory.
For example, if you specify a value of 8,192 for this parameter and the total free memory when CLIENT32.NLM loads is only 8 MB, your cache size would be around 6 MB because that is 75 percent of the free memory.
Larger values improve the performance of network file access but decrease the memory available for running applications or caching local drives.
When caching is turned off (by setting the File Cache Level to 0), the Client does not use any workstation memory for caching.
The range is 0 to 49,152 KB. The default is 0.
Name Cache Level
Name Cache level specifies the type of name cache that the Novell client will use. This entry comes with three settings:
0 = Disabled
1 = Enabled
2 = Enabled with persistence
The larger the value, the better the performance.
If you have trouble resolving server names or tree names or resolving user names to object IDs, try setting this parameter to 0 to determine whether the client is producing this problem. If this parameter is set to 1 or 2, entries are entered into name cache when a service name-to-IP address or object-to-ID is successfully completed by an NCP request to that network service. Subsequent name resolution requests are then handled by name cache.
Level 1 turns on name caching but does not save the cache entries to the hard disk. The cache will be empty when the workstation is restarted.
Level 2 enables name caching and saves the contents of the cache to the hard disk so it is available when the workstation is restarted.
The range is 0 to 2. The default is 1.
Opportunistic Locking
Use this parameter to automatically detect opportunities to cache files. Setting this value to On offers increased performance.
The default is Off.
True Commit
This setting specifies whether file writes should be written to the server's disk immediately. Setting the value of this parameter to On guarantees data integrity when processing critical data. However, the On setting slows performance, because data that is written to the network is not cached at the workstation or the server. Setting the value of this parameter to Off results in better performance.
Network writes are not cached if the True Commit value is set to On or if the Cache Writes value is set to Off. Set the True Commit value to Off if you want to choose performance over integrity, or set the value to On to choose integrity over performance.
The default is Off.
Printing
The Printing grouping contains those client settings that affect workstation printing.
Network Printers
This parameter sets the number of LPT ports that the Client can capture. This setting allows you to capture and redirect LPT1 through LPT9.
Increasing the value of this setting increases memory use. The amount of conventional memory used can be calculated using the following formula:
mem = netprt x (prthdr + prttail + 23 bytes)
For example:
Network Printers [netprt] = 3
Print Header [prthdr] = 64 bytes
Print Tail [prttail] = 16 bytes
Memory [mem] = 3 x (64 bytes + 16 bytes + 23 bytes) = 309 bytes (a very nominal amount)
The range is 0 to 9 printer ports. The default is 3.
Print Header
This control sets the size of the buffer (in bytes) that holds the information used to initialize a printer for each print job. However, this information is usually now a part of the print job itself and addressed by the printer driver used for printing.
You would only use this entry if the application does not have the driver that is capable of taking full advantage of the printer, or if you need to define specific paper forms. Since these reasons have been addressed by most Windows-based printer drivers, there is little reason to modify this value.
If you do try to use this value and you send print jobs with many instructions in the header (such as initializing a printer for an emulated mode or changing defaults, font selections, page length, or orientation) and the printer is not delivering all the requested attributes, increase the print header size.
When counting a setting's characters, keep in mind that all characters within delimiter brackets (<<) are considered one character, and each character outside the brackets is also considered one character. For example, <0x1b<3<ETX< is three characters long, one character for each of the two sets of information within the delimiter brackets, and one character for the 3.
If you are using a PostScript printer and print jobs are not printing properly, increase the print header size.
The range is 0 to 1024 bytes. The default is 64 bytes (characters)
Print Tail
This control sets the size of the buffer (in bytes) that holds the information used to reset or re-initialize the printer after a print job. This information is now a part of the print job itself and addressed by the printer driver used for printing.
Some printers use two characters for its initialization sequence, while other printers need each function used to be turned off. If your printer is not clearing out the printer buffer completely or is resetting after each print job, increase the print tail size and see if the problem goes away.
The range is 0 to 1,024 bytes. The default is 16.
Trouble Shooting
The Trouble Shooting grouping contains the parameters that are helpful in trouble shooting purposes.
Alert Beep
This setting specifies whether the Client should sound an audible beep when it displays popup alert messages. This parameter applies only to messages that are displayed in character mode.
The default is On.
Handle Net Errors
This setting determines whether the Novell client or the applications handle network-critical errors. A network error is generated when the client workstation does not receive a response from the NetWare server.
To have the client handle network critical errors, set the value to On.
To have the client generate an interrupt 24, allowing applications to handle network critical errors, set the value to Off.
The value of Handle Net Errors affects the handling of the Net Status Timeout and Net Status Busy Timeout settings.
The default is On.
Log File
This setting specifies the path and location of the log file used for client diagnostics. The default is the NIOS.LOG file in the NetWare home directory. For example,c:\novell\client32\log.txt.
Note: You must enable the log file by setting the following parameter in the SYSTEM.INI file:
NWEnable Logging=True
Log File Size
This setting specifies the maximum size (in bytes) of the log file used for client diagnostics.
The range is 1 to 1,048,576 bytes. The default size is 65,535 bytes (about 6K). When the limit is reached, the information is then truncated as newer information is added during the login process.
Message Timeout
This setting defines how long (in ticks) before broadcast messages are cleared from the screen without user intervention. Zero means to wait for the user to clear the message. There are about 18 ticks per second, so ten thousand ticks is about nine minutes.
The range is 0 to 10,000 ticks. The default is 0.
Net Status Busy Timeout
This setting specifies the number of seconds the Novell client waits for a non-busy response before displaying a message that the server is busy.
When Handle Net Errors is set to Off the error message does not appear. Instead, an error is returned to the application that made the network request.
The range is 1 to 600 seconds. The default is 20.
Net Status Timeout
This setting specifies the number of seconds the Novell client waits for a network response before concluding that a network error has occurred.
The actual time the client waits might be longer than this value. If four times the average roundtrip time to the network is greater than the value for Net Status Timeout, the client waits four times the average roundtrip time.
For example, if the Net Status Timeout is 15 seconds and the average roundtrip time to the server is four seconds, the client waits 16 seconds (four times the average roundtrip time) before displaying an error message.
When Handle Net Errors is set to Off, the error message does not appear. Instead, an error is returned to the application that made the network request.
The range is 1 to 600 seconds. The default is 30 seconds.
WAN
The WAN group contains the parameters that can be set to optimize the client's performance over various WAN links.
Large Internet Packet Start Size
This setting specifies the starting value (in bytes) for negotiating the Large Internet Packet size. Use this option to reduce the amount of traffic caused by the negotiation process (use 1514 for Ethernet, 4096 for Token Ring). Setting this value can shorten the initial negotiation time for packet size over slow links.
The range is 512 to 65,535 bytes. The default is 65,535.
On the server side, you can use the following SET command to set or define the maximum physical packet size that the server will support:
SET MAXIMUM PHYSICAL RECEIVE PACKET SIZE = 4224 (default size)
The default size for Ethernet is 1,514 bytes and the default for Token Ring is 4,202 bytes. NetWare 5 defaults to 4,202 to accommodate the larger size, even if the network uses the Ethernet protocol only. If that is the case, change this SET parameter to 1514. If you want to use this value every time the server starts, place this SET parameter in the STARTUP.NCF file with the appropriate size. The size will then be used as the server initially boots up.
When a workstation negotiates to make a connection to the server, the packet size for the session is also negotiated. Make sure this SET parameter is set large enough to support the protocols run on the network. If you do have Token Ring on part of your network segment, be sure the SET parameter runs the default of 4202. Otherwise, the server's packet receive buffers can become a potential bottleneck for Token Ring workstations.
Minimum Time to Net
On bridged WAN/satellite links with low time-to-net values, workstations may fail to make a connection under either of the following conditions:
The server on the other side of the link is not running Packet Burst
The transfer rate for the link is 2400 baud or less
The range is 0 to 65,535 milliseconds. The default is 0. For 2400 baud lines, use the 10000 setting.
NCP Max Timeout
This setting specifies the amount of time allowed to retry a network connection. If the network connection cannot be established in the specified amount of time, an error message appears.
The range is 0 to 65,535 seconds. The default is 30.
Graphical Interface
The Graphical Interface group contains the parameters that affect what the users see on the Windows desktop.
Cancel Desktop Login
Set this parameter to On if you do not want users to be able to log in to other Windows workstations/server or other network providers if they cancel their initial client login.
Set this parameter to Off if you do want to let users log in to the workstation and other network providers, even if they do not initially log in through the client.
The default is Off.
Send Message
This setting specifies whether the Send Message function is enabled. This function is accessed from the Context menu for the selected server in Network Neighborhood.
The default is On.
Show Edit Login Script Item
This setting specifies whether the Edit Login Script item is available in the User Administration menu. You get to the User Administration menu by right-clicking the big red Novell icon that appears in the system tray of the Windows 95/98 taskbar. You then select the "User Administration for (tree name or servername)" entry to see the selections available, which include:
Personal Information
Work Information
Mailing Information
Edit Login Script
Login Account Information
Novell Password Administration
Group Memberships
With the Edit Login Script enabled, users will see a screen similar to Figure 3.
Figure 3: The User Login for the Novell icon.
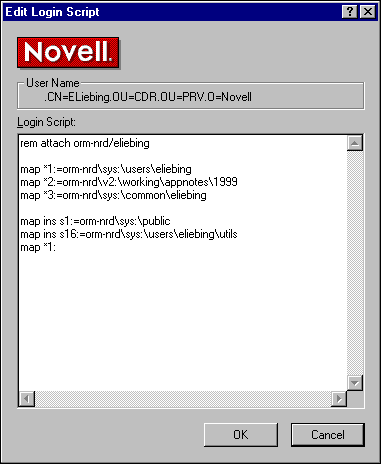
If the Show Edit Login Script is set to Off on a workstation, the Edit Login Script in the User Administration for "menu" will appear grayed out and cannot be selected.
The default is On.
Show Novell System Tray Icon
When this parameter is enabled, a red capital "N" icon appears in the system tray at the right-hand side of the Windows 95/98 task bar. You can then right-click this Novell icon to select from a list of client tasks. For example, you can double-click the icon to log in to a NetWare tree or server. Other Novell- related items you can perform here include tasks such as:
Performing a NetWare login
Viewing network connections
Mapping network drives
Capturing printers
Configuring browsable paths
The default is On. If you set this value to Off, the red "N" icon will no longer appear in the task bar. (You must reboot the workstation for this value to take effect.)
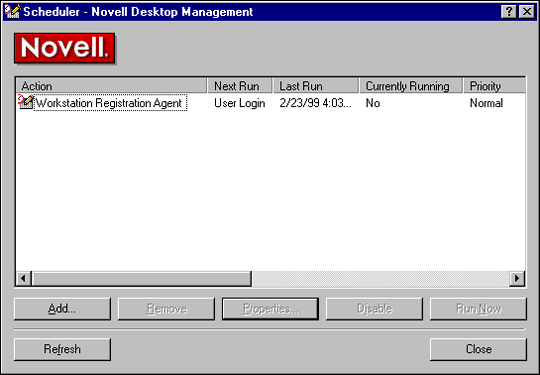
Show Scheduler System Tray Icon
If this value is enabled (the default is On), the Novell Scheduler icon appears in the system tray at the right-hand side of the task bar. Double-click the Scheduler icon to open the Scheduler. With the Show Scheduler System Tray Icon enabled, You can right-click the Scheduler icon to select from a list of Scheduler tasks, showing a screen similar to Figure 4.
Figure 4: The Novell Desktop management Scheduler windows.
The default is On. If you do not wish to have the Novell Scheduler icon appear in the system tray, set this entry to Off. (You must reboot the workstation for this value to take effect.)
Show User Administration Menu
This setting specifies whether the "User Administration for (tree name or servername)" menu item will be available for users when they right-click the big red Novell icon that appears in the system tray of the Windows 95/98 taskbar. With the default setting of On, users can presently select the "User Administration for (tree name or servername)" entry to see the available selections that were listed under the Show Edit Login Script Item entry earlier in this AppNote.
If the Show User Administration Menu is set to Off on a workstation, the "User Administration for context/servername" menu will appear grayed out and cannot be selected.
The default is On.
SLP General
The SLP General grouping contains parameters that deal with general Service Location Protocol settings.
SLP Maximum Transmission Unit
This parameter specifies the maximum transmission unit (User Datagram Protocol, or UDP packet size) for the link layer to use. If you set this parameter too large or too small, it will adversely affect the performance of SLP (Service Location Protocol).
The range is 576 to 4,096 bytes. The default is 1,400. Have it most closely match the protocol packet size the network is using (1514 for Ethernet and 4096 for Token Ring).
SLP Multicast Radius
This parameter specifies the maximum number of sub-nets (number of routers plus 1) that SLP's Multicasting should traverse. In the SLP world, multicasting is the client's method of locating IP services on the network.
In its simplest form, SLP uses multicasts from the clients (User Agents or UAs) to find services (Service Agents or SAs) on servers. In this simple configuration, the SA does not advertise its services by broadcasting or replicating information to other servers, routers, or clients. Instead, the server waits for a multicast request from a client. If a client sends a multicast request looking for a service that is running on the server, the server will send a unicast message back to the client with the information about the requested service.
Multicasts are not isolated to local segments. Routers will forward them to whatever subnets have a member of the multicast group. A value of 1 confines multicasting to the local segment (no routers). The range on the SLP Multicast Radius entry is from 1 to 32, with the default set to 32.
For best network performance, use Directory Agents (DA). Directory Agents reduce the consumption of bandwidth from SLP multicast traffic by having each server's Service Agent register its services via unicasts with the DA. Additionally, the workstation clients that are requesting IP services can unicast their requests to the DA instead of multicasting their requests to all the servers on the network.
Use Broadcast for SLP Multicast
This parameter specifies that broadcasting should be used in all cases instead of IP multicasting. SLP is designed to use IP multicasting; however, if any SLP Agent does not implement IP multicasting, then all Agents must use broadcasting to reach that Agent.
If it is a Directory Agent that does not support multicasting, then it is preferable to configure that Directory Agent using the Directory Agent list rather than this parameter.
If the network does not contain a Directory Agent, then IP servers must use their own Service Agents to specify the services that are available. If the Service Agent does not support multicasting and if there are any services advertised by that Service Agent that are needed by the User Agent on this machine, then the Use Broadcast For Multicast configuration parameter must be used.
Broadcasting has the disadvantage of being limited to the local LAN segment (as if Multicast Radius were set to 1).
The default is Off.
Use DHCP for SLP
SLP scopes allow network administrators to organize SLP services into groups. The Service Agent on each server determines into which groupings the services on that server will be registered. By default, all SLP services are registered in the "unscoped" grouping.
When clients send SLP requests to a Directory Agent, they can specify a scope for the DA to use in order to find the service they are looking for. If no scope is specified by the client, the DA will look in the "unscoped" table to find the service requested.
As a service, DHCP (Dynamic Host Configuration Protocol) automatically allocates reusable (dynamic) IP network addresses in an environment that has limited IP address resources. Windows 95/98 clients can use this service to initially establish connections and to set preferred tree and context.
The Use DHCP for SLP parameter specifies whether the Dynamic Host Configuration Protocol can be used for obtaining SLP scope and Directory Agent configuration information. The default is On.
In order to use DHCP on the server, the SET SLP DA Discovery Options = < value <, where < value <= 0 to 8 (Default = 3)
0x01 = Use multicast DA advertisements
0x02 = Use DHCP discovery
0x04 = Use static file SYS:ETC\SLP.CFG
0x08 = Scopes Required
The default of 3 combines both 0x01 and 0x02 values. For more on the different SLP server commands, see the Appendix: SLP Console Commands and Settings heading in "Dynamically Discovering Services on an IP Network Using SLP" in the March 1999 issue of Novell"AppNotes.
SLP Times
The SLP Times grouping contains more specific SLP parameters.
Give Up on Requests to SAs
A Service Agent (SA) is a process that works on behalf of one or more services to advertise those services for IP servers. When a Novell Client for Windows 95/98 workstation initially boots up and loads IP, by default the client queries NWHOST for a server name. If there is no name resolved in the NWHOST file, the client queries SLP for a server.
In order for IP to find a specific service object on the network, the User Agent (UA) in the client software sends a multicast request to find all Service Agents to see if they have the requested object registered with them, along with their corresponding IP addresses. These IP addresses, along with other relevant information about the server, are then sent directly back to the client using a unicast reply (a routed packet).
This parameter specifies the maximum amount of time SLP will take to send requests to Service Agents on the network. The range is 1 to 60,000 seconds. The default is 15 seconds.
SLP Cache Replies
When SLP receives a service request from a User Agent, the SLP reply is saved for the amount of time specified by the SLP Cache Replies parameter. If SLP receives a duplicate of this request, the cached reply is sent, so the same reply does not have to be generated again.
The default value is one minute. Setting this value higher will consume more memory to retain replies longer. It is recommended that you do not change this default, because any duplicate requests should occur within the first minute.
The range is 1 to 60 minutes. The default is 1 minute.
SLP Default Registration Lifetime
This setting specifies the lifetime of a service registration which is registered by a service provider requesting the default lifetime value. Each service contains a "Time To Live" (TTL) attribute for which the default is one hour. If the Server Agent doesn't re-register its services before the TTL period expires, the Directory Agent removes it from its list of available services. Every Service Agent has a TTL for each of its services.
If the service provider specifies a lifetime value when the service is registered, the SLP Default Registration Lifetime value is not used. The Directory Agent deletes the service when the lifetime expires if it hasn't been specifically renewed or unregistered before then. This prevents the Directory Agent's information from becoming too stale if the Server Agent registering the service goes down. The Server Agent automatically renews the service so the application doesn't need to.
The range is 60 to 60,000 seconds. The default value is 10800 seconds, which is 3 hours. Using a smaller value will make the Directory Agent's information less stale at the expense of more network traffic to renew services more frequently. This parameter does not affect how long the service is registered by the Server Agent.
Wait Before Giving Up On DA
This parameter specifies the amount of time that SLP will wait before giving up on a request to a Directory Agent. A Directory Agent collects and caches service advertisements from Service Agents.
The range is 1 to 60,000 seconds. The default is 5 seconds. At this point, the User Agent begins multicasting SLP for known services.
Wait Before Registering on Passive DA
When a Service Agent passively discovers a Directory Agent (that is, the Service Agent receives an unsolicited Directory Agent advertisement message because the Directory Agent just started), the Service Agent registers its services with the Directory Agent after waiting a random interval of time. This is to prevent all Service Agents from registering their information with the Directory Agent as soon as they receive the Directory Agent advertisement, overwhelming the Directory Agent.
The range of time for the random delay interval is specified by the Wait Before Registering on Passive DA parameter. The range is 1 to 60,000 seconds. The default is 2 seconds.
Conclusion
This AppNote covered the advanced settings for each parameter group along with their defaults and value ranges. It is hoped that by better understanding the client settings, system administrators and Novell users alike can take better advantage of the features that come with the Novell Client for Windows 95/98.
* Originally published in Novell AppNotes
Disclaimer
The origin of this information may be internal or external to Novell. While Novell makes all reasonable efforts to verify this information, Novell does not make explicit or implied claims to its validity.