An Introduction to NetWare for Small Business 4.11
Articles and Tips: article
Editorial Intern
Novell Developer Information
01 Jun 1998
There's a new version of NetWare out that's designed specifically for small businesses. Read this introduction to find out just how easy setting up a network can be.
- Introduction
- NetWare for Small Business Features
- Installation and Setup Guides
- Performing Administration Tasks with NEAT
- Connecting your Network to the Internet
- Installing the Bundled Software
- Summary
Introduction
At the end of March, Novell released NetWare for Small Business 4.11. Aimed specifically at single-site businesses with 25 or fewer users, NetWare for Small Business 4.11 comes bundled with all the software that small businesses need to run and maintain their network, including Internet connectivity.
NetWare for Small Business 4.11 also enables clients on multiple platforms, such as Windows, Windows 95, Windows NT, UNIX, OS/2, and Mac OS, to send and receive e-mail and share files and computing resources on intranets and the Internet and to effectively manage their clients and resources across multiple servers.
This AppNote provides an introduction to the network solutions for small businesses offered by NetWare for Small Business 4.11, from a look at its features to step-by-step installation and setup guides.
NetWare for Small Business 4.11 can be obtained through Novell Authorized Resellers. The product is sold on CD-ROMs in a five-user package and then in increments of single-, five-, or ten-user licenses for up to a total of 25 users. This per-user licensing enables customers to pay for technology as they grow.
To learn more about NetWare for Small Business 4.11 call 1-800 NETWARE or visit the web site at
http://www.novell.com/intranetware/products/smallbiz/
NetWare for Small Business Features
NetWare for Small Business 4.11 comes with all the product updates, enhancements, and features of NetWare 4.11 at a competitive price. Included also are the following:
Single-site NDS. This version of NDS, optimized for simple, single-site installations, makes using and managing networks easy, eliminating the need for a full-time network manager.
Novell Application Launcher (NAL). NAL takes full advantage of NDS to automate application distribution and management to each desktop.
NetWare Multi-protocol Router. This router provides businesses a direct connection to the Internet via modem or dedicated line and enables them to send and receive Internet e-mail from their GroupWise mailbox and also to browse the web.
In addition to the many powerful NetWare features, NetWare for Small Business 4.11 has features not included in NetWare 4.11 to simplify network administration for small businesses. These features include:
Novell Easy Administration Tool (NEAT) version 1.1. NEAT simplifies administrative tasks such as adding users, printers, groups, and applications. NEAT guides the administrator with a friendly graphical interface. It manages both GroupWise and the network, allowing the messaging and network systems to remain combined.
QuickStart for NEAT version 1.1. QuickStart simplifies the process of adding users, groups, printers, and applications during the initial setup and install.
NetWare Connect. This feature provides dial-up connectivity, allowing network users to access the company network anytime from anyplace. This lets users send and receive e-mail and maintain constant communication from even remote locations.
QuickFinder Plug-in for Netscape version 1.1. QuickFinder allows users to search documentation using the Netscape browser.
Nodal Licensing. NetWare for Small Business' flexible licensing program allows businesses to purchase the exact number of licenses they need (in one-user and five-user packs) and gives each licensed user access to all servers on the network.
Network Address Translator (NAT). NAT allows businesses to use one IP address from their Internet Service Provider. This feature provides additional security, as well as address simplification and conservation.
Easy Upgrade. As businesses experience growth and need larger networks, NetWare for Small Business offers a smooth and easy upgrade path to other versions of NetWare (NetWare 5, for example).
Remote Monitoring and Repair. NetWare for Small Business can enable authorized service technicians or resellers to monitor a business' network remotely and even diagnose and correct most network problems without going on-site. This can represent significant savings in time and money in network management.
Add-on Products. NetWare for Small Business allows businesses to take advantage of almost any other Novell product to enhance their network's functionality. For example, businesses could add ManageWise for complete network management functions and BorderManager FastCache to increase the speed at which they access or download files from the Internet.
Bundled Products
NetWare for Small Business 4.11 includes several bundled products not available in the previous release of intraNetWare for Small Business. In particular, Novell's GroupWise 5.2 is included, along with software and promotional software from Netscape, Oracle, and Computer Associates, to provide comprehensive small business networking solutions.
GroupWise 5.2. As Novell's groupware collaboration product for the Internet and intranets, GroupWise 5.2 combines e-mail with a powerful task management tool, scheduler, and calendar. GroupWise was not previously part of the default NetWare server installation, but it NetWare for Small Business 4.11 it is automatically installed.
GroupWise 5.2 offers a number of features to help people communicate more effectively and use their time more efficiently:
Integrated Desktop. This provides a single, customizable environment for accessing, organizing, managing, profiling, sharing, and communicating information.
Universal Mailbox. This forms a convenient, central environment that allows people to send, receive, and mange multiple types of information, such as e-mail, faxes, Internet messages, appointments, tasks, documents, and work flows. They can use the Mailbox whether they are connected directly to the network or dialing in from a remote location.
Internet/Intranet Integration. This integration simplifies Internet/Intranet access because all URLs, Internet e-mail addresses, and FTP filenames included in the subject or message body of any GroupWise item are automatically detected, highlighted in the subject or message body, and hyperlinked to the user's default browser, Send Mail view, or FTP application.
E-mail Client. The GroupWise client software offers a variety of features for working with e-mail messages, including tracking of outbound messages; recalling outbound messages; carbon copies and blind copies; attachments and document references; integrated speller, thesaurus, and QuickConnect composition coach. It also lets users convert information types, for example, converting an e-mail message to a task or appointment to flag it for follow up or for a meeting.
Work-In-Progress. This feature lets users track appointments and to-do lists, maintain personal address books, and manage a "work-in-progress" folder that holds unfinished items until they have been completed.
Group Calendaring and Scheduling. This feature automates the scheduling of meetings by storing personal and group calendars and searching calendars to find common times when everyone who needs to attend a meeting is available. You can even schedule resources such as conference rooms and video equipment.
Replicated Shared Folders. This feature lets users provide others with access to specific folders for workgroup and collaborative interaction, including group document editing.
Conversation Place. This feature integrates workstations with an organization's PBX system via TSAPI or through a TAPI modem or interface card. Computer-based telephone conversations and conference calls are possible, and users can add and remove participants, transfer individuals and share documents during these calls.
Document Management Services (DMS). DMS includes check-in/check-out (for single documents, single folders, multiple folders, selected documents from a single folder, or selected documents from multiple folders), concurrency control and versioning. So a business can easily manage the document creation process and identify which version of a document is the most recent one.
Netscape FastTrack Server for NetWare. FastTrack Server, which integrates with Novell Directory Services (NDS), gives business the fastest web serving solution available to accommodate their company's Internet presence.
Computer Associates FAXserve 5. A 2-user trial version of FAXserve provides a high performance facsimile solution that will fully integrate with NetWare and GroupWise to allow users to securely send and receive faxes directly from their workstations.
Computer Associates ARCserve 6.1. A 5-user version of ARCserve 6.1 provides small businesses with the security of network backup capabilities in the event of a system failure, protecting their data from loss.
Computer Associates InocuLAN 4.0. A server version of InocuLAN 4.0 provides a powerful anti-virus solution designed to protect the network servers from viruses.
Oracle 8. A 5-user version of Oracle 8 data server enables NetWare for Small Business customers to build and deploy network applications for cost-effective network solutions.
Installation and Setup Guides
Installing NetWare for Small Business 4.11 is a breeze. I had a 75MHz computer with a 1 GB hard drive and 32 MB of RAM set up and running as a NetWare server in just over an hour. The installation process simply consists of inserting the installation CD-ROM and diskette, restarting the computer, and then answering a few questions. Answering the questions and the automatic hard drive partitioning took about 10 minutes; the rest of the time was taken by the computer copying files from the CD-ROM to the hard drive.
The following are detailed instructions on how to install the NetWare for Small Business server, how to set up the administrator workstation, and how to use QuickStart to set up users and GroupWise.
Recommended System Hardware and Software
Novell recommends the following minimum hardware and software configurations for NetWare for Small Business.
Server
IBM PC-compatible computer with a 100MHz Intel Pentium Processor
48MB of RAM
At least 1GB of free hard disk space
Properly installed and configured network adapter
CD-ROM drive
3 ½ inch floppy drive
Client
IBM PC-compatible computer with a 100MHz Intel Pentium Processor
32MB of RAM
Installed copy of Windows 95
At least 100 MB of free hard disk space
Properly installed and configured network adapter
CD-ROM drive
Additional Equipment
One 10Base-T Hub for communication between the server and the client workstation.
Setting Up Your NetWare for Small Business 4.11 Server
This section describes the procedures necessary to make a NetWare for Small Business 4.11 server operational. During the server installation, all necessary GroupWise components will be installed automatically.
Upgrading to NetWare for Small Business. If you already have a server running intraNetWare for Small Business (the previous version of the small business product), follow these upgrade steps:
Down the server by typing "DOWN <Enter<".
Type "EXIT" at the prompt and press <Enter< to return to DOS.
Insert the NetWare for Small Business CD into the server's CD-ROM drive and type "INSTALL" at the drive letter corresponding to the CD-ROM drive.
Proceed to Step 4 under "New Installation of NetWare for Small Business" below. Do not use the Installation diskette.
New Installation of NetWare for Small Business. To install NetWare for Small Business on a new server, follow these steps:
Insert the NetWare for Small Business CD into the computer's CD-ROM drive.
Insert the Installation diskette into the floppy disk drive.
Turn the computer off. Wait 5 seconds, then turn the computer back on.
Follow the screen prompts to install the NetWare server software. During this process, the hard disk will be reformatted and new partitions will be created for the NetWare server installation. (A 100 MB DOS partition is automatically created.)
When prompted, insert the NetWare for Small Business License diskette.
When prompted, enter a name for your organization. This name becomes the name of your NDS tree.
When prompted, enter a name for this server. This name should be different than the name you used for your organization.
The installation program automatically detects some hardware devices on your computer, including hard disks, CD-ROM drives, and network boards.
You may be prompted with the message "Install found the following hardware but found more than one driver supporting this hardware: <hardware ID<. Press <Enter< for a list of drivers to choose from or press <F3< to continue without selecting". If you receive this message, press <Enter< and select the driver corresponding to your hard disk or network board. Consult the manufacturer's documentation if necessary.
When prompted, specify the time zone where this server will be installed.
When the file copy procedure is complete, you should restart the server. To do this, type the command "DOWN" at the prompt, then press <Enter<. Type "EXIT" and press <Enter<. Then turn the server off and back on.
Setting Up the Administrator's Workstation
The administrator's workstation must be a Windows 95 computer with a CD-ROM drive. Follow these setup steps:
Make sure the workstation is on and Windows 95 is running.
To install Novell 32-bit client software on the administrator's workstation, insert the NetWare Client CD 2 into the CD-ROM drive. This CD will auto-launch.
Select the language you want to install, select "Windows 95 Components", and then select "NetWare Client".
Answer "Yes" to accept the Software Licensing Agreement, and then select "Typical Installation".
Follow the screen prompts to complete the installation.
Turn the workstation off and then on again to activate the client installation.
Log in to the network as the "ADMIN" user. (Logging in to the network as administrator does not initially require a password. You should add a password with NEAT later on.)
Using QuickStart to Set Up the Network and GroupWise
After you log in to the administrator's workstation as ADMIN, the NetWare Application Launcher (NAL) automatically runs QuickStart to allow you to create groups and add users to your network. It also sets up the GroupWise system. (QuickStart will only run the first time you log in to the administrator's workstation as ADMIN. For day-to-day administration of your network, you will use the NEAT utility.)
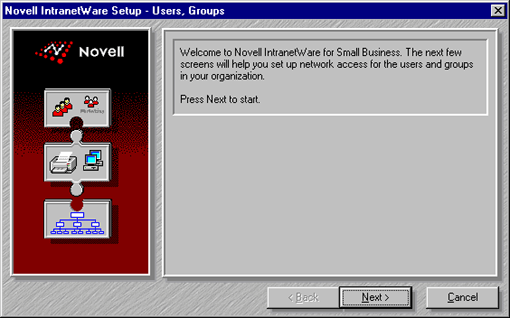
The QuickStart welcome screen is displayed as shown in Figure 1. Read the introductory information and then click on Next.
Figure 1: NetWare for Small Business QuickStart welcome screen.
Follow the screen prompts to enter names for each of the groups you want to create, then click on Next.
Follow the screen prompts to add a user to the first group, the click Next to display an entry box for the second group, if one exists.
Repeat Step 3 to add users to all of your groups.
When asked, indicate whether you want to set up Print Services at this time. If you do, you will need to follow the instructions in the online Administration Guide.
QuickStart proceeds to create the users and home directories. It then automatically runs the GroupWise Setup program. This will create the GroupWise Domain, Post Office, and user Mailboxes for all the users you just created.
You can install the GroupWise client on the administrators' workstation by double-clicking on the "Install GroupWise Windows 95" icon located in the NAL program group.
Setting Up Additional Client Workstations
NetWare Client Software. To allow a workstation to access the network, you must install the appropriate NetWare client software on that workstation. You can choose from several NetWare clients included with NetWare for Small Business:
NetWare Client 32 for DOS/Win3.1x
NetWare Client 32 for Windows 95
NetWare Client 32 for Windows NT
NetWare Client for Macintosh
You can install the NetWare client software on users' workstations just as you did the administrators workstation. If the client workstation does not have a CD-ROM drive, a CD containing the Client Diskette Images is provided so that you can create your own installation diskettes.
GroupWise Client Software. Each user created on the network has a GroupWise account set up automatically on the server. Each user must run the GroupWise client setup program after the NetWare client software has been installed on the user's workstation. To do this, perform the following steps:
Turn the workstation off and on to activate the NetWare client.
From the NAL program folder, double-click the GroupWise Client Install icon. (If you are using a Windows NT client, you will need to run the setup program from the GroupWise post office directory.)
The welcome screen shown in Figure 2 is displayed.
Figure 2: The GroupWise client setup welcome screen.

Follow the prompts to install GroupWise client software on the user's workstation.
Note: The GroupWise Macintosh client is located on the NetWare Client CD. To install this client, insert the CD into the machine's CD-ROM drive and follow the screen prompts.
NetWare for Small Business Online Documentation
Documentation for NetWare for Small Business is provided in online format. Once it is installed on the NetWare server, you can view or print the documentation from your workstation using the Netscape Navigator browser included with this product.
Performing Administration Tasks with NEAT
If you need to create new users or groups, or make other changes to your network configuration, after the initial installation, you can use the Novell Easy Administration Tool (NEAT). The following sections briefly describe some of the most common tasks that can be performed with NEAT.
Adding a User
To add a user to the network, follow these steps:
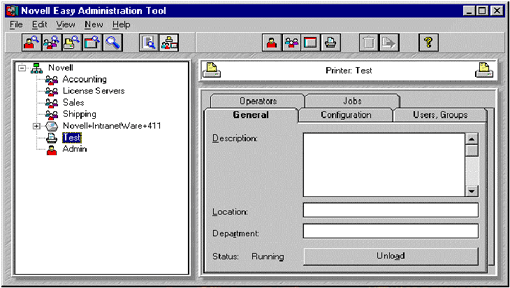
From the main NEAT screen (see Figure 3), click on the "add a new user" icon located on the taskbar to activate the Add a User coach.
Figure 3: Novell Easy Administration Tool (NEAT) main screen.
Type in the name of the new user and click on Next. NEAT automatically assigns a user ID and will create a home directory for the user. A GroupWise mailbox is also automatically created for the new user.
The coach-based interface gives you the opportunity to assign that user to a group if you have any created. Click Next when you are finished.
Finally, you're prompted to assign a password for the new user. Type a password and click on Finish.
Adding a Printer
To add a printer to the network, follow these steps:
From the main NEAT screen, click on the "add a new printer" icon to activate the Add a Printer coach.
Type a name for the printer (such as "Printer1"). If it is a PostScript printer, check the box. Then click on Next.
Indicate how the printer is connected to the network. For example, if it is attached directly to the server, select "Server" for the "Connected to" option. Click on Next.
Indicate whether the printer is a serial or parallel printer. For example, for a parallel printer you would select "Parallel" for the "Printer type" option. Click on Next.
Indicate what port the printer is connected to. For example, if it is a parallel printer connected to LPT1, select "LPT1" for the "Printer Port" option. Click on Next.
Select which NetWare volume you'd like to use for storing the print jobs and click on Finish.
Delivering Applications to Workstations Automatically
With the Novell Application Launcher (NAL), you can deliver applications to users automatically. Once you have completed these steps, a user will receive the application icon in the NAL program group. This example shows how to set up the Print Console (PCONSOLE.EXE) program for automatic delivery with NAL.
From the main NEAT screen, click on the "add a new application" icon.
Click on the "folder" icon.
Double click on the "SYS" volume.
Double click on the "PUBLIC" directory.
Double click on PCONSOLE.EXE.
Check the "DOS" check box as this is a DOS application. Click on Next.
Click on Next again.
Click on Add, then select the user and click on OK.
Click on Finish.
Connecting Your Network to the Internet
NetWare for Small Business includes routing software that provides access to the Internet. Small businesses can share a modem with the users on their network to make a dial-up connection to an Internet Service Provider (ISP) of their choice, enabling them to browse the World Wide Web and send and receive Internet E-mail from their GroupWise mailbox. The following instructions assume the customer will use a dial-up connection.
To configure Internet access you must first get an account with an Internet Service Provider (ISP) of your choice. You need to obtain the following items of information from your ISP before you begin configuring the Internet access software:
Dial-up access phone number to the ISP for your modem connection
User ID and password for your account with the ISP
IP address of your ISP
You also need to know the following information about your modem:
Modem Type
Modem Speed
Modem Interrupt
COM Port that your modem is using
After an account is set up and the necessary information is received from the ISP, you are ready to configure the Internet access software. The followings sections describe how to do this from your NetWare for Small Business server. You can perform these steps any time after the NetWare for Small Business CD has been used to install the server.
Configure Domain Naming Services (DNS)
From the NetWare server console, type "LOAD UNICON".
From the main menu, select the "Password field", press <Enter<, select "Manage Services", "DNS", and then "Initialize Master Database".
The Select Name Servers screen will display after the database initializes. Accept the default entries by pressing <Esc< to continue.
At the Do You Want DNS Configured for Specific Networks? prompt, select "No", then press <Esc<. The DNS menu will display.
Select the "Administer DNS" field, press <Enter<, select "Link to Existing DNS Hierarchy", then "Link Indirect via Forwarders" (for example, COM1).
In the "Forwarder #1" field, type the IP address of your ISP. This is the IP address that you should have already obtained from your ISP.
Press <Esc< to exit UNICON, saving changes when prompted.
Configure Hardware Interface
This procedure is necessary only if you need to change the default settings. A logical board and network interface have already been pre-configured, but you may need to change some settings to meet your modem requirements. The default settings are:
|
Modem Type |
U.S. Robotics Courier |
|
Modem Speed |
19200 baud |
|
Modem Interrupt |
4 |
|
Modem's COM port |
COM1 |
If you need to change these settings, follow the steps below. Otherwise, proceed to "Configure ISP Dial-Up".
From the NetWare server console, type "LOAD INETCFG". The first time you load the Internetworking Configuration utility, select "Yes" at the Transfer LAN drivers prompt.
From the Internetworking Configuration main menu, select "Boards".
From the list of configured boards, select the "COM port board".
Select "AIO Board Options", then select "AIOCOMX (Serial Port)".
In the "I/O Base" field, select the COM port that your modem is using.
In the "Interrupt" field, select the interrupt number that your modem is using.
In the "Speed Rating" field, select a speed that is appropriate for your modem.
Pres <Esc< to return to the Internetworking Configuration main menu, saving changes when prompted.
From the Internetworking Configuration main menu, select "Network Interfaces", then select the "COM port board".
Select the "Interface Speed" field, press <Enter<, and select a speed that is appropriate for your modem.
Select the "Modem/DCE" field, press <Ins<, and select your modem type. If your modem type is not listed, select "Hayes compatible".
Press <Esc< to return to the Internetworking Configuration main menu, saving changes when prompted.
Configure ISP Dial-Up
Next you need to configure the dial-up routine to the ISP.
From the NetWare server console, type "LOAD INETCFG".
From the Internetworking Configuration main menu, select "WAN Call Directory", press <Enter<, then select the pre-configured entry name YOURISP. The PPP Call Destination Configuration screen will display.
In the "Telephone Number" field, type the dial-up access telephone number provided by the ISP. Include area code and outside line extensions, if necessary
In the "Password" field, type your account password provided by the ISP. This field is case-sensitive.
In the "Local System ID" field, type your account user ID provided by the ISP. This field is case-sensitive.
Press <Esc< to return to the Internetworking Configuration menu, saving changes when prompted.
From the main menu, press <Esc<, and select "Yes" to exit.
Restart the Server
To restart the server, do the following:
At the console prompt, type the command "DOWN" and press <Enter<.
Type the command "EXIT" and press <Enter<.
Turn the server off, wait 5 seconds, then turn the server back on.
Test the Internet Connection
To test the Internet connection, do the following:
Type "LOAD PING ISP address", where ISP address is the IP address of your ISP.
At the main screen, check to see if packets are being received from the ISP host.
Note: The configuration described by these steps establishes Dynamic IP addressing, which means the ISP will assign a different IP address to your network each time you connect to the ISP. This type of addressing provides a connection to the Internet for sending e-mail and browsing. In order to configure Static IP addressing for sending and receiving e-mail over the Internet with GroupWise, you must perform the first three procedures above (Configure Domain Naming Service, Configure Hardware Interface, and Configure ISP Dial-Up.), then perform the additional two procedures described below.
Enable Static IP Addressing
The following information for the ISP needs to be obtained before configuring Internet access software:
Dial-up access phone number to the ISP for your modem connection IP address for your network (this is your static IP address) Domain hostname for your network (for example, companyname.com) User ID and password for your account with the ISP IP address of your ISP
With this information, the Internet access software is ready to configure by following these steps:
From the NetWare server console, type "LOAD INETCFG" and press <Enter<.
From the Internetworking Configuration main menu, select "Protocols", then "TCP/IP".
In the "TCP/IP" field, select "Enabled".
In the "LAN Static Routing" field, select "Enabled".
Press <Esc< until you return to the main Internetworking Configuration menu, saving your changes when prompted.
From the main menu, select "Bindings", press <Ins<, and then select "TCP/IP".
In the "Bind To?" field, select "A Network Interface".
From the Select a Network Interface menu, select the board you created and are currently configuring, and press <Enter<. The Binding TCP/IP to a WAN Interface screen will display.
Set the "Remote Router will Dynamically Assign the IP Address" field to "No".
In the "Local IP Address" field, enter the IP address for your local network. You should have obtained this IP address from your ISP.
Select "WAN Call Destinations", press <Ins<. The WAN Call Destination to IP Address Mapping Configuration screen will display.
Select "WAN Call Destination", choose the pre-configured entry named YOURISP, or the name you specified earlier for the WAN Call Destination (which is your ISP).
At the "Type" field, select "On Demand".
Press <Esc< to return to the Binding TCP/IP to an Interface screen, saving changes when prompted.
Select "Expert TCP/IP Bind Options". At the "Network Address Translation" field, change the Status setting to "Static Only".
Press <Esc< to return to the main menu, saving changes when prompted. Press <Esc< again to exit.
You must down and restart the server in order for your changes to be implemented by the server. At the console prompt, type DOWN <Enter<. Then type EXIT <Enter<. Turn the server off, wait 5 seconds, then turn the server back on.
Define the Foreign ID in GroupWise Internet Agent
In order to enable sending and receiving Internet mail, you also need to define the Foreign ID (or hostname) in GroupWise Internet Agent (GWIA). You do this with the NetWare Administrator utility at the Administrator workstation.
To install the NetWare Administrator utility, you must run the SETUPGW executable file. This file is found on your server at the following directory path:
SYS:PUBLIC\WIN95\SETUPGW
Follow the screen prompts. The executable will create a program folder on your workstation's desktop that contains the NetWare Administrator program icon.
Double-click NetWare Administrator.
Browse to the root of your NDS tree, and double-click the "GroupWise container object" to open it.
Right-click on the "GWIA" object, then select "Details".
At the "Foreign ID" field, type in the domain hostname that you obtained from your ISP.
Click OK.
Enable SMTP Dial-up
From the NetWare Administrator browser window, right-click on the "Internet Agent" object. Click "Details", then "Advanced Settings".
Fill in the "Dial-up: ETRN host" field. This is the IP address (or DNS name) of the message store at your ISP. You get this from your ISP.
Fill in the "Dial-up: ETRN queue" field. This is the same host name that you entered in the Foreign ID field on the main Information page for Internet Agent.
Fill in the "Dial-up: use dial connection" field. Leave this setting at "ON".
Configure SMTP Dial-Up Dialing Conditions and Schedule
From the NetWare Administrator browser window, right-click the "Internet Agent" object click "Details Schedule".
Click Create to create a new Profile, or Edit to edit an existing Profile definition including the default Profile. (This is where you specify the conditions that will initiate the dialing process and how the dial-up performs.)
Enter a name for the new Profile in the "Name" field.
Enter a description for the new Profile in the "Description" field.
Fill in the "Queue thresholds" fields. This is where you determine when the dial-up will take place. (If any of these threshold amounts are met, the Internet Agent will dial the ISP. "Messages" refers to outgoing Internet messages. "Kbytes" refers to the total size of combined outgoing Internet messages. "Minutes" refers to the maximum duration to wait before dialing the ISP to check for incoming messages.)
Fill in the "Dial parameters" fields. (This is where you control how the dialing process will take place.
Installing the Bundled Software
NetWare for Small Business includes a partner CD which contains CA FAXserve 5, CA ARCserve 6.1 and CA InocuLAN 4.0. This section will describe the procedures necessary to install the partner components on a NetWare for Small Business 4.11 server.
Installing the Computer Associates Components
Insert CD5 into your CD-ROM drive. The CD will auto-run.
Select the language you wish to install.
Follow the prompts.
Installing the Netscape FastTrack Server for NetWare
Insert CD5 into your CD-ROM drive. The CD will auto-run.
Close the Computer Associates install program.
From the Windows 95 main screen, click on Start, then Run. Type "D:\Fasttrack\setup.exe". (This assumes your CD-ROM drive is D. If it is not, type in the appropriate drive letter.)
Follow the prompts.
Summary
NetWare for Small Business 4.11 offers a wealth of networking solutions and services to the small business market in one simple package. With its quick and easy installation and administration, NetWare for Small Business addresses the needs of today's growing small businesses at an affordable price.
* Originally published in Novell AppNotes
Disclaimer
The origin of this information may be internal or external to Novell. While Novell makes all reasonable efforts to verify this information, Novell does not make explicit or implied claims to its validity.