An Introduction to ZENworks: Zero Effort Networking for Users
Articles and Tips: article
Product Manager
Novell, Inc.
01 May 1998
ZENworks is the Novell Application Launcher (NAL), the Novell Workstation Administrator, and a remote control product, all combined into one of the most exciting bundles ever! This AppNote will set you on your way to becoming a great Z.E.N. master.
- Introduction
- NDS and the Digital Persona
- What is ZENworks?
- Installing ZENworks
- Using ZENworks to Perform a Hardware Inventory
- Summary
Introduction
Much is being said in the computer industry about Total Cost of Ownership (TCO). According to several independent research organizations, the estimated cost of owning and maintaining networked personal computers is over $10,000 per year per computer. The price of the network operating system account for only 3-5 percent of the total costs associated with deploying and maintaining a network. The majority of these costs (79 percent according to a Gartner Group report) are directly attributable to administration. To stay competitive, organizations must implement solutions that are designed to reduce these administration and maintenance costs.
Novell's ZENworks is a directory-enabled service for workstation administration that significantly reduces the costs associated with managing networked PCs. The name ZENworks is short for "Zero Effort Networks." The name is not intended to imply that Novell is able to eliminate the work and effort associated with deploying and maintaining a network on the administrative side (although ZENworks does significantly reduce the costs and complexities of maintaining networked PCs). Rather, the name ZENworks was chosen to suggest that network administrators can remove the obstacles and frustrations that prevent users from effortlessly accessing the resources on the network. Hence, zero effort is required from users.
This AppNote is the first in a series of articles about implementing ZENworks on a network. This first installment explains what ZENworks is and how to install it. It then looks at specific things the product can do, using workstation hardware inventory as the first example.
ZENworks is available initially in English, with versions in several other languages to follow. To learn more about ZENworks, call:
1-888-321-4272 (U.S. & Canada) 1-801-228-4272 (international)
Or visit:
http://www.novell.com/products/nds/zenworks/
NDS and the Digital Persona
ZENworks was defined using a process known as Contextual Inquiry, where the product designers observe customers in their day-to-day workingenvironment and identify needs based on these observations. As a result, the product is designed to simplify the most frequent job functions performed bynetwork administrators in real-world situations.
ZENworks is designed around the concept of the "digital persona" introduced by Novell CEO Eric Schmidt at COMDEX/Fall '97 (see "The New Face of Networking" in the January 1998 issue of Novell AppNotes). In essence, the digital persona is a compilation of the resources and rights relevant to anindividual. Novell Directory Services (NDS) creates a digital identity for every employee and computer in an organization. ZENworks leverages this digitalpersona. Every employee has an identity within NDS that follows that individual from PC to PC. No matter what PC an individual uses to access network resources, the identity that has been created in NDS for that individual is delivered to the PC.
Just as an individual has an identity within an organization that is based on his/her individual needs, departmental needs, and organizational needs, an identity is created in NDS to provide the user with access to the required resources to successfully complete his/her assignments. For example, every employee in an organization is given an office, desk, and telephone just because they are employed. The network should be exactly the same. Every individual in an organization should have access to specific resources, such as the employee benefits or telephone databases. Beyond this, individuals within a particular division or group should automatically be given access to network resources that are associated with their division or group. This access should be effective when the user account is created.
Dynamic inheritance within NDS is what makes this concept of a digital persona possible. Users may have requirements that are specific to their individual needs as well as with respect to their position within the organization. For example, users may be given access to specific network resources because of their membership in the Accounting department. Additional network access may be granted because the users are also members of a task force investigating a specific issue. Additional privileges may be granted based upon location. Certain privileges may even be granted to all members of the organization. The dynamic inheritance of NDS creates the effective rights of the user by combining all of these access privileges.
NDS provides the framework to construct these hierarchical relationships that an individual has within an organization into the network. NDS then grants access to network resources based upon the privileges that have been given to the individual and the privileges that the individual inherits because of group memberships and location within NDS. This ability to grant network access to individuals and have the individual inherit additional access privileges give each individual his/her unique digital persona.
User Information vs. Workstation Information
ZENworks enhances the information that is stored within NDS, making it possible to store information in NDS such as:
The look and feel of the PC (background, screen saver, and so on)
What applications an individual is able to access
What printers the individual requires access to
Where the individual should go for help when a problem occurs
Who, if anyone, is able to remotely access the individual's PC
This configuration information is then automatically delivered to any PC, anywhere in the organization. The configuration information allows network users to always get a familiar interface and access to network resources that have been assigned to their digital persona regardless of the PC that is used. This is possible because the dependencies that have historically been stored at the local PC have now been transferred to NDS.
ZENworks also creates a digital persona for every workstation in the organization. A workstation object is created within NDS for every PC in the organization. This workstation configuration is independent of the user who is using the workstation to access the network. Workstation specific information stored in NDS includes:
Hardware inventory
Workstation policies
Preferred tree
Name context
What Is ZENworks?
ZENworks is the combination of three previously separate products:
Novell Application Launcher (NAL) v2.50, a solution targeted at reducing the costs and complexities of distributing and maintaining applications across the network. These applications can be network-based or installed locally on the PC. NAL implements a just-in-time (JIT) application distribution solution, where end users are delivered the application and the application's dependencies at the moment they request access to the application. NAL implements solutions such as fault tolerance and load balancing to guarantee end users always have access to needed applications.
Novell Workstation Manager v1.10, a solution targeted at reducing the costs and complexities of managing the Microsoft Windows 95 and Windows NT operating systems. Configuration parameters such as printer settings, policies, and hardware specifics are stored in NDS, thus enabling users to always have the same interface regardless of the workstation they use to access the network.
A previously unreleased remote control product that enables administrators and help desk personnel to look at and resolve workstation errors quickly, efficiently, and securely. If the problem is software related, it can be managed and corrected remotely through NDS. Network administrators will only have to physically visit workstations to manage hardware-related issues.
Policy Packages and Workstation Objects
The power of ZENworks lies in its use of new NDS objects, such as Policy Packages and Workstation objects. You can use the NetWare Administrator utility to create a Policy Package and associate it at the User, Group, or Container level. Within a Policy Package are various policies that you can enable. For example, a Windows 95 User Policy Package contains policies that allow you to configure the desktop and set up login restrictions. Once you enable one or more policies in a Policy Package, all users (and users within groups or containers) associated with the Policy Package will be affected by the enabled policies in the package.
Workstation objects are created when you register and import workstations in your NDS tree. They represent physical workstations and serve many functions, such as letting you collect workstation inventory and remote control the workstation.
Installing ZENworks
Installing ZENworks consists of two main steps:
Installing the necessary software on the server.
Installing the Novell Client software on the workstation.
In order to successfully install and use ZENworks, your network must meet these requirements:
Servers running NetWare 4.11 or higher
32 MB of available server memory
125 MB of available disk space on the server
New Novell client software installed on each workstation participating in
ZENworks
You must be logged in to your NDS tree as Admin (or as a user with the Supervisor right to the NetWare server and NDS container where you install ZENworks, and rights to modify the schema of the NDS tree you are installing ZENworks in) on a Windows 95 or NT workstation.
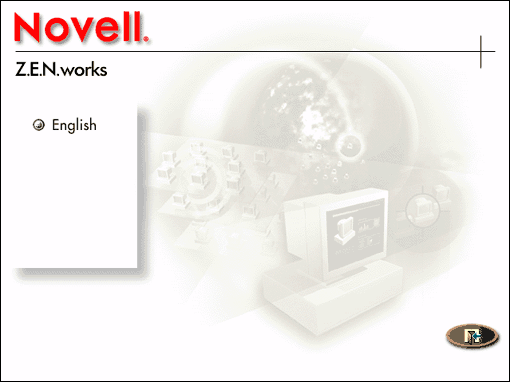
The installation CD is designed with an auto-run feature that automatically launches when the CD is inserted into the PC. The first screen, shown in Figure 1, asks you to select a language for the installation program itself (only English is available in the initial release).
Figure 1: An easy-to-follow interface is launched when you insert the CD.
The next screen, shown in Figure 2, allows you to select options for installing ZENworks, viewing Quick Start documentation, installing the Novell Clients for Windows, and browsing the contents of the CD.
Figure 2: This screen presents the options for the ZENworks CD.
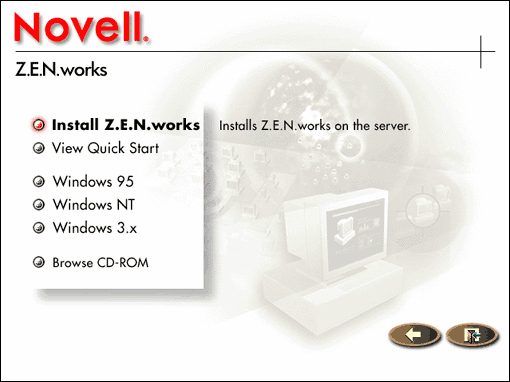
When you click on "Install ZENworks" an installation wizard starts to guide you through the process of installing the ZENworks software on one or more NetWare servers. Follow the onscreen prompts to read the introductory information and accept the license agreement.
Three Types of Installations
At this point, you should see the screen shown in Figure 3, giving you the choice between three types of installations.
Figure 3: Selecting the type of installation.
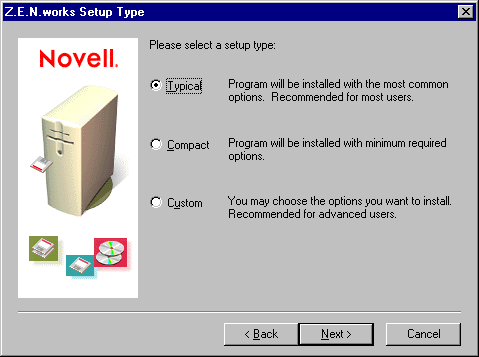
As explained onscreen, the three choices are as follows:
Typical. A typical installation installs all the server-side components of ZENworks, including NWAdmin, and stores a copy of the Novell Clients for Windows 95 and Windows NT on the network.
Compact. This option installs the program with the minimum required options. Choose this if your server is short on disk space.
Custom. Select this option if you are comfortable specifying which ZENworks components to install. Your choices are:
Application Management - Software Distribution (the NAL piece)
Workstation Maintenance (Workstation Manager)
Desktop Management (Remote Control - requires client update)
NWAdmin
Copy Clients to Network
Make your choice and click Next> to continue.
Now you are asked to select the server(s) on which the ZENworks software will be installed, as shown in Figure 4.
Figure 4: Selecting the server(s) on which to install ZENworks files.
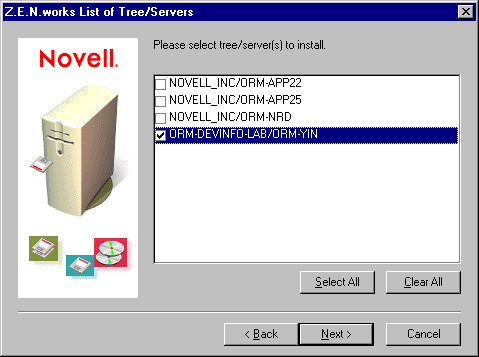
Your next choice is to select the language(s) to install. Once you do so and click Next>, follow the onscreen prompts to copy the appropriate files to the selected servers.
After the necessary files have been installed on the servers, the program is ready to be accessed. However, before some components of the ZENworks solution can be used, the Novell Client must be installed on the workstations. This can easily be accomplished from the ZENworks CD using the Automatic Client Upgrade (refer to the client help information for detailed instructions).
Using ZENworks to Perform a Hardware Inventory
Some of the most common questions network administrators are asked revolve around the hardware that is connected to the network: How many PCs are there in the company? How many of them have 32 MB of RAM or more? Questions such as these are difficult for most network administrators to answer. With ZENworks, however, you can easily automate the task of performing just such a hardware inventory, as shown in the following step-by- step example.
Preparing to Use ZENworks
In order to use ZENworks for any purpose, you must complete three initial steps:
Create a User Policy Package and enable the Workstation Import policy.
Register the workstations in your NDS tree.
Import the registered workstations.
These steps are accomplished using the NetWare Administrator 32 utility (NWAdm32.exe) that comes with ZENworks.
Note: You can use older versions of NetWare Administrator, but you must first modify the workstation's registry. Refer to the ZENworks online documentation for details.
Step 1a: Creating a User Policy Package
First we need to create an NDS "Policy Package" object. To do this, start NWAdm32 and highlight the Organization or Organizational Unit where you want to store your policy packages. Right-click on the container and choose Create from the pop-up menu. The "New Object" window shown in Figure 5 will appear.
Figure 5: Creating a new Policy Package.
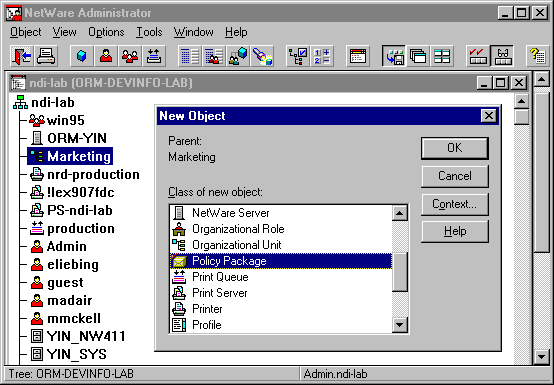
Scroll down until you see the Policy Package object class. Highlight it and click on OK. The Create Policy Package dialog is displayed as shown in Figure 6.
Figure 6: The Create Policy Package dialog.
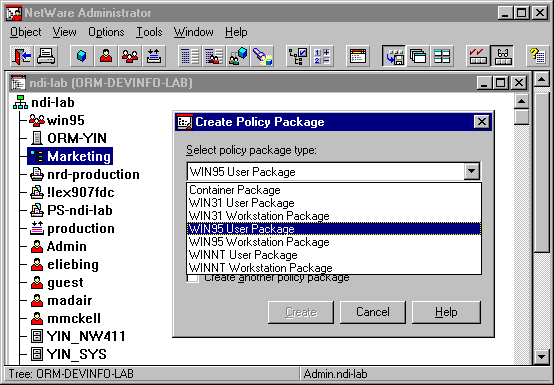
Click on the down-arrow to the right of the "Select policy package type" box to select what type of package you are creating. In this example, we will create a Windows 95 User Package for users running Windows 95.
Note: The screen shots shown in this AppNote are for a Windows 95 workstation. The same functionality is available on Windows NT, and most of it is also available on the Windows 3.1 platform. If you have users running Windows NT or Windows 3.1, choose the corresponding option for your policy package.
After selecting the package type, enter a name for your package in the Name entry box (see Figure 7). This is the name which will be displayed for the package in the NetWare Administrator utility.
Figure 7: Naming your User Policy Package.
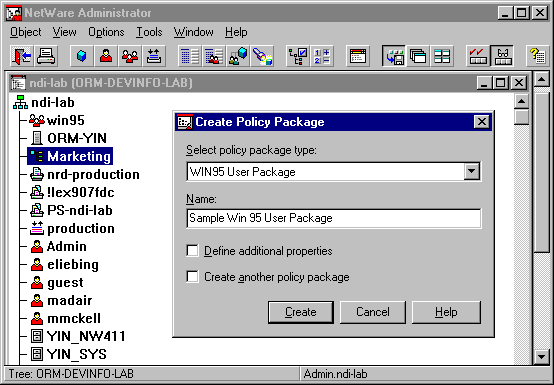
Check "Define Additional Properties" and then click Create.
Step 1b: Enabling the Workstation Import Policy At this point, a Policies page is displayed, listing the policies that can be enabled for the User package. Check the "Workstation Import Policy" check box as shown in Figure 8 and click on Details.
Figure 8: Enabling the Workstation Import Policy.

On the Workstation Location page, you define where the Workstation objects will be created. The Workstation objects can be created in the same container as the User object, or in any other container defined by the administrator. In our example, we select "User Container" as shown in Figure 9.
Figure 9: Specifying the location for Workstation objects.
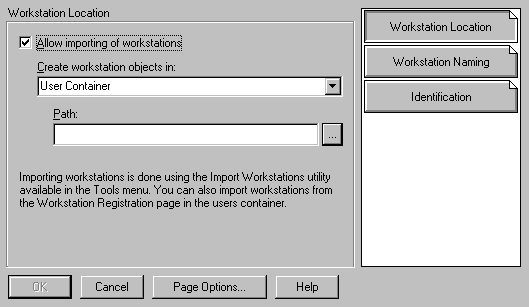
You can also define how you want the workstation objects to be named when they are created in NDS. The default workstation naming scheme is to combine the Windows computer name and the workstation's network address. While you can leave the default naming scheme in place, it tends to produce rather lengthy name strings in most cases. It is easier to identify the Workstation objects if they have more easily recognizable names. To change the naming scheme, click on Workstation Naming (see Figure 10).
Figure 10: Entering workstation naming options.
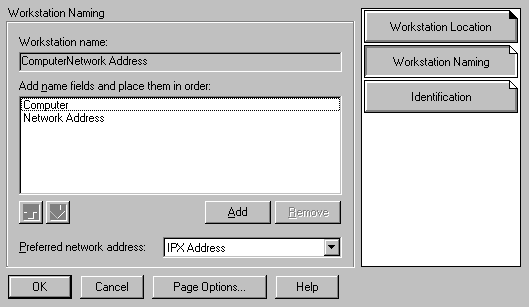
Click Add to select a new name field (see Figure 11) or Remove to delete a selected field. Use the up and down arrow icons to change the order of your selected fields. Multiple options are available for naming the computer within NDS. Combinations can also be used. For example, the computer could be given a combination of the user's name and the computer name.
Figure 11: You can choose any combination of name fields for naming your workstations.
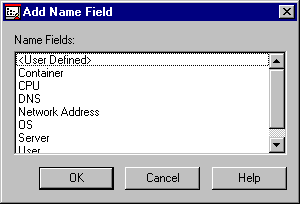
Click on OK at the bottom of the Workstation Naming window when you are satisfied with your naming scheme.
Step 1c: Associating the User Policy Package with Users
Once the Workstation Import Policy is enabled, you need to associate the Windows 95 User Policy Package with a User, Group, or container object within NDS. To do this, click Associations (see Figure 12).
Figure 12: Associating the User package with users, groups, or containers.
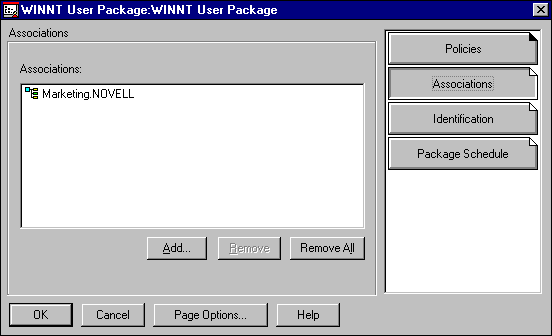
The Associations list will initially be blank. Click Add... to select a User, Group, or Container. All users associated with a Policy Package, including those within selected groups or containers, will be affected by the enabled policies in the package. Click OK when you are finished.
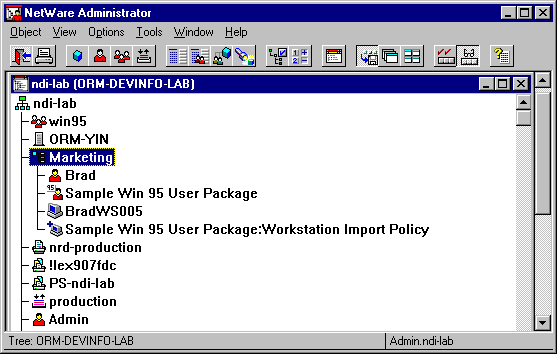
When a user that has been associated with the Windows 95 User Package logs in to the network, an NDS object representing the workstation being used will be automatically created. To see this, log out of the network and then log in to the network as a user in the container specified above. After you log in, there should be a Workstation Import Policy object in the container, as shown in Figure 13.
Figure 13: The Workstation Import Policy object in NetWare Administrator.
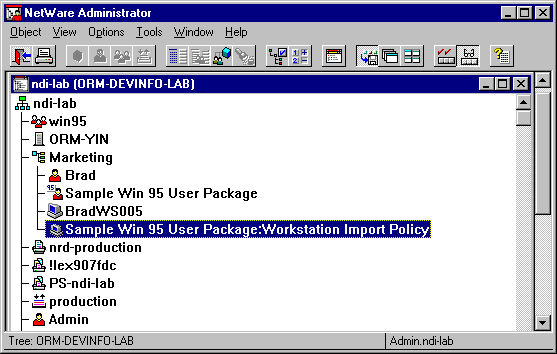
The workstation can now be registered and imported, as explained next.
Step 2: Registering Workstations
The registration process is configured so that the Workstation objects are automatically imported into NDS the next time the user logs in.
Before registration can happen, however, you need to run "Prepare Workstation Registration" from the Tools | Workstation Utilities option of the NWAdmin32 utility. This grants users the rights they'll need in the NDS container you selected.
To import the workstation, highlight the container you selected for Workstation object creation, right-click, and select Details from the pop-up menu. Click on Workstation Registration, as shown in Figure 14.
Figure 14: The Workstation Registration page.
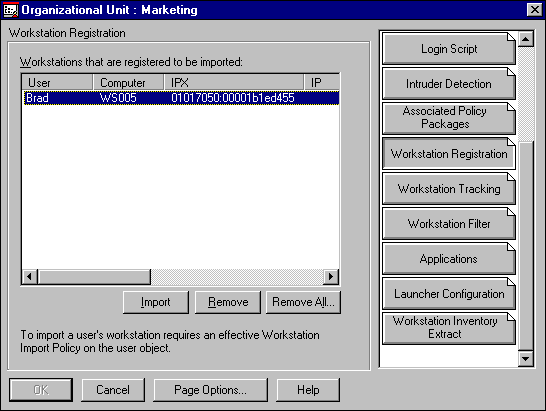
Highlight the workstation and click Import to import the workstation object. Once the workstation object has been imported, it appears as an NDS object in the appropriate container (see Figure 15).
Figure 15: The new Workstation object appears in the NDS tree.
Note: You can import multiple workstations at a time by using the Tools | Import Workstations option in the NetWare Administrator utility.
Enabling Workstation Inventory
Now that the Workstation object exists within NDS, you can begin to associate actions with the workstation objects. In the past, all access rights and actions within NDS were associated with users or groups of users. ZENworks introduces the ability to associate NDS actions with workstations in addition to users.
To accomplish this, you must create another Policy Package. This time it is a Windows 95 Workstation Package. As before, highlight the container, right- click, choose Create, select Policy Package, and click OK. This time, select WIN95 Workstation Package as shown in Figure 16.
Figure 16: Creating a Windows 95 Workstation Policy Package.
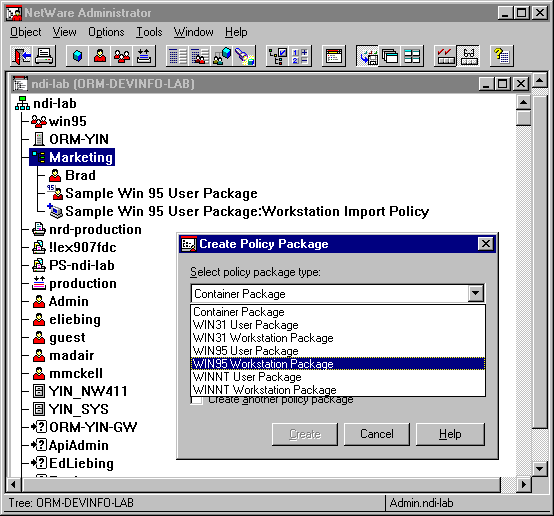
Name the package, check "Define additional properties", and then click Create.
On the Policies page, enable "Workstation Inventory" as shown in Figure 17.
Figure 17: Enabling workstation inventory on the Policies page.
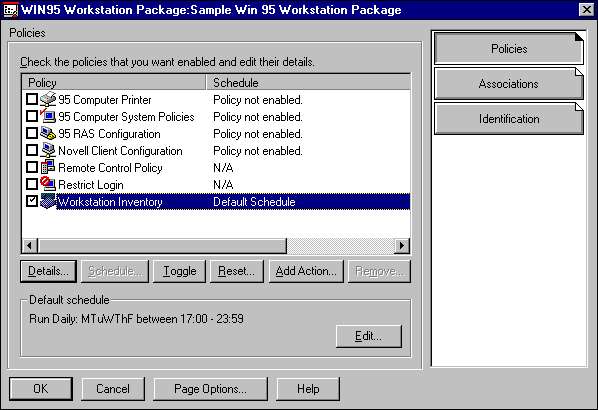
If desired, you can click Details... to set the schedule for when the inventory information will be gathered. Otherwise, the policy uses the default schedule as indicated.
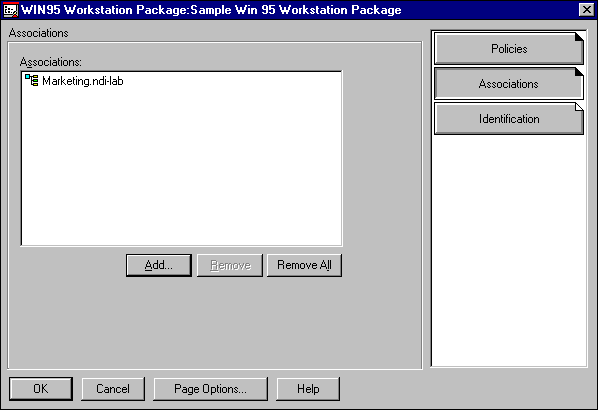
The last remaining step is to associate the Workstation Package with a user, group of users, or container, as shown in Figure 18.
Figure 18: Associating the Workstation policy with users.
Viewing Workstation Inventory Information
When the workstation is used to log in to the network, ZENworks will automatically populate NDS with an asset inventory that represents the hardware that is present in that PC and the hardware configuration. You can then access information such as:
Desktop OS and RAM present
Disk drives present within the workstation
Buses present in the workstation
Services that are running at the workstation
Devices that exist within the workstation
The interrupts, I/O ports, DMA channels, and memory addresses that are in use
The video display settings in use on the workstation
As an example, the following series of screen shots show how this information is displayed for the workstation in our example. The sequence begins by double-clicking on the workstation and selecting Workstation Inventory.
Figure 19: Desktop operating system and RAM information.
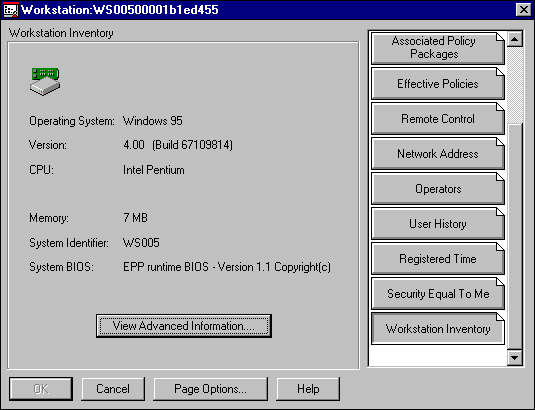
Figure 20: Disk drives list.
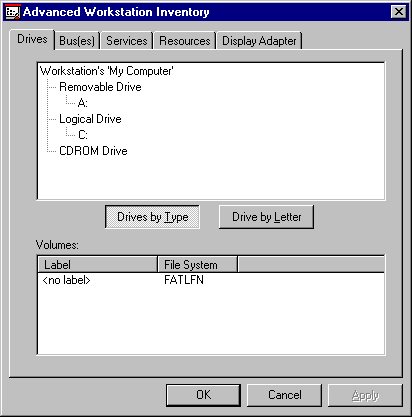
Figure 21: Bus information.
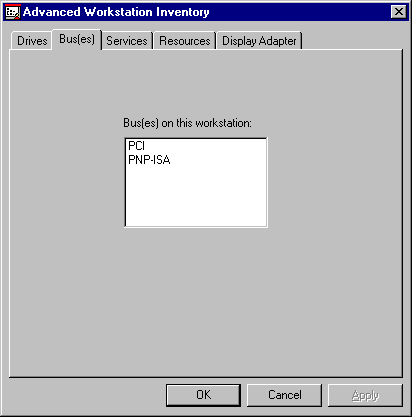
Figure 22: List of services running on the workstation.
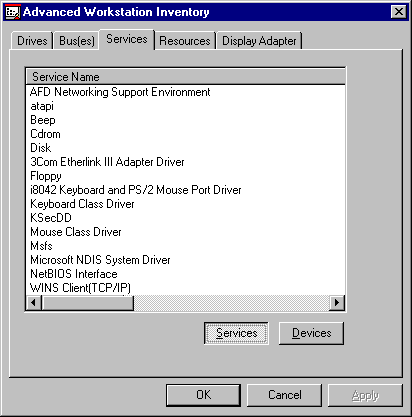
Figure 23: List of devices present on the workstation.
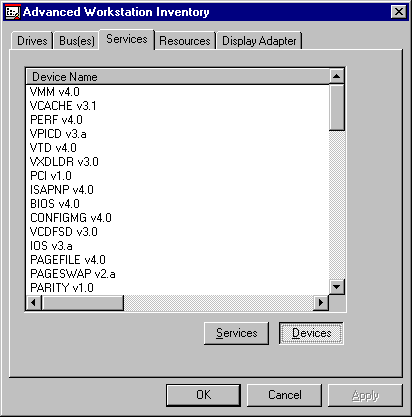
Figure 24: List of interrupts (IRQs) in use.
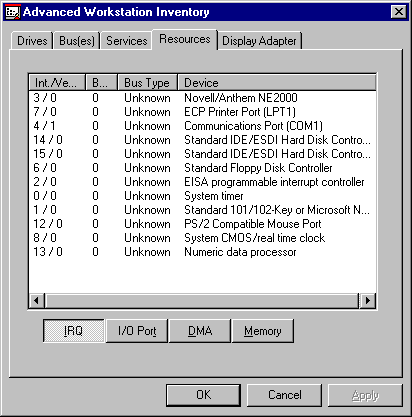
Figure 25: List of I/O ports in use.
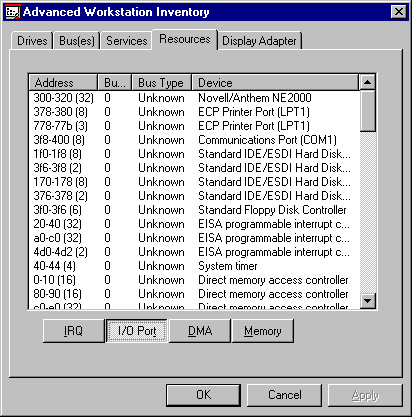
Figure 26: List of DMA channels in use.
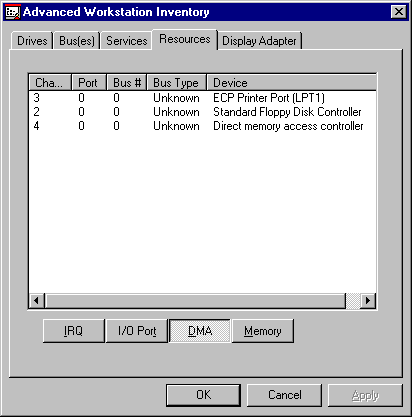
Figure 27: List of memory addresses in use.
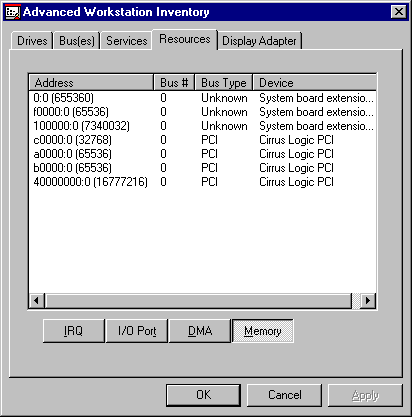
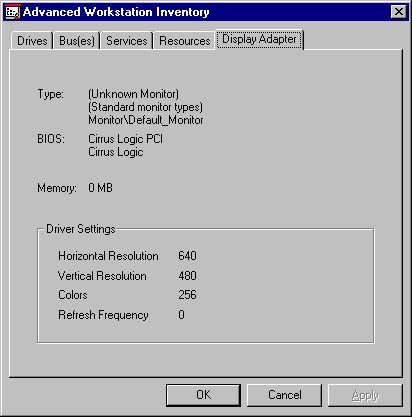
Figure 28: Video display settings.
The beauty of this solution is that all this information is stored within NDS and can be accessed at any time. Network administrators can look at the configuration of any PC in the network, no matter where that PC is located because the configuration is stored within NDS.
The ODBC interface into NDS can be used within reporting packages such as Crystal Reports to query NDS for information such as:
The number of PCs in an organization
The number of PCs that meet specific criteria such as 32 MB RAM
The number of PCs that are using a specific network board, such as
3Com EtherLink III
Summary
This AppNote has barely scratched the surface of what ZENworks can do to make Windows-based desktops easier to manage and use. Future AppNotes in this series will look at how ZENworks simplifies additional administrative tasks, such as policy-enabled software distribution, user printer administration, client configuration, scheduled workstation updates, application distribution, and help desk support.
* Originally published in Novell AppNotes
Disclaimer
The origin of this information may be internal or external to Novell. While Novell makes all reasonable efforts to verify this information, Novell does not make explicit or implied claims to its validity.