Using the Novell Upgrade Wizard
Articles and Tips: article
Technical Writer
Documentation Department
Common Technologies Group
RICK CARLSON
Product Manager
NPD Marketing
BRUCE CUTLER
Software Engineer
Common Technologies Group
NORM PAXTON
Software Engineer
Common Technologies Group
01 Mar 1998
Stepping up your network from NetWare 3 to intraNetWare is easier than ever with Novell's new Upgrade Wizard.
Introduction
Since intraNetWare's initial release in October 1996, computer industry research groups have touted the benefits of upgrading NetWare 3 network operating system (NOS) to intraNetWare. As with every Novell NOS release, intraNetWare features numerous innovative and advanced network services designed to bring more value to your existing Novell network. Consider just a few of the benefits that your company gains by upgrading your NetWare 3 NOS to intraNetWare:
Lowest cost of ownership of any server operation system. intraNetWare and intraNetWare for Small Business reduce network management costs by centralizing control of network resources via Novell Directory Services (NDS). intraNetWare also makes it easier to manage DOS, Windows, Windows 95 and Windows NT desktops, and to deploy and update applications.
Most trustworthy and secure platform to run your business network. NDS provides easy, secure access to corporate information. Employees, vendors and customers have controlled access to up-to-date corporate information through easy-to-use Web browsers.
The easiest way to connect to the Internet. Provide your employees with the wealth of information and services available on the Internet. And do it in a controlled way.
Advertising on the World Wide Web. Reach a greater number of potential customers through the wide reach of the Web.
Gain control of your expanding network. NDS allows for improved management of increasing network resources. NDS also allows you to enforce corporate software policies you have defined and easily update clients with the latest versions of applications.
Ready for the future. intraNetWare and intraNetWare for Small Business provide 100% Pure Java support to help you prepare for next generation applications, bringing even more capability to your business.
While enthusiasm for intraNetWare among NetWare 3 users has been favorable, the tools for upgrading to intraNetWare have been, up to now, not as well-received. Specifically, a suitable, easy-to-use solution for upgrading the existing NetWare 3 bindery and file system across-the-wire (referred to as a migration) to an existing NDS Directory tree, was not available.
For this reason, Novell set out to create a powerful, yet easy-to-use migration tool that allows you to leverage your existing NetWare 3 infrastructure. Novell Upgrade Wizard makes migrating your NetWare 3 bindery and file system as easy as dragging and dropping an object from one location to another.
The Novell Upgrade Wizard
The Novell Upgrade Wizard lets you copy your NetWare 3.1x server bindery and file system "across-the-wire" (via the network) and place them in a desired location in an existing NDS tree. The process involves the following steps:
Preparing for the migration.
Launching the utility.
Preparing a project.
Moving objects in the Project Window.
Verifying that objects and files can be migrated as specified.
Migrating across-the-wire.
Preparing for Migration
You must complete several tasks before you can use the Novell Upgrade Wizard. Each is discussed below.
Perform a System Backup. A migration should always be preceded by a proper backup of Novell Directory Services (NDS) and the volumes to which the NetWare 3.1x file system will be migrated. This measure protects against possible file loss or corruption during the migration. You also might want to backup the source server even though it will not be affected by the migration.
Verifying Workstation System Requirements. You can run the Novell Upgrade Wizard from either a Windows 95 or Windows NT workstation.
For Windows 95: Upgrade to intraNetWare Client for Windows 95 version 2.2 or higher.
Note: You can find the client version by choosing Start>Settings>Control Panel and then double-clicking Network, choosing Novell NetWare or intraNetWare Client, then clicking the Properties button. The intraNetWare Client page appears with the client version at the bottom. If this procedure did not access the client version number for you, your client version must be upgraded.
You can get a free Windows 95 client upgrade at the following location: http://www.novell.com/novellsw/brands.html
For Windows NT: Upgrade your client to intraNetWare Client for Windows NT version 4.11 rev. a.
Note: You can find the client version on the title bar of the Login dialog.
You can get a free client upgrade at the following location: http://www.novell.com/novellsw/brands.html
Verify That You Have Sufficient Rights. You must have Supervisor orequivalent rights to both the NetWare 3.1x and intraNetWare servers. If you are not authenticating to the NDS tree as user Admin, you must have Console Operator rights granted to you.
Make Accommodations for SAP Filtering (Conditional). You should ensure that SAP filtering is disabled on each server involved in the migration. If SAP filtering cannot be disabled, you should ensure that the default server (preferred server) for the client is on the same LAN segment as the other servers you are migrating to and from.
Update NLMs on the NetWare 3.1x Server. In order for the Novell Upgrade Wizard to work properly, a number of NLMs need to be updated with the latest versions. These NLMs are found in the PRODUCTS\NW3Xsubdirectory in the location where you installed the Novell Upgrade Wizard. For example, if you installed using the default path, the NLMs are at:
C:\PROGRAM FILES\UPGRADE\PRODUCTS\NW3X
Copy the NLMs in this directory to the source server's SYS:SYSTEM directory.
Unload NLMs on the NetWare 3.1x Server. Unload the following NLMs in the order indicated so that the newer versions can be loaded:
TSA311.NLM (for a 3.11 server) or TSA312.NLM (for a 3.12 server) SMDR.NLM SMDR311.NLM SMDR312.NLM SPXS.NLM TLI.NLM AFTER311.NLM CLIB.NLM A3112.NLM STREAMS.NLM
Note: Some NLMs may require you to unload additional interdependent NLMs. If doing so becomes too cumbersome or impossible, you can reboot your server. When the server is rebooted, the previously copied NLMs are loaded. If the server's AUTOEXEC.NCF file includes a LOAD command for TSA311.NLM or TSA312.NLM, it will already be loaded and you do not need to load it manually as documented below.
Load the New TSA31X.NLM (Conditional). The TSA31X.NLM, (where X is 1 for 1 3.11 server and 2 for a 3.12 server) must be loaded on the NetWare 3.1x server prior to the migration. If you did not reboot after updating the NLMs or the TSA31X.NLM was not in the AUTOEXEC.NCF file, load TSA31X.NLM manually. Doing so loads all of the updated NLMs that you copied earlier.
Load and Add Name Spaces (Conditional). If any of the volumes you are going to migrate contain files with non-DOS naming conventions, you must load the appropriate name spaces on the destination volumes and then add the name spaces to the volume prior to the migration. Windows 95, Windows NT, and OS/2 name spaces are loaded through LONG.NAM (long names). The NFS name space is loaded through NFS.NAM. The Macintosh name space is loaded through MAC.NAM.
Determine What Objects to Migrate. The Novell Upgrade Wizard allows you to migrate the entire NetWare 3.1x bindery and/or the contents of the individual NetWare 3.1x volumes.
In most cases, you will want to migrate both the bindery and the contents of the server volumes. However, there may be occasions where you want to only migrate the bindery (for example, to quickly add users in an NDS tree) or the contents of an individual volume.
Launching the Utility
Click the Windows 95 or Windows NT Start menu and then choose Programs -->Novell -->Novell Upgrade Wizard -->Novell Upgrade Wizard.
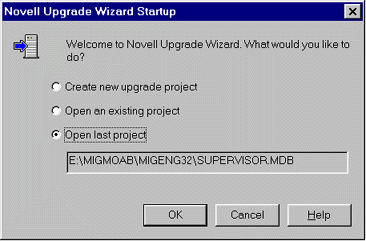
Once you launch the utility, the dialog box shown in Figure 1 appears, ready for you to create a new project.
Figure 1: The Novell Upgrade Wizard Startup screen.
Preparing a Project
A project is a model that you use to place NetWare 3.1x objects in the NDS tree. A project is created and completed before the actual migration can take place.
In the Startup dialog box, choose the "Create new upgrade project" option and click "OK". A wizard is launched. The first page of the wizard asks you to indicate the name and location of the new project (see Figure 2).
Figure 2: The Create Upgrade Project Screen.
Type a project name and use the "Browse" button to indicate the location where you want the project saved. Then click "Next".
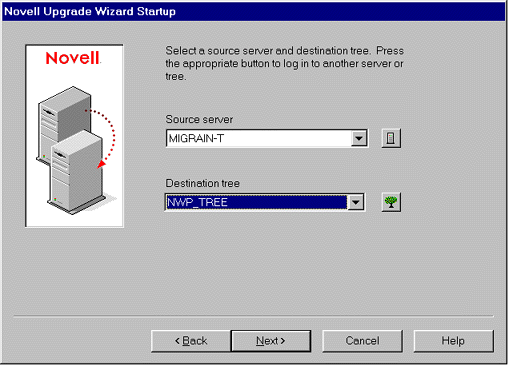
A new page appears as shown in Figure 3, asking you to indicate the NetWare 3.1x server you're migrating (the "source") and the NDS tree you're migrating to (the "destination").
Figure 3: In this window, you enter the migration source and destination.
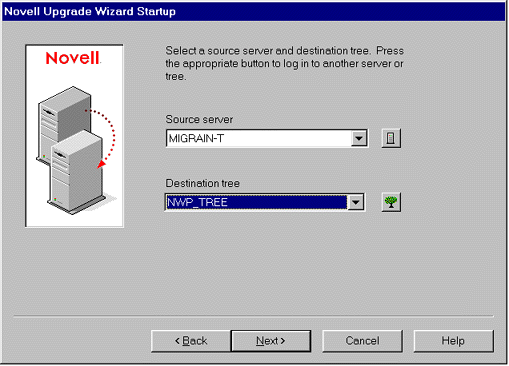
You can't proceed past this screen without being logged-in to a 3.1x server and an NDS tree.
Use the two drop-down list boxes to indicate the server and NDS tree. If the desired server and/or NDS tree are not displayed, use the server button or tree button to log in to a server or NDS tree. Once you have indicated the server and NDS tree, click "Next".
A new wizard page appears, as shown in Figure 4.
Figure 4: This screen displays information about the project's database.
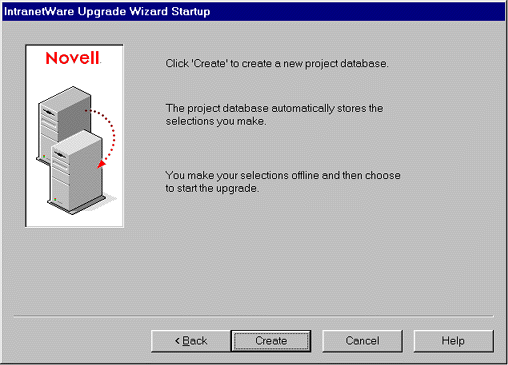
Click "Create." The project is created.
Moving Objects in the Project Window
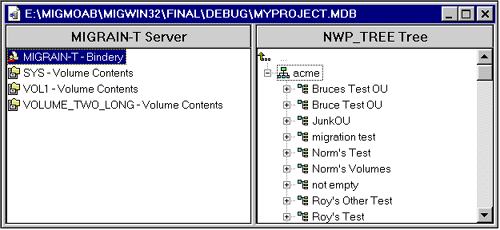
The indicated source server and destination tree are displayed in the Project Window, where bindery objects and volume data from the source server can be dragged and dropped to desired locations in the NDS tree (see Figure 5).
Figure 5: A sample project window.
Creating Subordinate Objects (Conditional). Before dragging and dropping the bindery or volume data, first determine where in the destination tree you want each to be copied to. If the desired container (for the bindery) or folder (for the volume data) does not already exist in the NDS tree, right-click the "parent" (container for the bindery, folder, or Volume for the volume data) and create and name the new container or folder (see Figure 6).
Figure 6: This will appear on the screen when you right-click the mouse parent folder.

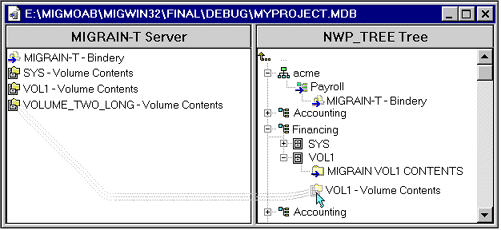
Dragging and Dropping Objects. Next, click and drag the bindery or Volume objects from the Source area to the desired location in the Destination area, as shown in Figure 7.
Figure 7: You can drag and drop objects in the Novell Upgrade Wizard.
Verifying that Objects and Files Can Be Migrated as Specified.
Once the bindery and volumes have been moved to the Destination area, you should verify that the migration can proceed as indicated in the Project Window. The verification process checks for object conflicts, sufficient NDS and file system rights, disk space limitations, and a variety of other criteria that could impede the migration.
From the toolbar, click the Verification button, or choose Project>Verify.
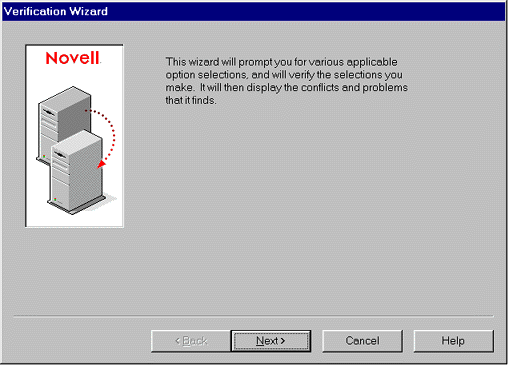
A new wizard is launched (see Figure 8).
Figure 8: The first wizard page gives an overview of how the verification works.
Click "Next".
The page shown in Figure 9 appears.
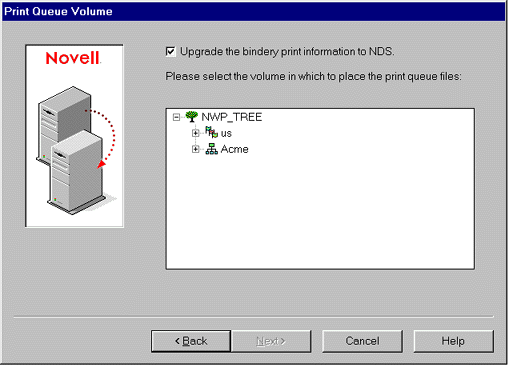
Figure 9: This page allows you to indicate whether you would like to migrate your print information, and if so, to which volume.
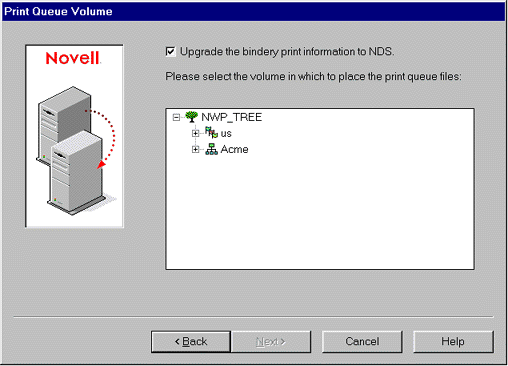
If you do not want to migrate the print information, uncheck the check box at the top of the page (it is checked by default). If you do want to migrate the print information, choose the desired volume in the tree browser and click "Next".
The page shown in Figure 10 appears.
Figure 10: This page allows you to apply an existing NDS Template object to all users being migrated.
If you do not want to apply a Template object, uncheck the check box at the top of the page. If you do want to apply a Template object choose the desired Template object, and click "Next".
This functionality is similar to that found in NWAdmin wherein the properties of a template object are copied to newly created users with the exception that existing properties copied from the source server are not overwritten.
The page shown in Figure 11 appears.
Figure 11: This screen gives you the option to create a Template object. You can then apply this template when you set up new users in the NDS tree.
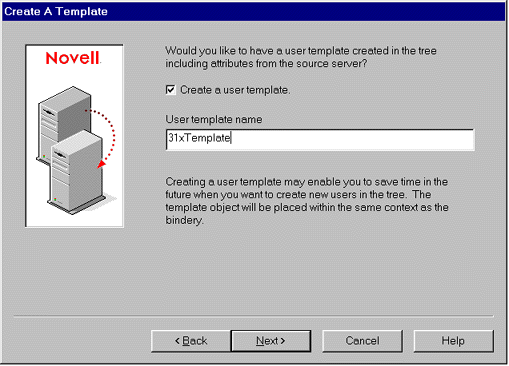
If you want to create a Template object, check the check box and enter a name for the template, then click "Next". This procedure copies the Default Account Balance and Restrictions from the source server to the template object you specify here. This Default information is edited via Syscon. From the main Syscon menu, select Supervisor options and then Default Account Balance/Restrictions and Default Time restrictions.
Generally, if you already have a Template object set up you will not check this option.
The page shown in Figure 12 appears.
Figure 12: This screen gives you the option to create a Template object. You can then apply this template when you set up new users in the NDS tree.
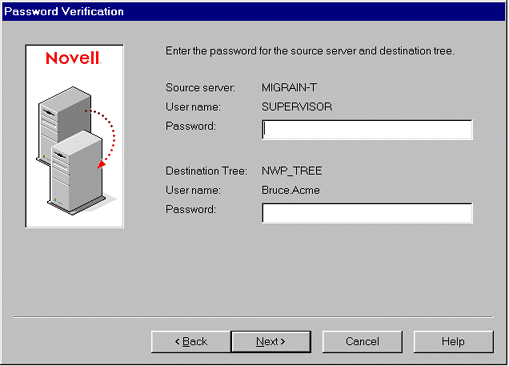
Enter the passwords and click "Next". These are the passwords you used to login to the source and destination server.
A new wizard page (see Figure 13) lets you indicate the type of verification that is to be performed.
Figure 13: Check boxes let you indicate what categories are verified.
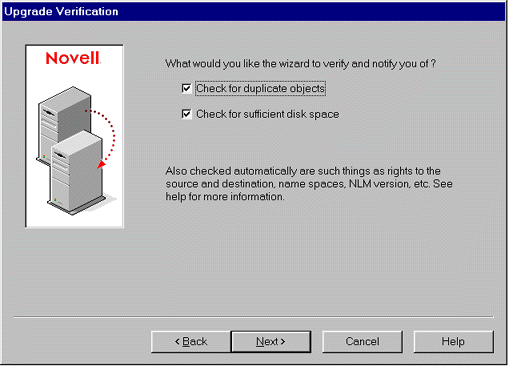
Indicate what you want verified by placing check marks in the appropriate check boxes and click "Next".
After running the verification, the page shown in Figure 14 appears.
Figure 14: This page shows any naming conflicts existing between same-type objects.
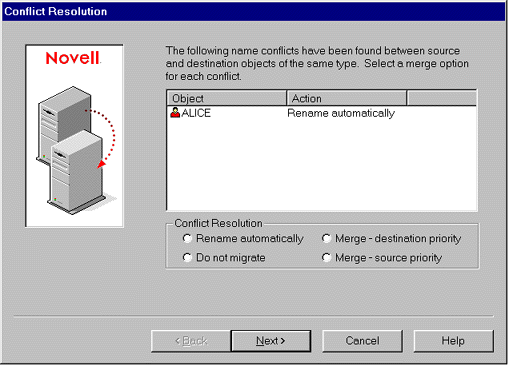
This page displays all objects with the same name (John, Paul, Susan, etc.) and same type (User, group, etc.) that already exist in the destination container. To correct the naming conflicts you can:
Let the wizard rename the object automatically.
Choose not to migrate the object.
Merge the objects and maintain the bindery properties. (Source priority)
Merge the objects and maintain the NDS properties. (Destination priority)
When merging, single-valued properties will be overwritten if the Source priority is selected. If the Destination priority is selected, single-valued properties will be left intact. Multi-valued properties will be merged in either case.
If no same-type naming conflicts are found, the list box in the wizard page is blank.
Click a single bindery object or multiple bindery objects in the list box and choose an appropriate conflict resolution option. Repeat this step for each conflict listed and then click "Next".
Note: If you do not choose a conflict resolution option, the object will, by default, be renamed.
A new wizard page appears (see Figure 15) showing any naming conflicts found between different type objects, or items that cannot be merged. For example, if a User named Manager is found in the bindery and an Organizational Role called Manager is found in the NDS container, then Manager would appear in this list. Since they are of different types, User vs. Organizational Role, they can't be merged. The only options you have are to rename the object or to not copy it.
Figure 15: The conflicts shown on this page can include print forms, print devices, and print configurations.

To correct the naming conflicts you can:
Let the wizard rename the object automatically.
Choose not to migrate the object.
If no different-type naming conflicts are found, the list box in the wizard page is blank.
Click a bindery object in the list box and choose an appropriate conflict resolution option. Repeat this step for each conflict listed and then click "Next".
Note: If you do not choose a conflict resolution option, the object will, by default, be renamed.
The page shown in Figure 16 appears.
Figure 16: This wizard page displays any errors and warnings that were encountered during the verification process, with the exception of any naming conflicts.
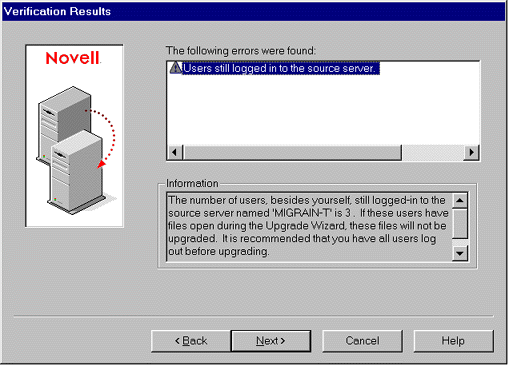
If no errors or warnings are detected in the verification, the list box is blank.
Make a note of the errors and warnings and resolve as many as possible before continuing. Click "Next" to continue.
A verification summary page appears (see Figure 17).
Figure 17: This page displays the results of the verification.
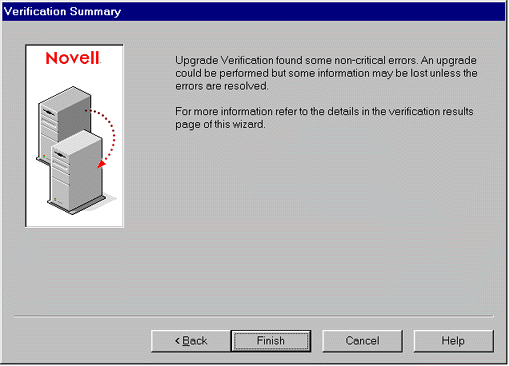
Read through the text and click "Finish".
Migrating Across-the-Wire
With the Project Window and verification completed, and all conflicts, warning, and errors addressed, you are ready to migrate the bindery and file system across-the-wire.
From the toolbar, click the "Upgrade" button, or choose Project -->Upgrade.
A new wizard is launched (see Figure 18).
Figure 18: The first wizard page gives an overview of how the migration works.
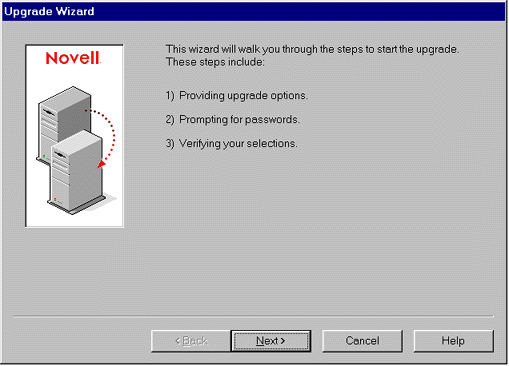
Click "Next".
Note: From this point, the migration repeats Steps 3-12 under "Verifying that Objects and Files Can Be Migrated as Specified". One exception is that the "Finish" button in Step 12 is now a "Proceed" button.
Any conflicts that were shown previously (during the verification) and still not corrected are indicated by a check through the icon, indicating that the conflict has already been seen.
If you have corrected all of the errors, you can begin the migration by clicking the "Upgrade" button, shown in Figure 19.
Figure 19: This screen shows the progress of the Upgrade process.
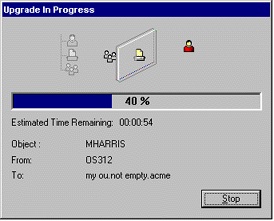
(If you haven't resolved the errors, you won't be allowed to proceed with the Migration.) The wizard first copies the contents of the bindery and then the file system, according to where you dragged and dropped objects in the Project Window. A progress bar indicates the relative percentage of objects that have been migrated and those yet to be migrated.
You can stop the migration by clicking "Stop". A dialog box appears asking you to confirm your choice. If you still want to stop the migration, click "Yes". The migration is terminated. All NetWare 3.1x server bindery and file contents copied to that point, however, remain in their destinations in the NDS tree until you delete them manually.
Following the migration, you should perform any applicable post migration procedures. These include:
Modifying login scripts
Modifying your print configuration
Checking migrated user information
Checking migrated file information
Checking third-party applications
Moving individual objects to different locations in the NDS tree
Conclusion
Using the Novell Upgrade Wizard to upgrade NetWare is easy and powerful.The use of wizards and the intuitive Project Window make the user interface practically fool proof. The verification capability makes error identification and correction extremely simple. For more information on post migration procedures or any of the information in this document, refer to the online help in the Novell Upgrade Wizard.
* Originally published in Novell AppNotes
Disclaimer
The origin of this information may be internal or external to Novell. While Novell makes all reasonable efforts to verify this information, Novell does not make explicit or implied claims to its validity.